For most covered patios and screened enclosures, a dual-hose portable AC in the 10,000 to 14,000 BTU range is your best bet today. It gives you real cooling power, handles humidity, and can be vented through a sliding door or a panel you cut into a screen wall. For open patios with no walls to vent through, a portable AC simply won't work the way you want it to, and you're better off with a misting fan, evaporative cooler, or a ductless mini-split. The key is matching the unit to your specific setup before you buy anything.
Best Portable Air Conditioner for Patio: Buyer Guide

Elise Prescott
29 Apr 2026
How to Pick the Right Portable AC for a Patio
Sizing a portable AC for a patio is not the same as sizing one for a bedroom. Outdoor spaces, even covered ones, deal with far more heat load. Direct sun beating on a roof, ambient temperatures 10 to 20 degrees higher than indoors, poor insulation (or none), and constant air infiltration through screen panels or gaps all stack up fast. If you undersize, the unit runs constantly, overheats, and still can't keep up.
A reasonable starting point is 20 BTUs per square foot, but for a sun-baked covered patio you should bump that up significantly. A 200 sq ft covered patio in direct afternoon sun with no insulation overhead realistically needs 10,000 to 12,000 BTUs. A 400 sq ft screened room that's shaded and well-sealed can sometimes get away with a 12,000 to 14,000 BTU unit. The more gaps, the more sun, the more BTUs you need.
| Patio Size | Shade/Exposure | Recommended BTU Range |
|---|---|---|
| Up to 150 sq ft | Shaded, enclosed screen room | 8,000–10,000 BTU |
| 150–250 sq ft | Partially shaded, covered patio | 10,000–12,000 BTU |
| 250–400 sq ft | Mostly shaded, screened enclosure | 12,000–14,000 BTU |
| 400+ sq ft | Any exposure, semi-enclosed | 14,000+ BTU dual-hose or mini-split |
| Open, no walls | Any | Portable AC not recommended |
Beyond square footage, think about ceiling height (taller ceilings mean more air volume to cool), how well the space is sealed, and how much direct sun hits the roof or walls during the hours you use it most. A screened room with a solid roof and shade trees behind it is a very different problem than a pergola-covered slab with a clear polycarbonate roof in a Phoenix summer. Be honest about your conditions and size up, not down.
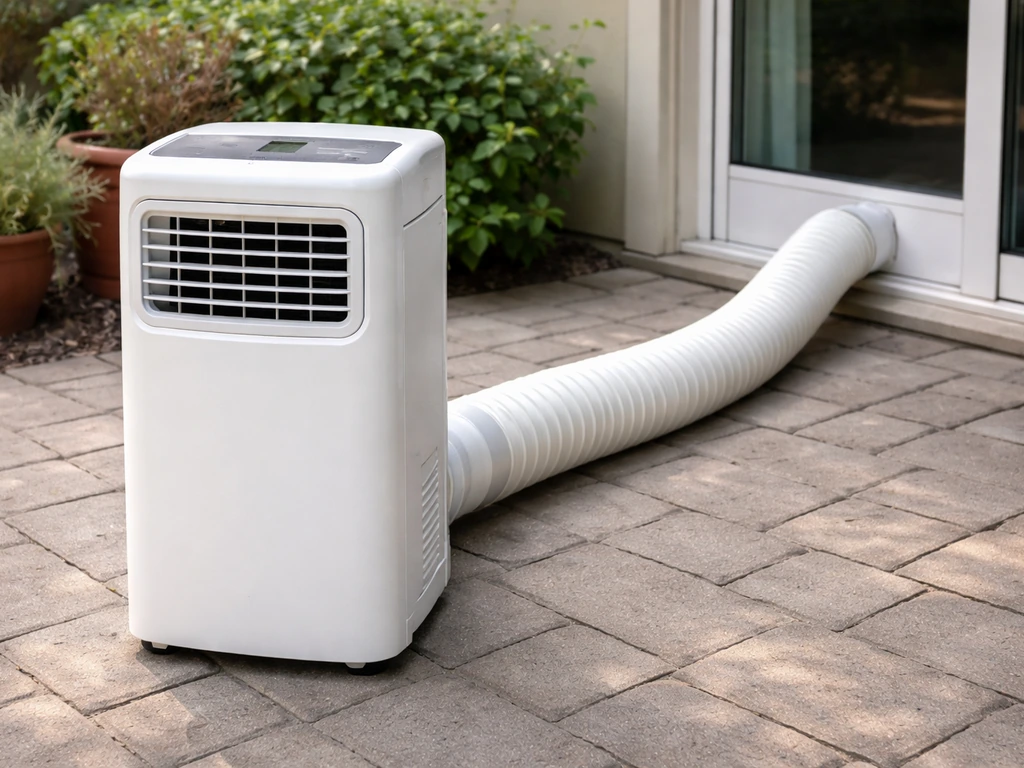
Exhaust Setup and Ventilation: The Make-or-Break Factor
Here's the thing most people skip over and then wonder why their portable AC barely cools anything: venting the exhaust is absolutely non-negotiable. A portable AC pulls heat from the air and dumps it through an exhaust hose. If that hot air has nowhere to go, it just pumps back into your space and you get zero net cooling. On a patio, this is even more critical than indoors.
Most portable ACs come with a 5-foot exhaust hose. That's it. You cannot extend it without causing problems. Longer hoses create backpressure, reduce airflow, and can cause the unit to shut down on thermal protection. Do not kink it, bend it sharply, or route it through a long path. Keep it as straight and short as possible.
Single-Hose vs Dual-Hose on a Patio
Single-hose units pull air from inside the space to cool the condenser, then exhaust that air outside. This creates a slight negative pressure, which means hot outside air seeps in through any gap or crack to replace it. On a patio with screen walls, this is a serious problem because there are gaps everywhere. A dual-hose unit solves this by pulling outside air through a dedicated intake hose to cool the condenser and then exhausting that same air back outside. Your conditioned space air stays inside, where it belongs. For any patio application, go dual-hose.
One important detail on dual-hose setup: if you're routing both hoses through the same opening (like a sliding door panel), keep the intake and exhaust ends separated by at least 8 inches. If they're too close together, the hot exhaust air gets pulled right back into the intake, completely canceling the dual-hose advantage. Route them to opposite sides of the opening if possible.
Routing Options on a Patio
Your venting options depend entirely on what kind of patio you have. Here are the most common approaches:
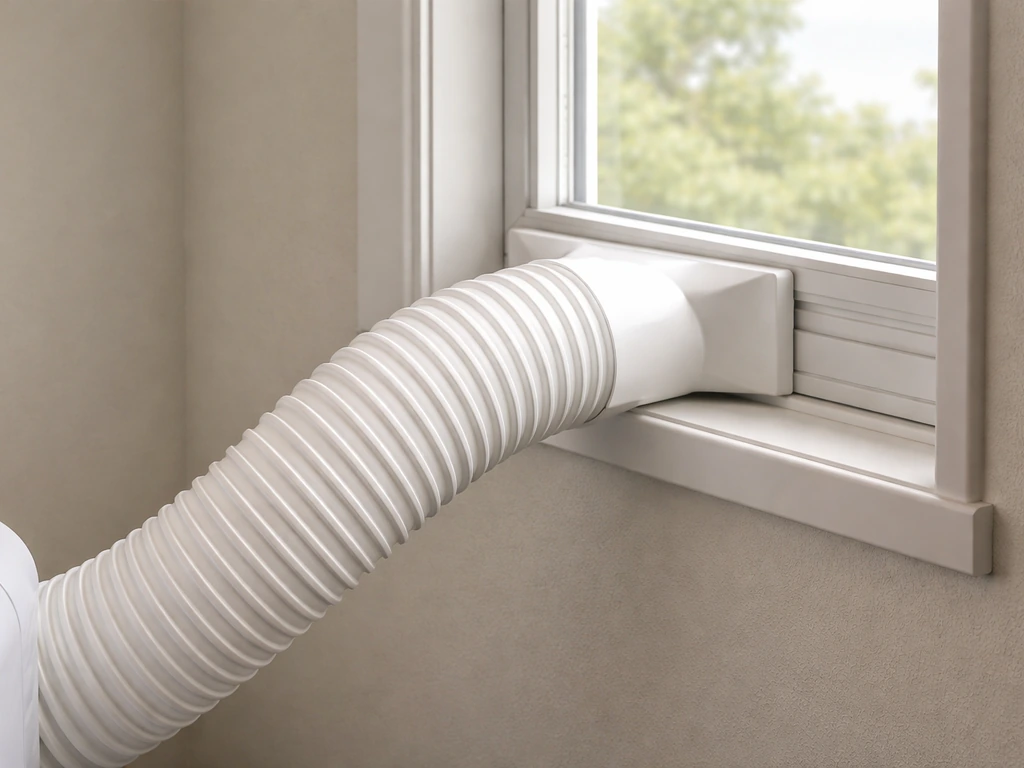
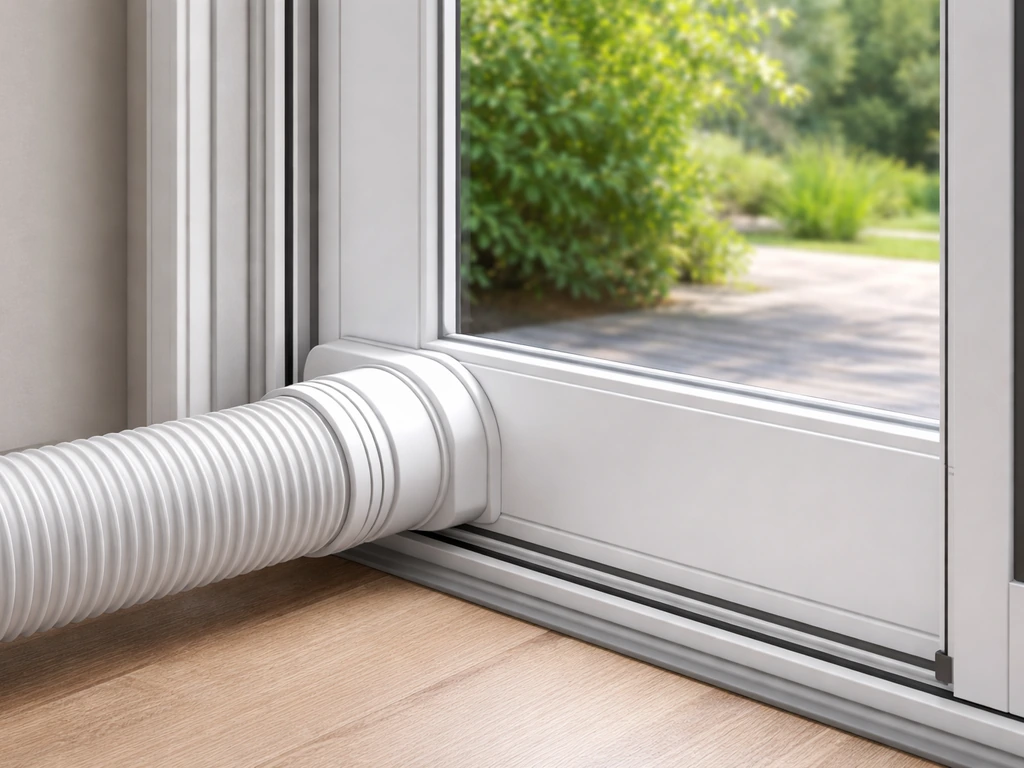
- Sliding glass door: Use the window/door kit that comes with the unit. Most kits adjust to fit a standard 6-foot slider. This is the cleanest solution if your patio connects to the house through a sliding door.
- Screen room panel: Cut a foam board or rigid insulation panel to fit one screen opening, run the hose(s) through it, and seal around the hose with foam tape. It's not pretty, but it works and it's reversible.
- Screened door: Route the hose through the lower screen panel of a screened door using the same foam-board method. Keep the door latched closed so it doesn't shift.
- Wall penetration: If you have a solid half-wall or a wood-framed screen room, you can cut a hole and install a vent cap. This is the most permanent and cleanest setup, but it takes some carpentry work.
- Open wall or no wall: If your patio has no walls to vent through, a portable AC won't work. The exhaust has nowhere to go and you're just heating the outdoors.
Best Options by Patio Type
Fully Open Patio (No Walls)
Skip the portable AC entirely. There's no way to vent the exhaust and no way to contain cooled air. You're fighting physics. The right tools here are misting fans, patio fans with shade structures, or a high-output evaporative cooler if you're in a dry climate.
If you are looking for a budget-friendly way to add comfort outdoors, a life is good patio cooler can be a helpful option for warmer days. For dry climates, you can find the best outdoor evaporative cooler for a patio by focusing on air-flow capacity, water efficiency, and how much shade and airflow the setup will get high-output evaporative cooler.
These won't drop temps by 20 degrees, but they make the space genuinely comfortable without the frustration of a unit that can't do its job.
Covered Patio Near a Door or Window
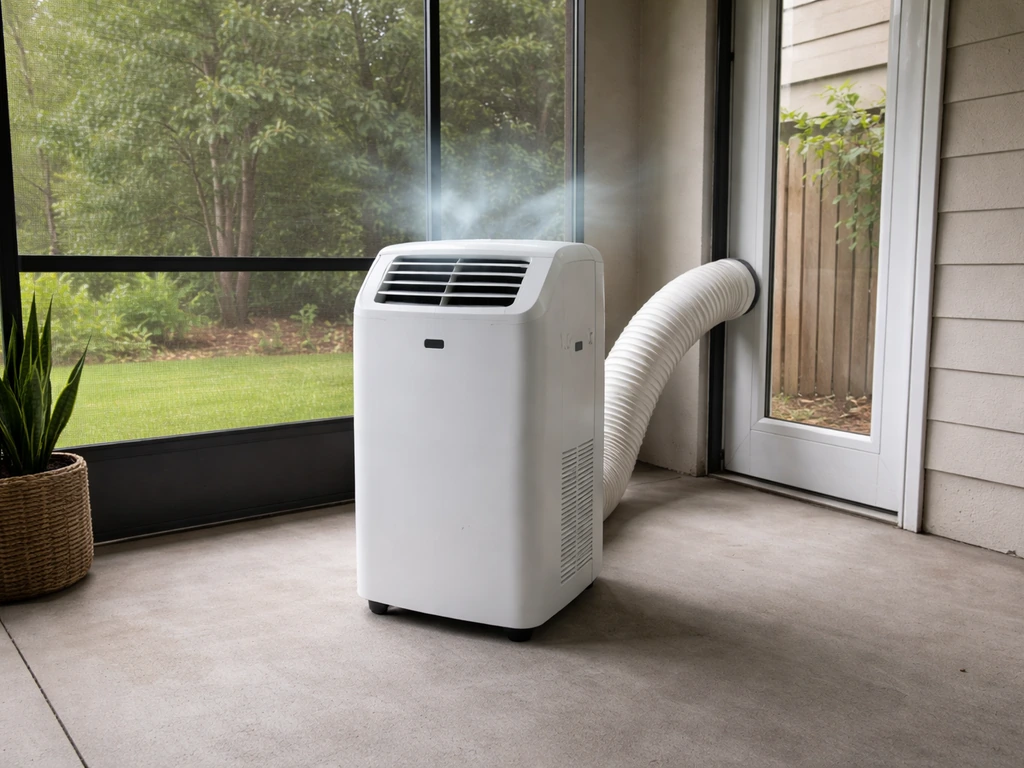
This is actually the sweet spot for portable AC use on a patio. A great related option to compare before you buy is the best cooler for patio, especially if your space has more open-air exposure than a fully enclosed screen room. If you have a covered, partially enclosed patio with a sliding glass door or a double-hung window nearby, a dual-hose portable AC in the 10,000 to 12,000 BTU range can do solid work. Set the unit on the patio side, run the hoses through the door kit, and the unit will cool the space effectively as long as the area has some containment (a solid roof and at least partial walls or railings).
Screened Enclosure or Screen Room
Screen rooms are probably the best patio application for a portable AC. The space is mostly enclosed, which means the cooled air stays put. You still need to vent the exhaust outside the screen perimeter, not just into the screened-in space, so the foam-board panel method works well here. A 14,000 BTU dual-hose unit can handle a 300 to 400 sq ft screen room on most days, though in extreme heat (think Florida in August), you'll notice limits.
Pergola or Shade Structure with Partial Enclosure
If you've added outdoor curtains or drop-down shade panels to a pergola, you've created a semi-enclosed space. A portable AC can help here if you've sealed the enclosure reasonably well. Realistically, the more gaps and openings, the less effective it will be. In this scenario, a portable AC is often a stopgap while you plan a more permanent solution like a mini-split or a comprehensive cooling setup.
Features That Actually Matter
Not all portable AC features are worth paying extra for on a patio. Here's what to focus on and what to skip.
- Dual-hose design: As covered above, this is not optional for patio use. Single-hose units fight themselves in open or semi-open spaces.
- Dehumidification (Dry mode): This matters a lot in humid climates like the Southeast, Gulf Coast, or Midwest summers. A unit with a dedicated dry mode and continuous drainage option (drain hose port, not just a bucket) is far more practical outdoors where condensate production is high.
- Multiple fan speeds: At minimum, you want high and low. High for peak afternoon heat, low for evening when you just want gentle circulation.
- Smart controls or app connectivity: Useful if you want to cool the space before you head outside. Being able to flip it on 20 minutes early from your phone makes a real quality-of-life difference.
- Lockable casters: Patios are not always level and you don't want the unit rolling. Locking wheels also matter if you have kids or pets around.
- Auto-restart: If you're on a circuit that occasionally trips or you lose power briefly, auto-restart brings the unit back to its previous settings without you having to babysit it.
- Self-evaporating condensate: Some units evaporate most of the collected water through the exhaust. This reduces how often you drain the tank, which is a genuine convenience outdoors.
Energy Use and What It'll Cost You
Portable ACs are not particularly efficient, and running one on a hot patio costs more than running it indoors. The efficiency metric to compare units is CEER (Combined Energy Efficiency Ratio), which is the unit's cooling capacity in BTU/h divided by total electrical input in watts. A higher CEER means more cooling per watt. DOE test standards calculate Annual Energy Use (AEU) based on 750 operating hours per year under standard conditions. On a patio in a hot climate, you'll likely exceed that in a single season.
A 12,000 BTU portable AC drawing around 1,200 watts costs roughly 12 to 18 cents per hour to run depending on your local utility rate. Run it 4 hours a day for 4 months and you're looking at $60 to $85 added to your electric bill per month during peak season. That's not alarming, but it's real money. A 14,000 BTU unit at 1,500 watts pushes that higher.
A few practical ways to keep costs down: pre-cool the space in the morning before the sun hits it directly, use fan-only mode in the evenings when ambient temps drop, and run the unit during off-peak electricity hours if your utility offers time-of-use pricing. On a well-shaded screened porch, you might only need to run the compressor for the hottest 2 to 3 hours of the afternoon and then switch to fan mode the rest of the time.
Installation Checklist and Placement Tips
Where and how you set up the unit has a big impact on whether it works well or frustrates you all summer. Work through this before you drag it outside.
- Place the unit on a firm, level surface. Uneven surfaces cause vibration and can affect condensate drainage. Use a rubber anti-vibration mat if your patio surface is rough.
- Maintain at least 20 inches of clearance between the back of the unit and any wall, railing, or obstruction. Blocking the intake kills efficiency immediately.
- Keep the exhaust hose as straight as possible. A 5-foot hose run in a gentle arc is fine. Sharp bends, 90-degree turns, or coils will restrict airflow and can cause shutdown.
- Do not place the unit in direct sun. Afternoon sun on the unit's casing heats it up and forces the compressor to work harder. Position it in the shadiest spot that still allows proper hose routing.
- Seal the window/door kit gaps with foam tape or weatherstripping. Any gap around the hose is a path for hot outside air to sneak back in.
- For dual-hose setups, keep intake and exhaust ends separated by at least 8 inches at the vent opening.
- Make sure the unit is on a dedicated 120V outlet rated for its amperage. Most 12,000–14,000 BTU portables draw 12 to 15 amps. Don't run extension cords outdoors for any AC unit.
- Position the unit so airflow blows across the occupied area, not directly at a wall or screen.
Safety, Weather Durability, and Keeping It Running
Portable ACs are designed for indoor use. LG’s owner’s manual explains that after a power failure, an auto-restart function restores the previous settings unless it has been disabled auto-restart function restores the previous settings after a power failure. They are not weatherproof. If you're using one on a patio, you need to think carefully about protection from the elements.
Rain and Moisture
Never leave a portable AC exposed to rain, even a brief shower. Water getting into the electronics or the compressor is a fast path to a dead unit and a potential electrical hazard. If your patio doesn't have a solid roof above where you'd place the unit, a portable AC is not appropriate for that space. For covered patios with a solid roof, you're fine as long as wind-driven rain can't reach the unit.
Wind and Debris
Position the unit away from the outer edge of a covered patio where wind gusts can carry debris into the intake. Leaves, pollen, and dust will clog the filter fast in an outdoor environment. Plan to clean or rinse the air filter every two to three weeks during heavy use, compared to the monthly interval you'd follow indoors.
End-of-Season Storage
Before storing the unit for fall and winter, drain all condensate completely, run fan-only mode for 30 to 60 minutes to dry out the internal components, and clean the filter. Store it upright in a covered, dry space. Cover it with a breathable fabric cover, not a plastic tarp, to prevent moisture buildup. If you're in a climate with freezing winters, bring it indoors rather than leaving it in a shed or garage that drops below freezing.
Condensate Management

On a humid patio, condensate fills up faster than you'd expect. If your unit doesn't self-evaporate, connect a drain hose to a floor drain or a bucket you check daily. For continuous drainage, TCL recommends attaching a drain hose setup that lets the portable AC drain continuously to a suitable receptacle or drain connection connect a drain hose to a floor drain or a bucket you check daily. Running the unit in dry (dehumidify) mode produces even more condensate and requires continuous drainage to function properly. Plan this before you need it, not when the internal tank is overflowing at 3pm on a Saturday.
When a Portable AC Isn't the Right Tool
Honestly, a portable AC is a compromise solution for most patios. It works well in specific situations (screened rooms, covered patios with good venting access) but falls short in others. Before you commit, here are the alternatives worth considering based on your situation.
| Alternative | Best For | Rough Cost | Key Trade-off |
|---|---|---|---|
| Misting fan system | Open patios, dry climates, Texas/Southwest | $150–$600 | Adds humidity; less effective above 60% relative humidity |
| High-velocity patio fan | Any patio, budget-conscious | $80–$300 | Moves air, doesn't lower temperature significantly |
| Evaporative (swamp) cooler | Dry climates, semi-enclosed spaces | $200–$800 | Ineffective in humid climates like Florida or Gulf Coast |
| Ductless mini-split | Screened rooms, permanent enclosures | $1,500–$4,000+ installed | Best performance; requires professional installation and permits |
| Portable AC (dual-hose) | Covered/screened patios with venting access | $400–$900 | Requires venting, not weatherproof, moderate efficiency |
If you're in a dry climate like Arizona, New Mexico, or inland California, an outdoor evaporative cooler is dramatically cheaper to run and often cools just as effectively on an open patio as a portable AC does in a screened room. If you're in Florida, Louisiana, or the Carolinas where humidity is the real enemy, a mini-split for a screened enclosure is the investment that makes sense for a permanent space. Misting systems and patio fans are the right answer when you just need to knock the edge off the heat without a major setup, and they work on fully open patios where portable ACs simply can't.
If you're weighing all of these options side by side, it's worth looking at what a full outdoor patio cooling system entails, comparing patio evaporative coolers for drier climates, or exploring what a dedicated patio air cooler can realistically do before landing on portable AC as your answer. If you want the best patio air cooler, focus on airflow capacity, water efficiency, and how well the setup fits your patio’s shade and ventilation. If you want the most effective results, you should also compare different options that make up the best outdoor patio cooling system for your climate and patio layout. The best solution is always the one that matches your actual patio layout, climate, and how you use the space, not just the one that's easiest to order online.
The Bottom Line
If you have a screened enclosure or a covered patio with venting access to a sliding door or nearby window, a dual-hose portable AC in the 12,000 to 14,000 BTU range is a solid, flexible solution you can have running this weekend. If you want a life is good patio cooler setup instead, focus on airflow, shade, and the right cooler type for your covered or screened space.
Buy a unit with a continuous drain port, keep the exhaust hose short and straight, position it out of direct sun with 20 inches of clearance behind it, and protect it from rain. That combination will give you real, noticeable cooling in an enclosed or semi-enclosed outdoor space. For many homeowners, the best patio air conditioner is the dual-hose type that can properly vent its exhaust and keep cooled air inside the enclosure.
If your patio is open with no walls, skip the portable AC and put that money into a quality misting fan or evaporative cooler instead. Matching the tool to the space is the whole game here.
FAQ
Can I run a portable air conditioner for a patio if it is under a roof but exposed to some wind and occasional drizzle?
Yes, but only if you can keep it effectively sheltered and control wind-driven rain. Even under a solid roof, aim to place it inside the covered area but not so close to the patio edge that gusts push debris toward the intake. Also keep a few feet of clearance around the unit sides for airflow, not just behind it for the hose.
What happens if I need more than the included exhaust hose length on my patio?
Don’t assume the “hose length” number is safe to change. If your model has a 5-foot included hose, adding length can reduce exhaust airflow and trigger protective shutdown. If you need more reach, use a different vent path (like a closer sliding-door kit opening) rather than extending the factory hose.
How do I route the intake and exhaust hoses if my sliding door kit forces them through the same opening?
If your air exchange setup is reversed, it can short-circuit cooling. For dual-hose units routed through the same opening, keep the hoses separated by at least 8 inches and place intake on the side that faces cooler outdoor air when possible. If you do not separate them, the exhaust can be pulled back into the intake and the unit will feel like it is barely cooling.
Is CEER the right metric to compare patio portable ACs, or should I use the BTU rating alone?
Look at the unit’s CEER alongside real-world runtime. Many units that list similar BTU output can differ meaningfully in watts draw, especially in humid climates where dehumidification runs longer. For patio use where you may run more than the typical 750 annual test hours, slightly higher CEER can noticeably reduce cost over a season.
How can I prevent a dual-hose portable AC from shutting off due to the condensate tank filling up?
If the unit has a continuous drain port, you can reduce interruption from the internal tank. Connect to a floor drain or bucket, and make sure the drain line slopes consistently downward. Continuous drainage helps most on humid patios because condensate can fill faster than the default tank capacity.
How much clearance do I need around the portable AC on a patio to keep airflow strong?
There is no single universal “right” amount, but use a practical rule: the outdoor air path should be as straight and short as possible, and the unit should sit where the exhaust jet is not blocked by walls, railings, or ceiling overhang. If exhaust or intake are obstructed, airflow drops and cooling performance falls. If you have options, place the unit so the hoses exit the enclosure in the most direct route.
Why does a patio need higher BTUs than the same square footage indoor room?
Start with the coverage assumption only as a baseline, then adjust based on heat gain sources. Direct afternoon sun, uninsulated or clear-roof structures, higher ceiling volume, and frequent door opening can all push you to the upper end of the BTU range. If your patio is only partially enclosed, treat it like an “outdoor wind and sun” problem, not a bedroom-size indoor problem.
What is the best schedule to reduce electricity use while still feeling comfortable on a hot patio?
Pre-cooling helps, but you also want to use the unit’s mode smartly. Run compressor cooling during the hottest window, then switch to fan-only or reduced cooling when outdoor temperatures drop. Pair that with ceiling fans or a gentle air circulation fan to keep cooled air from stratifying, which improves perceived comfort even when you are not running full power.
Will a portable AC still work well if I frequently open the patio door or move between indoor and outdoor areas?
Yes, but it can backfire if the enclosure is not sealed well or if you cool and then reintroduce hot outdoor air quickly. Keeping patio doors mostly closed and minimizing gaps around the vent opening matters as much as picking the right BTU size. If you routinely open the sliding door, you may need the higher BTU option or a more permanent system.
If my patio has no walls, is there any way to make a portable AC work anyway?
A portable AC is typically not a good match for fully open patios because there is no reliable way to contain cooled air while also exhausting heat outside. If you can vent but the cooled air is free to mix with hot outdoor air, the net cooling effect can be minimal. In those cases, consider misting fans, evaporative cooling (dry climates), or a mini-split for screened enclosures.