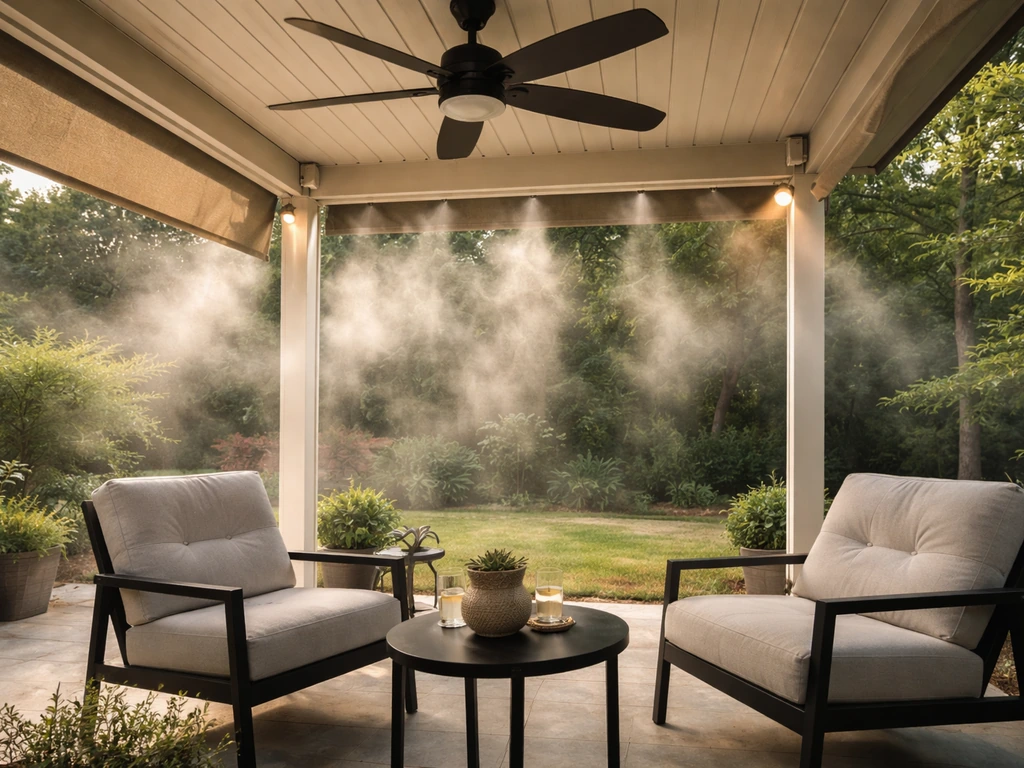
The best outdoor patio cooling system for most homeowners is a layered approach: start with shade to cut the radiant heat load, add a ceiling or pedestal fan for airflow, and layer in a misting system if you live somewhere with low to moderate humidity. That combination drops perceived temperature by 20 to 30 degrees Fahrenheit on a dry, sunny day and works within almost any budget. If you live in a humid climate like Florida or coastal Texas, skip the mist and lean harder on shade and fans, or look at a purpose-built outdoor air conditioner for a covered patio. The right answer depends on three things: your climate (specifically your humidity level), your patio size and layout, and how much you want to spend up front versus over time.
Best Outdoor Patio Cooling System: Choose What Works

Elise Prescott
29 Apr 2026
Start Here: Define Your Cooling Problem and What Success Looks Like
Before you buy anything, spend five minutes defining what you actually need. A 200-square-foot covered patio in Phoenix is a completely different problem from a 600-square-foot open deck in Atlanta. Write down your answers to these before you compare products or get quotes.
- Is your patio covered, partially covered, or fully open to the sky? Open patios need shade first; covered ones can skip that step.
- What is your local summer humidity like? Check your city's average July relative humidity. Above 60% RH, evaporative cooling and misting lose effectiveness fast.
- How many people use the space and for how long at a time? A quick grilling spot needs less than a full outdoor living room where people linger for hours.
- What is your power situation? Running a 240V outdoor AC requires a dedicated circuit. Fans and misters can often run on a standard 120V outlet.
- Do you have access to a water line nearby for a misting system, or will you rely on a portable tank?
- What is your budget range? Systems range from under $100 for a basic fan to $10,000 or more for a permanent misting-plus-shade installation.
Success for most people means being able to sit outside comfortably when the thermometer hits 95 to 100 degrees Fahrenheit. Cooling systems do not bring the temperature down to indoor levels, and if you expect that, you will always be disappointed. Aim for a 15 to 25 degree reduction in perceived temperature (heat index), and plan your system around that realistic target.
The Main Patio Cooling Systems Compared
There are five real contenders for outdoor patio cooling. Each works on a different physical principle, which is why climate matters so much in choosing between them. Here is an honest breakdown.
Shade Structures and Patio Covers
Shade is not a cooling system in the mechanical sense, but it is the most important variable of all. Direct sun beating on a concrete or tile patio can raise the surface temperature 40 to 60 degrees above air temperature, and that radiant heat overwhelms any fan or mister you put on top of it.
A quality pergola with a solid or louvered roof, a shade sail, or an insulated patio cover dramatically reduces the heat load before any active cooling starts. Aluminum insulated patio covers are especially effective because they block radiant gain from above and reflect heat away. If your patio is uncovered, adding a shade structure is almost always the highest-value first step, and it works in every climate and humidity level without exception.
Outdoor Ceiling and Pedestal Fans
Fans do not lower air temperature at all. What they do is increase evaporation from your skin, which reduces perceived temperature by 4 to 8 degrees depending on wind speed and humidity. Under a covered patio, a large outdoor-rated ceiling fan (52 to 72 inches for a typical 200 to 400 square foot space) is almost always worth the investment.
ENERGY STAR maintains product qualification and specifications for ceiling fans that you can use as a reference point when choosing efficient models ENERGY STAR product qualification and specifications for ceiling fans. It costs little to run, roughly $0.
01 to $0. 03 per hour for most motors, and it works year-round in mild climates with a reverse setting for winter. For open patios without a ceiling structure, high-velocity pedestal or tower fans can create a directional airflow corridor. The limitation is obvious: in still, 100-degree heat, moving hot air around only helps so much.
High-Pressure Misting Systems
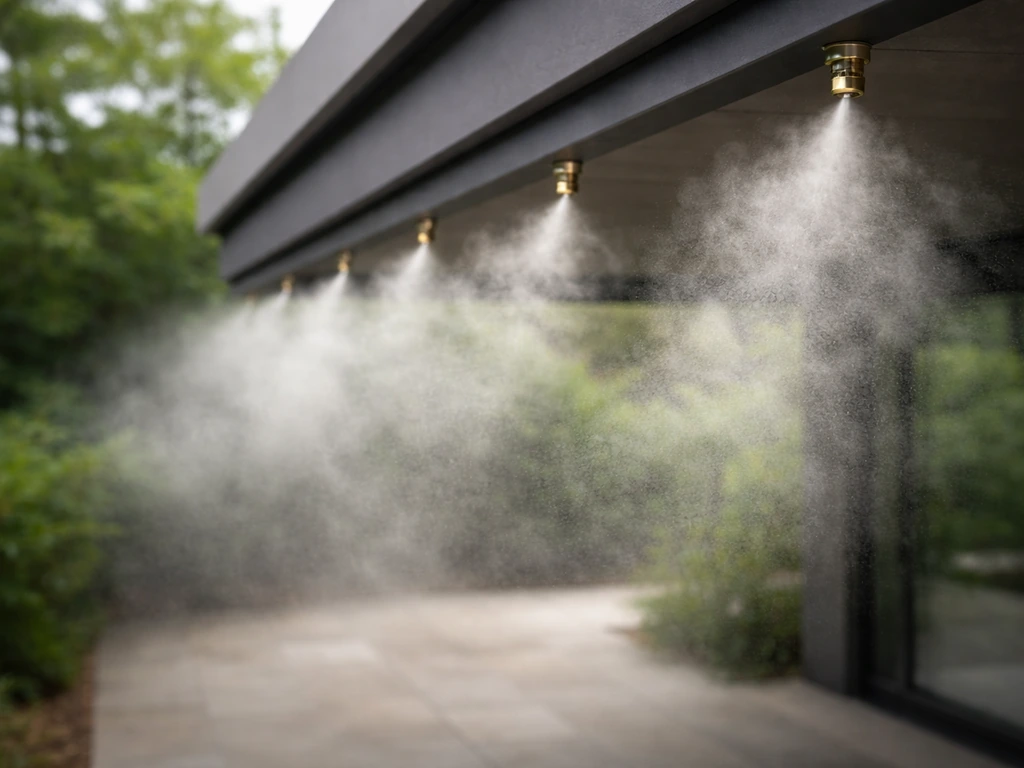
Misting systems work by forcing water through tiny nozzles at high pressure (800 to 1,200 PSI for premium systems, 100 to 250 PSI for mid-range) to create a fog of water droplets that evaporate almost instantly in the air around you. That evaporation absorbs heat and drops the local air temperature. In low-humidity conditions, a quality high-pressure system can reduce ambient temperature by 20 to 30 degrees Fahrenheit.
In high-humidity climates, the droplets do not evaporate as quickly, the cooling effect shrinks, and you can end up feeling wet instead of cool. This is the single biggest reason why a misting system that is magic in Tucson is useless in Tampa. Mid-pressure and low-pressure misters are cheaper but produce larger droplets that wet surfaces and furniture more easily.
Evaporative Coolers (Swamp Coolers)
An outdoor evaporative cooler pulls hot outside air through water-saturated pads and blows the cooled, humidified air out toward the patio. The physics here is important: in an ideal evaporative process, [the air temperature can only drop as far as the outdoor wet-bulb temperature](https://handbook. ashrae. org/Handbooks/A19/SI/a19ch53/a19ch53_si.
aspx), which is a function of both temperature and humidity. ASHRAE defines this limit clearly, and manufacturers express performance as 'cooling effectiveness,' meaning how close the cooled air gets to that wet-bulb target. In dry climates like Phoenix or Denver, where the dry-bulb and wet-bulb temperatures are far apart, the potential cooling is enormous, sometimes 20 to 30 degrees. In a humid climate where the two temperatures are close together, an evaporative cooler barely does anything.
These units use no refrigerant, consume far less electricity than an AC, and work best in climates with relative humidity below 50 to 60%. For more detail on choosing between types, the best patio evaporative cooler comparisons and best outdoor evaporative cooler for patio guides on this site go deeper on specific models and configurations. A well-chosen cooler for patio use can help you manage heat and humidity more effectively than shade or fans alone patio evaporative cooler.
For homeowners in dry climates, a well-matched evaporative cooler can be one of the best patio evaporative cooler options to consider. If you are shopping for the best outdoor evaporative cooler for patio use, focus on performance in your local humidity and how effectively the unit can cool to the wet-bulb limit.
Outdoor Air Conditioners
A true outdoor air conditioner, whether a mini-split, a portable unit, or a packaged outdoor system, uses refrigerant to mechanically remove heat from the air. It is the only system type that works regardless of humidity. If you do not have the humidity for a misting system, a high-quality patio air cooler can be a practical alternative to consider best patio air cooler.
The tradeoffs are significant: higher upfront cost, higher operating cost, and for a mini-split, professional installation involving refrigerant lines and electrical work. Mini-split systems sized for a covered patio (12,000 to 18,000 BTU is common for 250 to 450 square feet) run $1,500 to $4,000 installed. Portable outdoor AC units exist but are rarely effective in open-air spaces.
For a fully enclosed or semi-enclosed patio in a humid climate, an outdoor air conditioner is often the only system that will actually keep people comfortable. The best patio air conditioner and best portable air conditioner for patio articles on this site cover those options specifically.
| System Type | Best Climate | Temp Drop (Perceived) | Upfront Cost | Operating Cost | Works in High Humidity? |
|---|---|---|---|---|---|
| Shade / Patio Cover | All climates | 15–40°F (radiant reduction) | $500–$8,000+ | None | Yes |
| Outdoor Ceiling Fan | All climates | 4–8°F | $150–$600 | Very low | Yes |
| High-Pressure Misting System | Dry/arid | 15–30°F | $500–$3,000+ | Low (water) | No |
| Evaporative Cooler | Dry/arid (<50% RH) | 15–30°F | $200–$1,500 | Low | No |
| Outdoor Mini-Split AC | All climates | 20–30°F+ | $1,500–$5,000+ | Moderate–High | Yes |
How Your Climate (Especially Humidity) Changes Everything
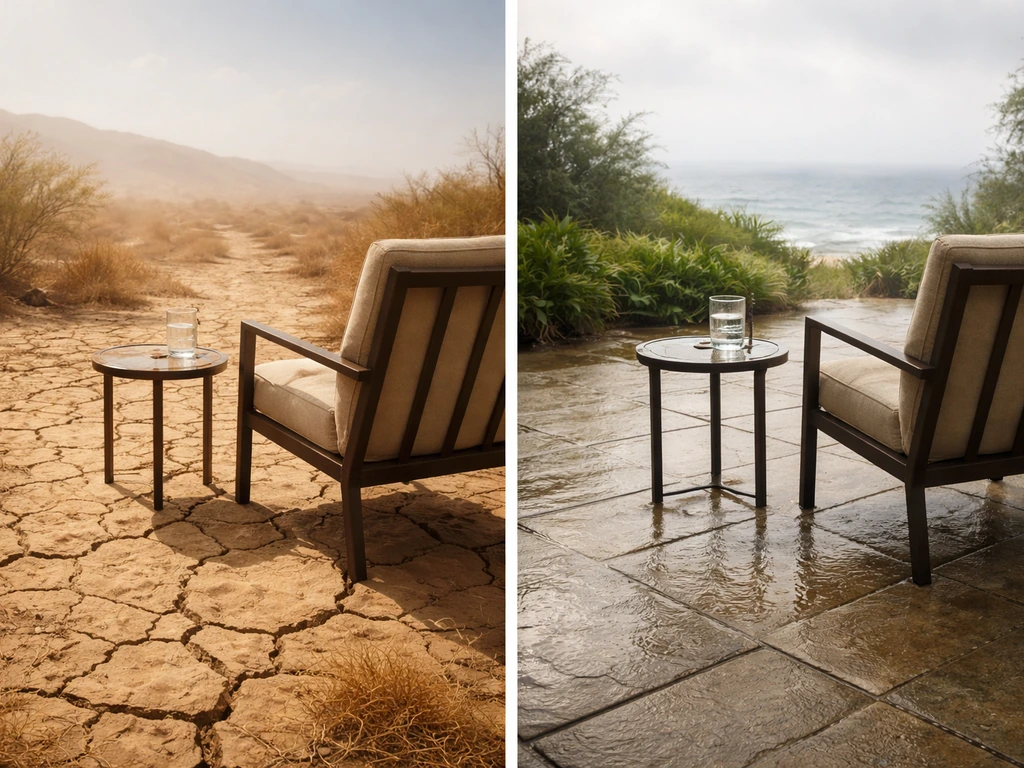
I cannot stress this enough: humidity is the single most important factor in choosing a patio cooling system. Here is how to think about it by region.
Dry and Arid Climates (Southwest US, Mountain West)
If you are in Phoenix, Las Vegas, Albuquerque, or the Front Range of Colorado, you have the best conditions for evaporative cooling and misting. Summer relative humidity in these areas often sits between 10 and 30%. The gap between dry-bulb and wet-bulb temperature is large, which means evaporative systems can cool air dramatically before hitting their physical limit. A high-pressure misting system with a ceiling fan and a good shade structure is often all you need. Evaporative coolers are also excellent here. Outdoor AC is an option but usually overkill given how well the cheaper systems perform.
Hot and Humid Climates (Gulf Coast, Southeast, Mid-Atlantic)
In Houston, Miami, New Orleans, or anywhere summer humidity routinely hits 70 to 90%, evaporative cooling and misting are largely ineffective. The wet-bulb temperature is already close to the dry-bulb temperature, which means there is almost no room for additional evaporative cooling. Mist will not evaporate; it will just make you wet. In these climates, the winning strategy is shade first (to cut radiant load), fans for airflow, and if you want serious cooling, a mini-split outdoor air conditioner on a covered, semi-enclosed patio. Do not waste money on an evaporative cooler in these conditions.
Mixed or Variable Climates (Texas Hill Country, Midwest, Pacific Northwest)
These regions see real variation. In Texas, you might have low-humidity heat in spring and high-humidity misery in August, especially on the coast. In these cases, a layered system (shade plus fan, with misting as an option during dry stretches) gives you the most flexibility. In the Pacific Northwest, summer heat events are short but intense, and a portable evaporative cooler or a good fan set often handles it without permanent installation.
Sizing, Coverage, Placement, and Airflow Design
Getting the sizing wrong is the number one reason people end up with a system that disappoints them. Here is how to measure correctly and plan coverage.
Measure Your Patio and Calculate Square Footage
Measure the length and width of your usable patio area in feet and multiply them. A 20 x 15 foot patio is 300 square feet. For irregular shapes, break it into rectangles and add them up. Note your ceiling height if you have a covered patio, because fans and misters sized for 8-foot ceilings perform differently at 12 feet.
Fan Sizing Rules of Thumb
For outdoor ceiling fans, the general guideline is a 44-inch fan for spaces up to 200 square feet, a 52-inch fan for 200 to 350 square feet, and a 60 to 72-inch fan for larger spaces up to 600 square feet. In spaces larger than that, use two fans rather than one oversized unit, and position them to create overlapping airflow coverage rather than competing drafts. Mount ceiling fans 9 to 10 feet above the floor when possible for optimal airflow. For pedestal fans, position them to blow across the seating area, not directly at faces from close range.
Misting System Layout
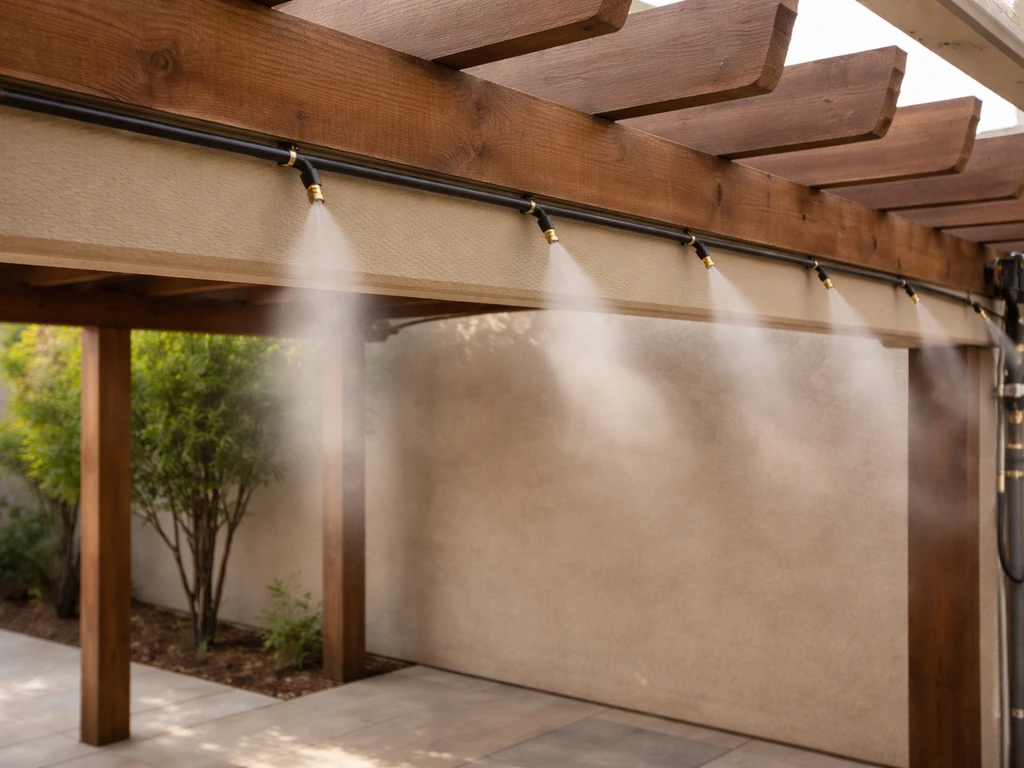
Misting lines are typically run along the perimeter of a patio cover or pergola at 8 to 10 feet high. Nozzle spacing of 18 to 24 inches is standard for most residential high-pressure systems. The goal is even mist distribution across the space so that the evaporating fog creates a cooled air zone. Avoid directing nozzles at furniture, electronics, or areas where getting wet is a problem. Running the misting system with a ceiling fan dramatically improves effectiveness because the fan distributes the cooled air and helps the fog evaporate before it settles.
Evaporative Cooler Placement
Position evaporative coolers so that they blow cooled air across the main seating area, with some airflow path for the warm air to escape. In a semi-enclosed patio, this means placing the cooler at one end and leaving the opposite end or sides open. If you box in an evaporative cooler without an exhaust path, the space humidifies quickly and the cooling effect collapses because the entering air is no longer dry enough to accept evaporation.
Cost, Power, Water, and Maintenance: The Real Tradeoffs
| System | Typical Install Cost | Monthly Operating Cost | Water Use | Maintenance Level |
|---|---|---|---|---|
| Shade/Patio Cover | $500–$8,000+ | $0 | None | Low (annual inspection) |
| Outdoor Ceiling Fan | $150–$600 installed | $5–$15 | None | Low (seasonal cleaning) |
| High-Pressure Misting System | $500–$3,000+ | $10–$30 (water) | 2–4 gallons/hr | Moderate (nozzle cleaning, winterization) |
| Evaporative Cooler (portable) | $200–$800 | $15–$40 | 3–15 gallons/hr | Moderate (pad replacement, cleaning) |
| Outdoor Mini-Split AC | $1,500–$5,000+ | $60–$150+ | None (condensate drain) | Moderate–High (filter, refrigerant checks) |
Power requirements are worth thinking through before you buy. A standard outdoor ceiling fan draws 50 to 80 watts and runs fine on any 120V outdoor outlet. A high-pressure misting pump typically draws 100 to 200 watts. A portable evaporative cooler draws 200 to 600 watts. A mini-split outdoor unit runs on 240V and typically draws 1,200 to 2,000 watts or more depending on the tonnage. If you are adding a mini-split, budget for an electrician to run a dedicated circuit, which can add $300 to $800 to your project.
Misting systems require periodic nozzle cleaning (calcium and mineral buildup clog nozzles over time) and winterization in freezing climates to purge the lines. High-pressure pumps typically last 5 to 10 years with reasonable maintenance. Evaporative cooler pads need replacement every season or two. Mini-splits need annual filter cleaning and a refrigerant check every few years by an HVAC tech.
What to Look For When You Shop: A Practical Checklist
Here is what actually matters when you are comparing specific products and systems in each category.
For Outdoor Fans
- UL Listed for wet or damp locations (wet-rated if fully exposed to rain, damp-rated for covered patios)
- Blade pitch of at least 12 to 14 degrees for effective airflow
- Motor rated for outdoor use with sealed bearings
- Remote control or smart-home compatibility for convenience
- Blade span matched to your square footage (see sizing guidance above)
- A DC motor for quieter operation and lower power draw
For Misting Systems
- High-pressure pump rated at 800 to 1,200 PSI for best results (avoid low-pressure gravity-fed systems for permanent installations)
- Stainless steel or brass nozzles instead of plastic for longevity
- Anti-drip nozzles to prevent dripping after the pump shuts off
- Stainless steel or UV-resistant nylon tubing
- Timer or thermostat control so the system runs automatically
- Filter on the inlet line to protect the pump from sediment
- Coverage area ratings from the manufacturer (match to your square footage)
For Evaporative Coolers
- CFM (cubic feet per minute) airflow rating: roughly 2 CFM per square foot of patio space as a starting point
- Honeycombed cellulose or rigid media pads for better cooling effectiveness than fiber pads
- Built-in thermostat or programmable controls
- Castor wheels or portability if you want to move it seasonally
- Water tank capacity if no direct water hookup (larger tanks need less frequent refilling)
- Check that the model is rated for outdoor/covered patio use, not just indoor
For Outdoor Mini-Split AC
- BTU capacity matched to your covered patio square footage (roughly 6,000 BTU per 150 square feet as a baseline, adjusted for sun exposure and climate)
- SEER rating of 18 or higher for energy efficiency
- IP or NEMA rating on the outdoor condenser unit for weather resistance
- Inverter-driven compressor for quieter, more efficient operation
- Heating function if you want year-round use
- Brand with local service network for refrigerant and warranty support
Layering Systems for Maximum Comfort
The best patio cooling setups almost always combine multiple approaches. Think of it as layers: shade handles radiant heat, fans handle airflow and perceived temperature, and misting or mechanical cooling handles the remaining ambient air temperature. In a dry climate, shade plus a ceiling fan plus a high-pressure misting system is a genuinely powerful combination that outperforms any single system and costs less than a mini-split installation. In a humid climate, shade plus fans plus a mini-split on an enclosed or semi-enclosed patio is the equivalent layered answer. You do not need to do everything at once. Most people start with shade and a fan, use the space for a season, and then decide if they need the next layer.
DIY vs. Hiring a Local Pro: How to Decide
Some of this work is genuinely DIY-friendly. Some of it is not. Here is an honest breakdown.
What Most Homeowners Can Handle Themselves
- Installing a ceiling fan on an existing outdoor fan box (if you are comfortable with basic electrical work and the box is already rated for fan weight)
- Running a low-pressure or mid-pressure misting kit along an existing patio structure
- Setting up a portable evaporative cooler or portable fan
- Installing shade sails or basic pergola kits designed for DIY assembly
When to Hire a Professional
- Installing a new electrical circuit or outdoor subpanel for fans, pumps, or AC
- Installing a high-pressure misting system with a dedicated pump and plumbing tie-in
- Installing a mini-split outdoor AC, which requires an HVAC technician for refrigerant handling and electrical work
- Building a structural patio cover, pergola, or shade structure that requires permits in your municipality
- Any work where local code requires a licensed contractor for the permit to be valid
The permit question is important and often overlooked. A structural patio cover or an electrical circuit addition usually requires a permit, and unpermitted work can complicate home sales and void homeowner's insurance in some cases. When in doubt, call your local building department before you start. For complex installations, getting quotes from two or three vetted local contractors is worth the time. A good contractor will also help you avoid common sizing and placement mistakes that are expensive to fix later.
Common Installation Mistakes to Avoid
- Undersizing a fan for the space, then being surprised that it does not create enough airflow
- Installing a misting system without a filter, which leads to rapid nozzle clogging
- Running a misting system in high humidity conditions and wondering why you are just getting wet
- Placing an evaporative cooler in a closed space with no exhaust path, killing its effectiveness
- Buying a mini-split sized for an indoor room and installing it in a large open patio, where it cannot maintain temperature against the outdoor heat load
- Using indoor-rated fans or electrical fixtures in wet outdoor locations, which is both ineffective and a safety risk
Your Next Steps Based on Your Situation
If you are ready to make a decision, here is how to move forward based on where you are starting from.
- Check your local average July relative humidity online. If it is consistently above 60%, cross misting and evaporative coolers off your list and focus on shade, fans, and potentially a mini-split.
- Measure your patio and calculate square footage. Write down whether it is covered, partially covered, or open.
- Decide on your budget tier: under $500 (fan plus shade upgrades), $500 to $2,000 (fan plus misting or a quality evaporative cooler), or $2,000 and up (permanent misting system or mini-split AC).
- If your patio has no shade structure, price out a patio cover or shade sail before anything else. This step pays dividends for every other system you add.
- If you are in a dry climate and want the best bang for your buck, get quotes on a high-pressure misting system with a ceiling fan. This is the sweet spot for most arid-region patios.
- If you are in a humid climate and want real comfort, talk to a local HVAC contractor about an outdoor mini-split on a covered patio. Get at least two quotes.
- For any electrical or structural work, contact your local building department to understand permit requirements before hiring anyone.
The honest truth is that there is no single best outdoor patio cooling system in the abstract. There is the best system for your humidity level, your patio size, your shade situation, and your budget. Start with those four variables and the decision becomes a lot clearer. Most people end up happier when they layer two systems rather than betting everything on one, and when they get the shade situation handled first before adding fans or mist on top of a sun-baked slab. If you are looking for an option that keeps things pleasant even when temperatures climb, a life is good patio cooler can be a practical choice to compare for your setup and conditions.
FAQ
What comfort temperature should I expect from the best outdoor patio cooling system?
Use a heat index target, not the thermometer. A realistic goal is to reduce perceived temperature by about 15 to 25 degrees, especially outdoors where you cannot reach indoor comfort. If your goal is “comfortable at 100°F,” systems that only drop air temperature by a few degrees will feel disappointing even if their specs look good.
Why do fans and misters feel weak on some patios even when they are “working”?
If your patio is open to the sun on all sides, active systems will fight a constant radiant heat load. Start by measuring how much of your seating area actually stays in shade during peak afternoon hours. If you cannot shade most of the seating, plan on shade first because a fan or mist will struggle no matter how powerful it is.
How can I tell if a misting system will work in my climate before I buy?
For misting, check whether droplets can evaporate where you live. A quick rule is that high humidity climates (often around 70% to 90% relative humidity) can leave you wet and only slightly cooler. If your humidity is consistently high, prioritize shade plus airflow, and consider a true outdoor air conditioner instead of mist.
Do ceiling fans cool differently if my patio ceiling is higher than 8 feet?
Ceiling fan performance depends heavily on mounting height and airflow path. If your ceiling is higher than typical, you may need a larger fan or different blade pitch to keep air moving across seats. Also avoid placing the fan so that it blows directly into a wall or solid barrier, which can block the airflow corridor you are trying to create.
Where should I point pedestal or tower fans for the best cooling feel on an open deck?
For pedestal or tower fans, aim across the seating area rather than at faces from very close range. Close, direct blasting mostly makes people feel annoyed and can create dead spots at the far end of the patio. If you have a long seating layout, two fans staggered or positioned to overlap airflow usually beats one fan at maximum speed.
How do I avoid under-sizing a fan system for a patio with deep seating areas?
Sizing outdoor ceiling fans is more accurate when you consider seating zone coverage, not just total patio area. For example, a patio with deep furniture rows may need a second fan even if the total square footage seems to fit one fan size range. If airflow reaches only part of the seating, you will still feel “hot spots” despite running the fan.
How should I plan mist nozzle placement to avoid wet furniture and uneven cooling?
Outdoor mist lines often distribute best when nozzles are run along the perimeter or along the overhead structure, at a height that matches the seating zone. You should also space nozzles to avoid uneven “wet bands” where droplets hit surfaces. If you have limited overhead space, consider how to keep the mist from landing on electronics, grills, and cushions.
What maintenance issue most often ruins misting systems, and how do I prevent it?
Nozzles will clog faster if you use hard water or have high mineral content. Plan for periodic cleaning and use appropriate filtration if your region’s water is aggressive. If you dislike maintenance, a system with better filtration and fewer nozzles in contact with the driest airflow path can reduce the “wet and clogged” problem.
Why does my evaporative cooler lose cooling power after a while?
Evaporative coolers need an exhaust path so the air can carry away moisture. If the cooler is placed where air gets trapped, humidity builds quickly and cooling performance collapses. In semi-enclosed patios, leave an opening on the opposite side or along one edge so air can escape while cooler air sweeps across seating.
Are portable outdoor AC units worth it for open patios?
Portable AC units often underperform outdoors because hot air and heat gain can continuously re-enter the space, and venting effectiveness varies by setup. If you go this route anyway, look for solutions designed for semi-enclosed patios with good shielding and a proper exhaust plan. For truly open patios in humid climates, a mini-split designed for outdoor conditions is usually the more reliable comfort choice.
What are the most common mistakes people make when installing an outdoor mini-split patio cooling system?
A mini-split can be a great option when humidity is high, but installation quality matters as much as unit specs. Budget for a dedicated electrical circuit, and ensure proper line-set routing and drainage so condensate management does not create problems. If you are not willing to pay for professional installation and correct placement, you may be better off sticking to shade plus fans.
Do I need permits for patio cooling installations, and what should I document?
In many areas, adding electrical work, running refrigerant lines, or installing a structural cover can trigger permits. Check with your local building department before starting, and keep documentation for the work in case you sell your home. This is especially important for insurance coverage if there is ever property damage related to wiring or the structure.
How do I estimate my monthly electricity cost for different patio cooling options?
Power draw affects both operating cost and whether your outlets can handle continuous use. Fans are usually low wattage, but mist pumps, portable evaporative coolers, and mini-splits can add up quickly. If you plan to run the system during peak hours, calculate estimated daily kWh and confirm your breaker and outdoor-rated circuits can support the load safely.
What’s the smartest order to buy patio cooling upgrades if I am on a budget?
Most homeowners get the best results by layering two approaches rather than buying one “maximum” system. A common progression is shade first, then a fan for airflow, then mist or mechanical cooling only if humidity and heat load demand it. If budget is tight, prioritize the layer that reduces the heat load before paying to actively remove heat or replace air.