
For most standard concrete pavers and brick patios with joints up to 1/2 inch wide, polymeric sand is the best patio filler: it locks weeds out, resists washout, and lasts 5 to 10 years with minimal upkeep. For a breakdown of options and how to choose the best patio gap filler, see this guide. For flagstone or natural stone with wider, irregular gaps (1 inch or more), a sand/cement dry-mix or flexible sealant over a foam backer rod works better. Narrow tile-style joints under 1/4 inch call for epoxy grout or cementitious grout. And if you have a permeable paver system designed to drain stormwater, none of those apply, as you need blank" rel="noopener noreferrer">open-graded crushed aggregate to keep infiltration working. The right choice depends on your paver type, joint width, climate, and how much maintenance you are willing to do.
Best Patio Filler: How to Choose for Every Patio Type

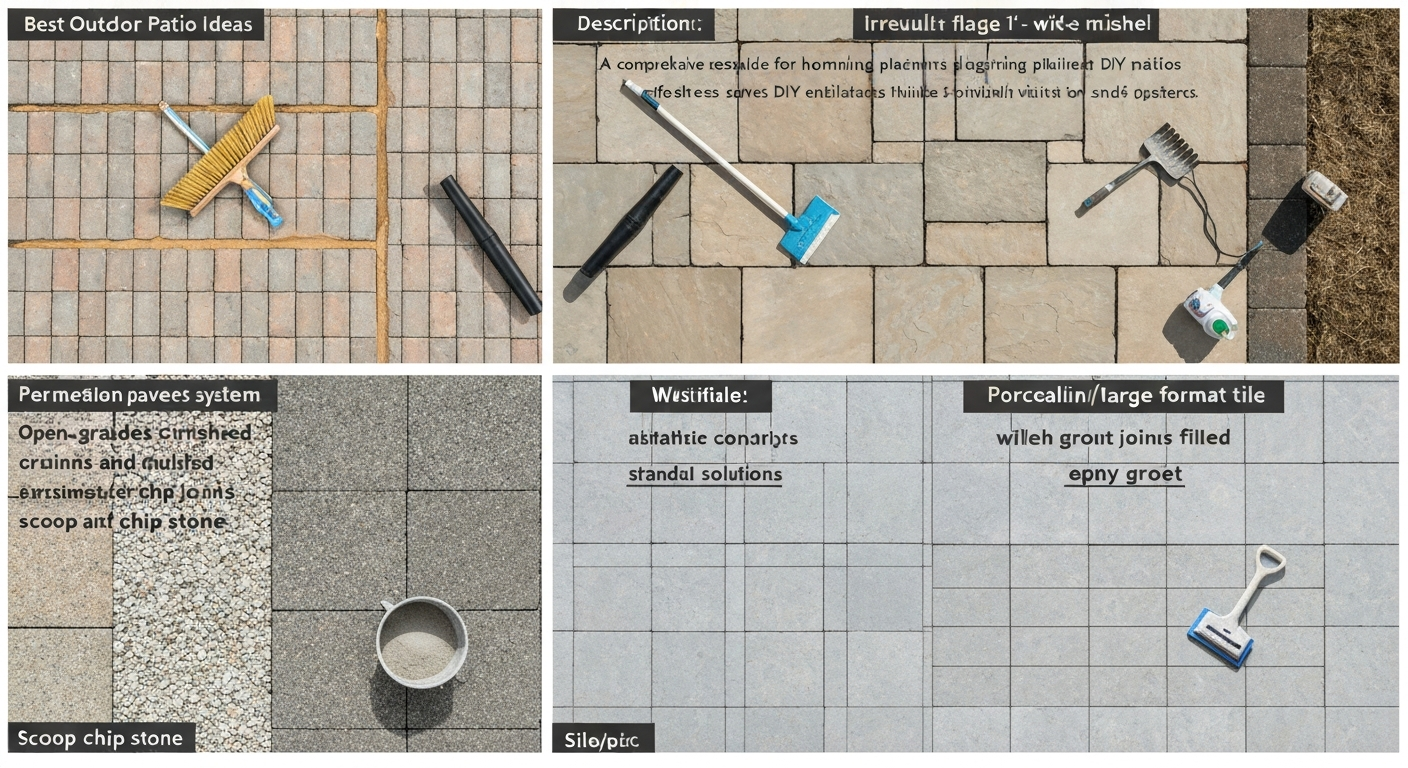
Quick Recommendations by Surface and Goal
Before diving into the details, here is a fast-reference breakdown. These are starting points, not absolutes. Your climate and base construction matter just as much as the filler itself, something the Interlocking Concrete Pavement Institute (ICPI) stresses repeatedly: even the best joint material will fail if the base, edge restraints, and drainage are not right.
| Patio Surface / Situation | Best Filler Pick | Why |
|---|---|---|
| Concrete or brick pavers, joints 1/8"–1/2" | Polymeric sand | Weed resistance, washout resistance, easy DIY application |
| Flagstone or irregular natural stone, joints 1/2"–2" | Sand/cement dry mix or flexible sealant + backer rod | Fills wide gaps, accommodates movement, tolerates frost |
| Cut stone or porcelain tile, joints under 1/4" | Epoxy grout or cementitious grout | Strong, stain-resistant, precise color matching |
| Permeable/PICP paver systems | Open-graded crushed aggregate (chip stone) | Preserves infiltration; polymeric sand blocks drainage |
| Budget gravel or informal stepping stone path | Regular coarse sand or fine pea gravel | Low cost, easy to top up, drains freely |
| Concrete slab expansion joints, joints 1/4"–3/4" deep | Polyurethane or silicone sealant + foam backer rod | Flexible, handles thermal movement, waterproof seal |
| Any joint where weeds are the main problem | Polymeric sand (first choice) or polymeric jointing compound | Binder hardens to resist both weeds and washout |
Checklist: Pick the Right Filler Before You Buy Anything
Running through this list before you head to the home improvement store will save you a return trip and a wasted Saturday. I have made almost every mistake on this list personally, including buying polymeric sand for a permeable driveway (wrong choice) and using regular sand on a freeze-thaw-prone Minnesota patio (it was gone in two winters).
- Measure your joint width and depth. Most polymeric sands specify a minimum joint depth of 1.5 inches. Joints narrower than 1/8 inch need grout, not sand. Joints wider than 2 inches typically need a dry-mix mortar or backer rod plus sealant.
- Identify your paver or stone type. Soft or porous stones (sandstone, tumbled travertine) can be stained by polymer binders or damaged by acidic cleaners used to remove efflorescence. Check manufacturer compatibility first.
- Know your climate zone. Freeze-thaw cycling (roughly Zone 6 and colder) rewards flexible fillers. Rigid mortars crack; fillers that trap and hold moisture accelerate spalling. Hot, dry climates (Southwest, Texas) are more forgiving of rigid fills but punish anything that shrinks without UV stabilization.
- Confirm your drainage setup. Is your patio a permeable/infiltration system? If yes, use open-graded aggregate only. Polymeric sand and grout both block infiltration.
- Check if you have edge restraints. Without solid edge restraints, joint sand migrates outward regardless of binder. Fix edges first, or the filler fix is temporary.
- Decide your maintenance tolerance. Polymeric sand needs re-sanding every 5 to 10 years. Regular sand needs annual or biannual top-ups. Epoxy grout is permanent but very hard to remove if you ever need repairs.
- Consider nearby water features or fountains. Runoff from polymeric sand curing (the haze left on surfaces before full cure) can discolor ornamental fountain basins. Plan your work sequence to protect water features during installation.
- Budget realistically. Regular sand costs roughly $5 to $10 per 50 lb bag. Polymeric sand runs $25 to $45 per 50 lb bag. Epoxy grout kits start around $30 to $60 per kit and cover much smaller areas. Professional installation adds $3 to $8 per square foot depending on region and material.
At-a-Glance Comparison of All Common Patio Filler Types
| Filler Type | Best Joint Width | DIY Difficulty | Longevity | Weed Resistance | Freeze-Thaw Suitability | Approx. Cost per 50 lb |
|---|---|---|---|---|---|---|
| Regular sand | 1/8"–1/2" | Easy | 1–3 years | Poor | Fair (drains freely) | $5–$10 |
| Polymeric sand | 1/8"–2" (product dependent) | Easy–Moderate | 5–10 years | Excellent | Good (if drains well) | $25–$45 |
| Sand/cement dry mix | 1/2"–2" | Moderate | 10–20 years | Good | Moderate (can crack) | $8–$15 |
| Cementitious mortar/grout | 1/8"–1" | Moderate–Hard | 10–25 years | Excellent | Moderate (rigid) | $10–$20 |
| Epoxy/resin grout | 1/16"–1/2" | Hard | 20–30 years | Excellent | Good (flexible options exist) | $30–$60/kit |
| Flexible sealant + backer rod | 1/4"–3/4" deep | Moderate | 5–15 years | Good | Excellent (designed for movement) | $8–$20/tube |
| Open-graded aggregate/gravel | Any | Easy | Indefinite (top up needed) | Poor–Fair | Excellent (drains freely) | $4–$10 |
| Groundcover/plants | 1/2"+ wide | Easy | Seasonal maintenance | Excellent (plants occupy space) | Varies by plant | Variable (seed/plug cost) |
Regular Sand: Simple, Cheap, and Best When Drainage Matters Most
Regular coarse sand (typically ASTM C144-graded or a contractor-grade washed concrete sand) is the original patio joint filler, and it still earns its place in the right situations. It is the standard bedding and jointing material under permeable paver systems, it works well for informal or rustic installations where a little movement is acceptable, and it is the lowest-cost option available. A 50 lb bag typically costs $5 to $10 at any hardware store or landscape supplier.
Where It Works Well
- Permeable and open-jointed paver systems where infiltration must be preserved
- Rustic or informal stepping stone paths with wide, irregular gaps
- Temporary or short-term installations you plan to rework within a few years
- Low-budget projects where annual maintenance is acceptable
Pros, Cons, and Longevity
The biggest advantage of regular sand is that it is completely forgiving. Top it up with a broom every season and you are done. It drains freely, which is actually excellent for freeze-thaw climates: water moves through rather than pooling in the joint and expanding during freeze cycles. Peer‑reviewed research, including 'Towards a more representative assessment of frost damage to porous building materials (Building and Environment)', shows freeze‑thaw damage in porous masonry depends strongly on moisture content, pore structure and number of cycles, so joint fillers that retain water or allow saturation raise risk in freeze‑thaw climates. The downside is that it offers almost no weed resistance, it erodes easily under heavy rain or pressure washing, and ants love to excavate it. Realistically, you are looking at annual or biannual top-ups. In high-traffic or high-rainfall areas, it may need attention every spring.
Maintenance and Buying Tips
Buy washed, coarse-grained sand rather than fine play sand or beach sand. Fine sand compacts too densely, reduces drainage, and actually creates a better seed bed for weeds. For joint filling, coarse silica or all-purpose contractor sand is the right spec. Sweep it into joints, compact lightly, sweep again, and repeat. Keep a half-bag in the garage for seasonal top-ups. One tip I have picked up from contractors: blend a small amount of fine gravel into the sand for very wide joints (over 1 inch) to reduce settlement.
Polymeric Sand: The Best All-Around Choice for Most Homeowners
Polymeric sand is regular sand with a water-activated polymer binder mixed in. You sweep it into joints dry, compact it, then lightly mist it to activate the binder, which hardens the sand into a semi-rigid mass. Techniseal's SmartSand and Quikrete's Polymeric Jointing Sand are two widely available examples. The result resists weeds, resists washout from rain or irrigation, and holds together far better than plain sand across seasonal temperature swings. This is why I recommend it as the default starting point for concrete paver and brick patio installations.
Application Range and Joint Width Limits
Most polymeric sands are rated for joints roughly 1/8 inch to 1/2 inch wide and at least 1.5 inches deep. Some product lines (including certain Quikrete formulations) are specifically formulated for wider joints up to 2 inches. Always check the technical data sheet for the specific product, because using a fine-grade polymeric sand in a joint that is too wide will result in a weak, crumbly fill that erodes faster than plain sand. Joint depth matters too: if the joint is too shallow, the binder layer is thin and haze problems on the paver surface are more likely.
Installation Notes That Actually Matter
The ICPI and manufacturers like Techniseal and Sakrete all emphasize the same critical steps: sweep the sand into completely dry joints (moisture before activation causes uneven hardening), compact with a plate compactor equipped with a protective rubber pad (or hand-tamp on softer stone to avoid cracking), sweep a second time to refill any voids, blow off excess from the surface with a leaf blower before misting, and then mist lightly in stages rather than flooding. Check the product's TDS for the required rain-free curing window: most need 24 to 48 hours without rain after activation. Rushing this step is the number one reason DIY polymeric sand jobs fail.
Pros, Cons, Climate Notes, and Environmental Considerations
- Pros: excellent weed resistance, good washout resistance, DIY-friendly, widely available, works in freeze-thaw climates when properly installed and draining
- Cons: not suitable for permeable paver systems (blocks infiltration), can leave a polymer haze on paver surfaces if not blown off cleanly before misting, some natural stones are sensitive to the binder chemistry
- Climate note: in freeze-thaw climates, the semi-rigid fill does well as long as the base drains properly. If water pools under or in the joint and freezes, even polymeric sand can heave. Good base construction is non-negotiable.
- Environmental note: the UF/IFAS Extension and EPA stormwater guidance both flag that polymeric sand makes joints impermeable, which increases surface runoff. If your municipality requires permeable coverage or you are in a Florida-Friendly or similar eco-landscaping program, this matters. Consider the drainage implications for any nearby patio water features or fountains when planning your installation.
Cost and Buying Tips
Expect to pay $25 to $45 for a 50 lb bag, which typically covers 35 to 75 square feet depending on joint width and depth. Buy from a full-service masonry supplier or a reputable hardware store rather than the cheapest generic option: low-cost polymeric sands sometimes have inconsistent binder ratios and perform noticeably worse. Store any leftover bags in a sealed plastic bin, because humidity in the bag will partially activate the binder and render it useless.
Sand/Cement Dry-Mix: The Go-To for Wide Joints and Natural Stone
A dry-mix of sharp sand and Portland cement (typically a 3:1 or 4:1 sand-to-cement ratio by volume) is swept or packed into joints dry, then lightly misted or allowed to absorb ambient moisture over time. It cures into a rigid mortar. This is the traditional choice for flagstone patios, natural stone, and slate with irregular, wide joints. It is also common for restoration work on older brick patios where original mortar has eroded.
Where It Excels and Where It Struggles
Sand/cement mix handles joints from roughly 1/2 inch to 2 inches well, which puts it in a range that polymeric sand handles poorly. Once cured, it is hard, durable, and fairly weed resistant. The cured surface blends naturally with stone. The weakness is rigidity: in climates with significant freeze-thaw cycling, a fully rigid joint can crack and pop as the substrate moves seasonally. I have seen well-done dry-pack flagstone patios in Colorado survive 10 to 15 years with minimal cracking when the base prep was solid, but the same approach on a poorly prepared base in Minnesota can start showing cracks within two or three winters.
Longevity, Maintenance, Cost, and Buying Tips
Properly installed, a sand/cement joint on a well-drained base can last 10 to 20 years. Maintenance is minimal: inspect annually and repoint any cracked sections before water infiltration makes the problem worse. A 50 lb bag of pre-blended sand/cement jointing mix costs roughly $8 to $15 at hardware stores, or you can mix your own from Portland cement and coarse sand. Bagged pre-mixes are more consistent and worth the modest premium for DIY projects. One buying note: do not confuse dry jointing mix with fast-set concrete or hydraulic cement, which are entirely different products with incompatible workability windows.
Mortar and Grout for Joints: When You Need a Permanent, Rigid Bond
Wet-mixed mortar (Portland cement, sand, water, sometimes a polymer additive) and cementitious grout are what most professional masons reach for when the job calls for a fully bonded, long-lasting joint fill. This approach is most common on fully mortared flagstone patios set on concrete slabs, brick patios with tight joints, and any installation where the stones are bonded to a substrate rather than set on sand.
Uses, Joint Widths, and Application
Wet mortar works across a wide joint range, from about 1/8 inch for fine grout work up to 1 inch or more for rustic flagstone. For joints under 1/2 inch, a pourable or bagged cementitious grout (unsanded for joints under 1/8 inch, sanded for wider) is the standard choice. For joints over 1/2 inch, a troweled mortar mix is more practical. The Sika product line, for example, specifies certain sanded jointing products for paving joints in the 2 to 5 mm range, which gives a sense of how specialized the narrower end of the scale gets.
Pros, Cons, and Climate Considerations
- Pros: very strong bond, permanent fill, excellent weed control, wide range of colors available, compatible with most stone types when matched correctly
- Cons: rigid (prone to cracking with freeze-thaw movement or slab settlement), difficult to remove or repair, mixing and application require more skill than sand-based fills, efflorescence (white salt deposits) is a common issue on new mortar
- Freeze-thaw climate note: polymer-modified mortars perform noticeably better in cold climates than standard Portland mixes because they retain some flexibility after cure. If you are in Zone 6 or colder, spend the extra few dollars per bag on a polymer-modified product.
- Slab settlement note: if the patio has any history of settling or is built over fill soil, rigid mortar joints will crack within a season or two regardless of how well they are applied. A flexible sealant or polymeric sand is a smarter choice in those situations.
Longevity, Maintenance, Cost, and Buying Tips
Well-applied mortar joints on a stable substrate can last 15 to 25 years. Annual inspection and spot repointing are all the maintenance most installations need. Bagged pre-mixed grout starts at roughly $10 to $20 per 25 lb bag. For larger areas, buying Portland cement and coarse sand separately and mixing on site is more economical. If efflorescence appears after curing (a common complaint), a diluted masonry cleaner removes it, but address the moisture source driving it or it will return. This is where good patio edging and drainage design, including thinking about how nearby fountains or water features drain and irrigate, directly affects joint longevity.
Epoxy and Resin Joint Fillers: Premium Performance for Demanding Applications
Epoxy and resin-based grouts are two-part systems that mix a resin component with a hardener, often with fine aggregate included. Once cured, they are chemically resistant, stain resistant, extremely strong, and dimensionally stable. LATICRETE's SpectraLOCK family is one of the most widely used professional-grade examples, available in a wide range of colors including UV-stable options. Clear epoxy resins are also available and are sometimes used for natural stone patios where you want to fill joints without adding visible color.
Where Epoxy Grout Makes Sense
Epoxy grout earns its premium price in a few specific scenarios: pool surrounds and outdoor kitchens where chemical exposure (chlorine, cooking grease, cleaning agents) is constant; porcelain or large-format tile patios with tight joints that need long-term stain resistance; and commercial or high-traffic residential patios where joint integrity has to last 20 to 30 years without repointing. LATICRETE product data confirms higher compressive and tensile strength than cementitious grouts, along with UV-stable color options that resist fading in direct sun.
Colored and Clear Epoxy Systems
Colored epoxy grouts give you the most precise, permanent color match available for joint filling, and the color will not fade or shift with UV exposure the way standard cementitious grout does. Clear epoxy resins are a niche but useful product for natural stone where any colored fill would look artificial. They fill the joint while allowing the stone color to read through. Both systems require careful surface prep (stone must be sealed or the resin can stain porous surfaces), strict mixing ratios, and fast, confident application because pot life (working time after mixing) is typically 20 to 45 minutes at 70 degrees Fahrenheit and shortens significantly in hot weather.
Pros, Cons, and Safety Notes
- Pros: exceptional durability (20–30 year realistic lifespan), stain and chemical resistance, UV-stable color, clear options available for natural stone, excellent freeze-thaw performance when properly installed
- Cons: highest cost of any filler type (kits start at $30–$60 and cover small areas), difficult DIY application requiring experience with two-part systems, nearly impossible to remove cleanly if repairs are ever needed, requires PPE (gloves, eye protection, ventilation) per LATICRETE SDS guidance
- Safety note: epoxy components contain reactive chemicals. The LATICRETE SDS for SpectraLOCK and similar products specifies nitrile gloves, eye protection, and adequate ventilation. Skin and eye contact with uncured epoxy is a sensitization risk.
- DIY guidance: if you have never worked with two-part epoxy systems, do a small test section first or hire a tile setter with epoxy grout experience for large areas. The finished result is excellent but the application window is unforgiving.
Cost and Buying Tips
Entry-level epoxy grout kits start around $30 to $60 per kit and cover roughly 40 to 60 square feet at standard joint widths. Professional-grade systems like SpectraLOCK are more expensive per unit but are available at tile supply houses in larger quantities. Buy from a reputable tile supply dealer rather than the cheapest online option: the mixing ratios in off-brand two-part systems are less reliable, and an improperly cured epoxy joint is worse than no fill at all. Check shelf life before buying: unmixed epoxy components have a limited shelf life (typically 12 to 24 months from manufacture date) and off-spec material will not cure properly.
Flexible Sealants and Foam Backer Rods: The Right Answer for Expansion Joints
Polyurethane and silicone sealants are not joint fillers in the traditional sense, but they belong in any honest discussion of patio joints because they are the correct answer for expansion joints in concrete slabs and for wide, shallow joints in horizontal hardscape. Sika and other manufacturers rate many of their horizontal-joint sealants from roughly negative 40 degrees Fahrenheit to positive 150 degrees Fahrenheit, which covers virtually every residential climate in North America. That temperature range matters because expansion joints in concrete slabs are moving joints by design, and a rigid fill will crack within one seasonal cycle.
Backer Rods: The Step Most DIYers Skip
For any joint deeper than about 1/2 inch, Sika's application guidance specifies installing a closed-cell foam backer rod before applying sealant. The backer rod controls the depth of the sealant (ideally a width-to-depth ratio of 2:1), prevents three-sided adhesion (which causes sealant to tear rather than flex), and reduces material cost. This is one of those details that separates a sealant joint that lasts 10 to 15 years from one that starts peeling in three. Backer rods are inexpensive (a few dollars for a roll at any hardware store) and take two minutes to install.
Longevity, Maintenance, and Cost
A properly installed polyurethane sealant joint with a backer rod lasts 10 to 15 years in most climates. Silicone lasts longer but is harder to tool neatly on horizontal surfaces and may not adhere as well to concrete without a primer. Expect to pay $8 to $20 per tube for a quality exterior-rated sealant. Inspect annually and reapply when the sealant shows cracking, delamination, or significant shrinkage. Removal before reapplication is important: sealant applied over degraded material will not bond properly.
Troubleshooting Common Patio Filler Problems
Even a well-chosen filler runs into problems if installation conditions were off or the underlying base has issues. Here are the most common complaints and what to do about them.
| Problem | Likely Cause | Fix |
|---|---|---|
| Weed regrowth through polymeric sand | Incomplete joint fill depth or binder not fully activated | Re-sand with dry joints, compact properly, mist correctly per TDS |
| Sand erosion after rain | Plain sand with no binder, or slope/drainage issue | Switch to polymeric sand; address drainage grade |
| White haze on paver surface (efflorescence) | Polymer binder residue or cement salt migration | Dry brush before misting; use diluted masonry cleaner after full cure |
| Joint cracking (mortar or cement mix) | Rigid fill + freeze-thaw movement or base settlement | Repoint with polymer-modified mortar or switch to flexible sealant |
| Sinking pavers near joints | Base washout or poor compaction, not a filler problem | Lift and reset pavers; recompact base before re-jointing |
| Ants tunneling through joints | Any granular fill is vulnerable | Treat with diatomaceous earth before re-filling; switch to polymeric sand |
| Staining around epoxy joints | Porous stone not sealed before application | Seal stone first; use diluted epoxy cleaner on fresh stains only |
DIY vs. Hiring a Professional: An Honest Assessment
Most sand-based joint filling is genuinely DIY-friendly. If you have a plate compactor (rental runs $50 to $80 per day), a push broom, a leaf blower, and a free afternoon, you can re-sand a standard concrete paver patio yourself. The ICPI and manufacturers like Sakrete and Techniseal provide detailed installation guides, and the steps are not complicated as long as you follow the sequence carefully, especially the drying and curing requirements for polymeric sand.
Where I would strongly recommend calling a vetted professional: any large-scale mortar or epoxy grouting job (skill and speed matter enormously with these materials), any patio with a known base problem (sinking, drainage failure, or heaving), any permeable paver system that requires certified stormwater BMP compliance, and any restoration project on expensive natural stone where a mistake means a five-figure replacement cost. Getting professional quotes for complex jobs is always worth the hour it takes, and a good local contractor will often flag base or drainage issues that would cause any filler to fail prematurely.
A Few Final Notes on Edging, Drainage, and Water Features
Joint filler does not work in isolation. The ICPI is emphatic about this: base preparation, edge restraints, and drainage are the foundation, and joint stabilization is secondary. If your patio edging is failing, joints will keep migrating outward no matter what you fill them with. For guidance on selecting and installing the best patio edging, see our best patio edging guide. Getting edging right before or at the same time as joint filling is the correct sequence. Similarly, if you have an ornamental fountain or water feature near the patio, think through your drainage plan: runoff from freshly misted polymeric sand can carry polymer residue into feature basins during the curing window, and mortar or grout washout during mixing or cleanup can cloud and damage fountain water chemistry. For ideas on integrating ornamental fountains or other attractive options safely, see our guide to the best patio water features. If you're choosing a water feature, our guide to the best water fountain for patio helps select options that minimize runoff and maintenance. For product ideas and placement tips, see our guide to the best outdoor patio fountains. If you're also shopping for water features, see our guide to the best patio fountains for options that pair well with different patio materials and drainage setups. Plan your work timing and rinse paths accordingly.
FAQ
Which patio joint filler is best overall for most homeowners and DIYers?
For most residential patios made from pavers or brick, polymeric sand is the best general‑purpose choice: it stabilizes joints, reduces weeds, is easy to install for competent DIYers, and offers good longevity when installed over a properly prepared base with sound edge restraints. Limitations: not suitable for permeable paver installations, can trap water in poor‑draining systems, and performs poorly if joints are wider than the product rating or if installation/curing windows are missed.
How do common joint fillers compare (regular sand, polymeric sand, sand/cement, mortar/grout, epoxy/resin, flexible sealants, foam backer rods, gravel, plants)?
- Regular (washed) sand: cheapest, permeable, high weed risk, easily washed out. Good for wide joints where infiltration is desired. - Polymeric sand: sand + water‑activated polymer; stabilizes, resists weeds, moderate cost, not permeable. Best for sealed/impermeable patios with good drainage. - Sand/cement (dry-mix or mortar): rigid, durable on small joints for stone/concrete; can crack with movement and is less flexible. - Mortar/grout (cementitious grout): strong and durable for narrow joints in rigid installations (flagstone on slab), but brittle with thermal or substrate movement. - Epoxy/resin grout: very durable, chemical- and stain-resistant, excellent for narrow joints and heavy use; requires PPE and experience; harder to remove/repair; higher cost. - Flexible sealants (polyurethane/silyl-modified): used for movement joints and wide horizontal joints; need backer rod for depth control; good for waterproofing around water features. - Foam backer rods: not a filler alone but used to set sealant depth, save sealant and prevent three‑sided adhesion. - Gravel/pebble infill: permeable and decorative for very wide joints; can shift and support weeds unless maintained. - Plants/groundcover: aesthetic in wide joints; high maintenance and not suitable where hard, stable walking surface or minimal weeds are required.
Which filler is best by patio material (concrete pavers, slab concrete, flagstone, brick, natural stone)?
- Concrete pavers/interlocking pavers: polymeric sand for most homeowners; open-graded aggregates for permeable systems; epoxy for high‑traffic/commercial uses. - Concrete slabs: sand/cement or mortar for narrow sawcut joints; sealants for movement/crack repair; polymeric sand only for paver-style joints on top. - Flagstone (dry laid on sand/gravel): coarse sand, crushed stone, or polymeric sand (if drainage acceptable and joint width suits product); mortar can be used for tightly packed installations. - Brick patios: polymeric sand for conventional paver-style brick; mortar for rigid, bonded brick on mortar beds. - Natural irregular stone: depends on joint width — for narrow joints, mortar/grout or epoxy; for wide joints, crushed stone, gravel, or planting mix for groundcover. Always account for substrate movement and expected joint movement when choosing rigid vs flexible systems.
How do joint width and depth affect the choice of filler?
- Narrow joints (<1/8" / 3 mm): use fine polymeric sand formulated for thin joints, cementitious grout or epoxy grout. - Moderate joints (1/8"–1/2" / 3–12 mm): polymeric sand, sand/cement mixes, or epoxy (if high performance needed). - Wide joints (>1/2" / >12 mm): consider flexible sealants with backer rod for movement joints, crushed aggregate or planting/groundcover. Many polymeric sands and epoxy products specify maximum joint widths — follow manufacturer TDS. Joint depth must meet product guidance (e.g., some polymeric sands require full depth fill leaving small reveal; sealants require controlled depth with backer rod).
What filler choices are best in specific climates (freeze‑thaw, heavy rain, hot/dry)?
- Freeze‑thaw climates: avoid joint fillers that retain water in porous unit materials or trap moisture against freeze-prone materials. Well‑draining joint infills (coarse aggregates) or flexible sealants with drainage and a sound base are safer; polymeric sand can be used if drainage is excellent and joints dry quickly. Adequate base, edge restraint and slope/drainage are primary defenses. - Heavy rain / high runoff: permeable joints (open-graded aggregate) preferred if you need infiltration; otherwise ensure polymeric sand or mortar installations have good surface drainage and aren’t subject to concentrated runoff that will wash joints out. - Hot/dry climates: most fillers perform well; watch for polymeric sands that can dry prematurely during installation in hot conditions — follow manufacturer curing instructions. Flexible sealants may soften with prolonged extreme heat; check service temperature ranges.
How do joint fillers interact with edging, drainage, and nearby water features?
Answer: Edge restraint integrity and drainage are critical regardless of filler. Rigid joint materials transfer loads to the edge—poor edging leads to settlement/edge failure. For permeable systems and BMP compliance, use open-graded aggregate joints and a permeable base; polymeric sands are not suitable for permeable paver systems as they block infiltration. Near fountains and water features choose non‑leaching, weather‑resistant, and water‑tolerant materials (epoxy grouts or properly rated sealants). For waterproofing or to prevent water intrusion into substrates, use flexible sealants with backer rods at perimeter joints and transitions.