The best patio brush for most homeowners is a stiff-bristle push brush with a long handle and a wide head, typically 12 to 18 inches across, made with polypropylene or union mix bristles. That covers concrete, pavers, and brick for general grime and algae scrubbing. But the right pick shifts depending on your surface and what you're cleaning: soft natural-fiber bristles for sealing-sensitive stone or tile, a stiff wire brush only for bare concrete or raw brick, and a narrow grout or joint brush for weeds and debris packed into paver seams. Match those three variables (surface, mess, bristle type) and you'll get the job done without scratching or lifting anything you want to keep.
Best Patio Brush Guide: Choose the Right One for Your Surface

Elise Prescott
4 Jun 2026
How to choose the right patio brush for your surface
Surface material is the first filter. Get that wrong and you can scratch a sealed travertine tile, rip out polymeric sand from paver joints, or leave rust stains on a concrete slab from a wire brush. Think of it this way: the harder and more porous the surface, the more aggressive the bristle you can get away with. The more finished or sealed the surface, the gentler you need to be.
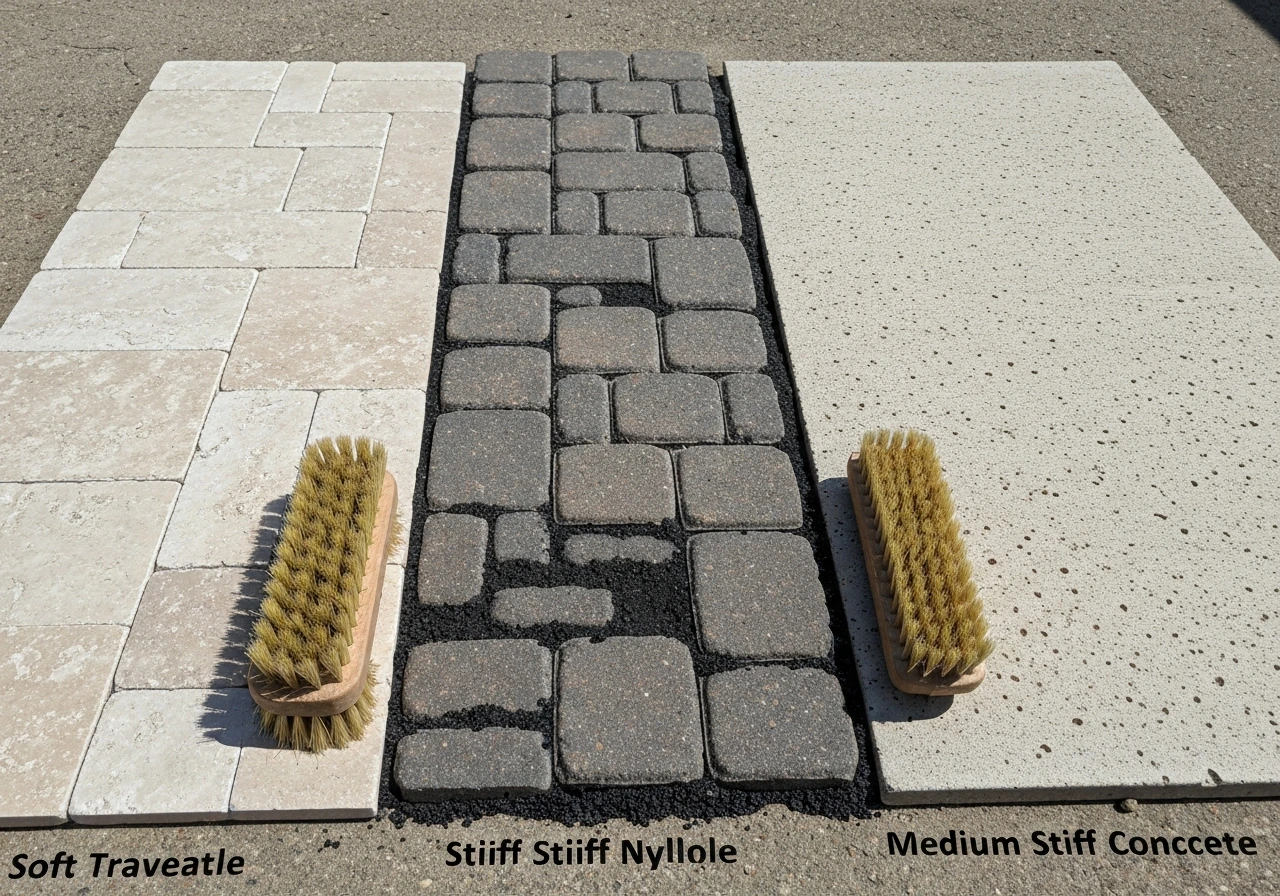
Concrete is the most forgiving surface for brushes. You can use stiff polypropylene bristles (sometimes called palmyra fiber blends), medium-to-stiff nylon, or even wire cup brushes for spot stain removal on bare, unsealed slabs. Sealed or stamped concrete is a different story: treat it more like tile and drop down to a soft-to-medium bristle so you don't scratch the sealer coat.
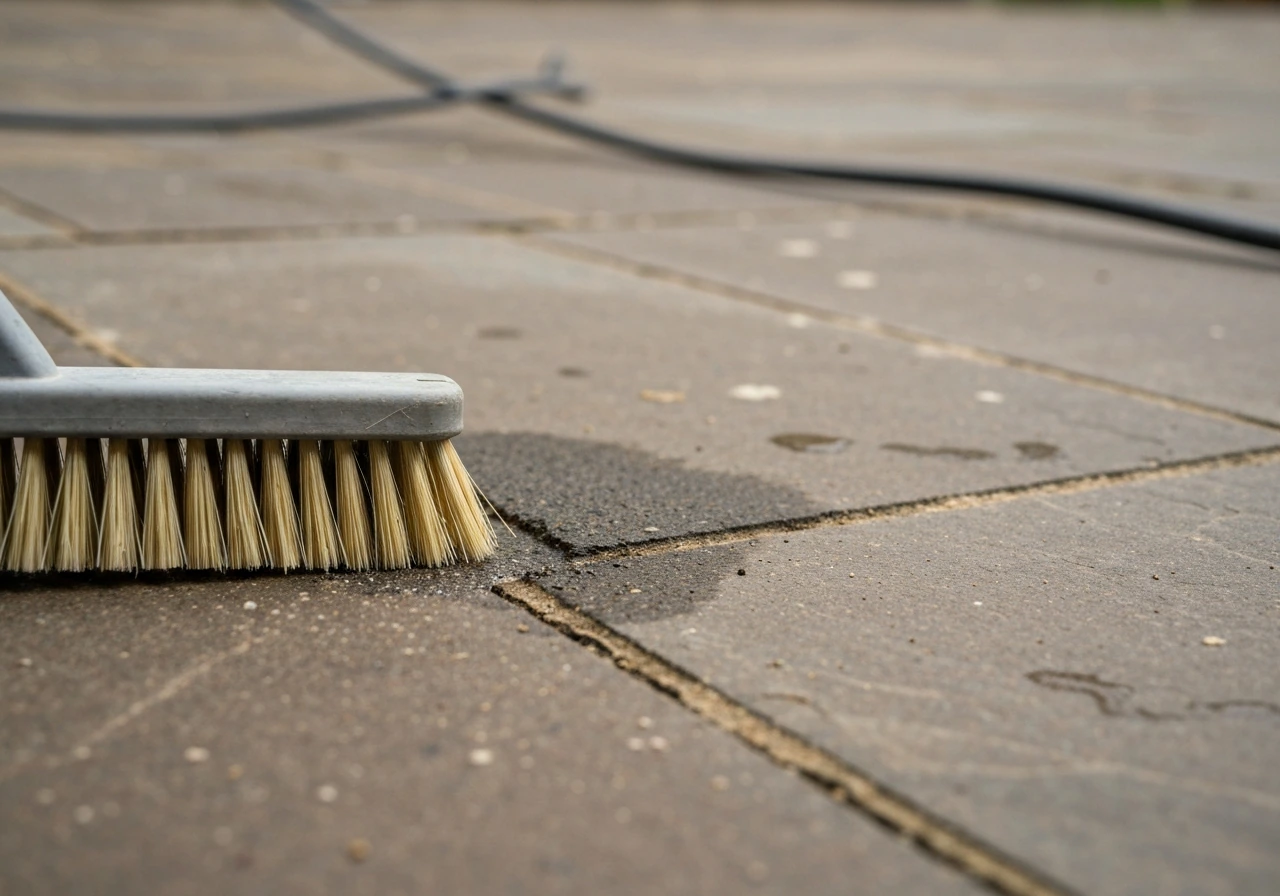
Pavers, whether concrete, clay, or natural stone, need a medium-stiff brush. The concern here is not just the paver face but the joints. Overly stiff wire bristles can dislodge polymeric sand or regular jointing sand, which is expensive to replace and a real headache. Stick with stiff nylon or a union mix and scrub across the face, not aggressively along the seams.
Natural stone (flagstone, travertine, slate) and glazed tile are the most sensitive surfaces. Use a soft-to-medium natural-fiber brush like tampico or horsehair, or a soft synthetic like fine nylon. These surfaces scratch easily, and if they're sealed, harsh bristles will dull the finish faster than the grime will. If you're in a wet climate like the Pacific Northwest where moss and algae build up constantly, you'll want a no-scrub approach (more on that below) rather than aggressive brushing.
Composite or PVC decking that borders your patio area also shows up in a lot of backyards, and the rules are similar to tile: soft bristle only, scrub with the grain of the board surface, and never use a wire brush or you'll permanently scratch the material and void most warranties.
Beyond surface type, think about handle length and head design before you buy. A long handle (48 to 60 inches) saves your back on large slab areas. A shorter handle (18 to 24 inches) gives more control for scrubbing tight corners or stair risers. Angled or swivel heads let you maintain pressure without awkward posture, which matters a lot when you're working a 400-square-foot patio on a warm Saturday. If you're already shopping for a patio garden hose or pressure washer to pair with your brushing routine, look for brushes with a hose attachment port built into the head since it's genuinely useful for continuous rinsing.
Best bristles and brush types for common patio messes
Different messes respond to different bristle types. A brush that's excellent for scrubbing dried mud off concrete will be overkill and damaging on a moss-covered sandstone slab. Here's how to think about it by the mess itself.
General grime and dirt buildup
For everyday dirt, pollen, and general outdoor grime, a medium-stiff polypropylene push broom or scrub brush with a 12 to 18-inch head is the go-to. If you are shopping broadly for the best outdoor broom for patio areas, this medium-stiff polypropylene push broom style is the most reliable starting point for everyday dirt and grime. Polypropylene is water-resistant, doesn't absorb detergent, and holds its shape after dozens of uses. For a patio broom that doubles as a scrubber, look for flagged-tip bristles (split ends) because they pick up fine debris more effectively than blunt-cut bristles.
Moss, algae, and mildew stains
Moss and algae are the most common complaint I hear from homeowners in humid regions or anywhere with regular shade. For active scrubbing, a stiff-bristle deck brush or scrub brush works well after you've applied a cleaning solution and let it dwell. But honestly, for moss and algae specifically, the most effective approach combines a chemical treatment with light brushing rather than aggressive dry scrubbing, which just spreads spores. Products like Wet & Forget Outdoor concentrate, mixed at about 1 part concentrate to 5 parts water and applied with a garden sprayer, do the heavy lifting over time. According to the EPA pesticide label registry listing for WET & FORGET (product registration 84115-1), Wet & Forget has an EPA registration label page on the EPA site with the product registration number shown blank" rel="noopener noreferrer">Wet & Forget Outdoor concentrate. blank" rel="noopener noreferrer">Apply it on a cloudy or overcast day (not in direct sun) so it doesn't evaporate too quickly, and let it work. The product won't show instant results; green stains can take several days or even weeks to fully disappear as rain and weathering remove the dead growth. Once the moss has died back, a medium-stiff scrub brush and rinse clears it cleanly without spreading live spores.
Weeds and debris in joints and seams
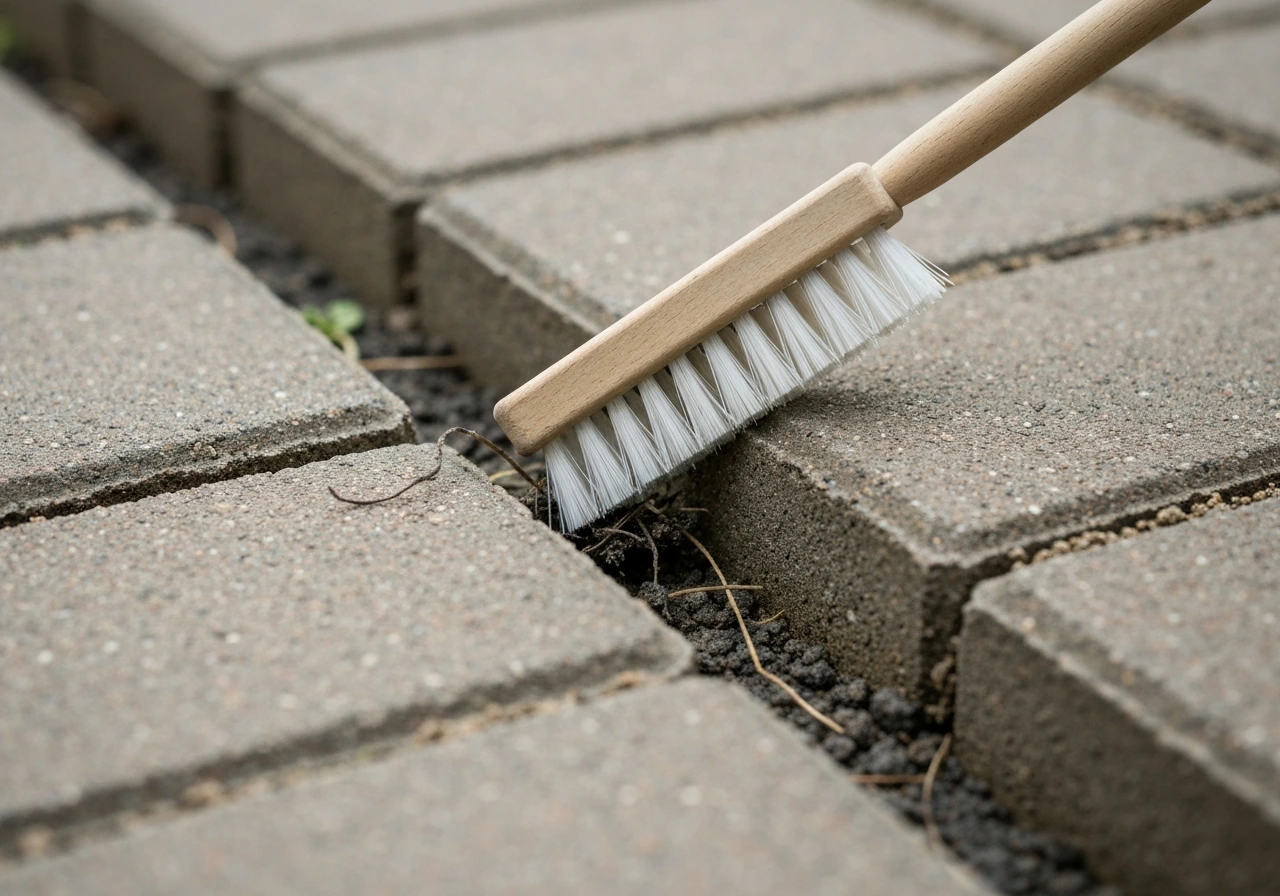
For paver joints, grout lines, and edge seams, a narrow joint brush or grout brush (sometimes called a crevice brush) with stiff nylon bristles is far more effective than a wide push broom. The narrow head lets you direct pressure exactly into the joint without disturbing surrounding sand. These are often sold in the floor-care aisle but work just as well outside. If weeds are established in the joints, you'll want a dedicated patio weeding tool to pull roots first, then follow up with the joint brush to clear debris and remaining dirt before reapplying jointing sand or a joint stabilizer.
Tough stains (oil, rust, organic)
Grease, oil, rust, and deep organic stains need a combination of the right cleaner and a stiff scrub brush with a focused head (6 to 8 inches wide) so you can apply real downward pressure. On bare concrete, a wire-bristle hand brush can be effective for spot stain work. On sealed concrete, pavers, or any finished surface, stay with stiff nylon to avoid scratching. Apply your degreaser or concrete cleaner, let it dwell for at least 5 to 10 minutes, then scrub in tight circular motions before rinsing. A long-handled version of the same brush keeps your back out of it for larger stain areas.
Quick comparisons: top picks by patio material and cleaning goal
| Patio Surface | Cleaning Goal | Best Brush Type | Bristle Recommendation |
|---|---|---|---|
| Bare/unsealed concrete | General grime, stains | Wide push scrub brush (12–18 in) | Stiff polypropylene or union mix |
| Sealed or stamped concrete | Grime, light stains | Wide push brush or flat deck brush | Medium nylon, avoid wire |
| Concrete pavers | General cleaning, algae | Wide deck brush or push scrub brush | Medium-stiff nylon or palmyra blend |
| Brick | Grime, moss, staining | Stiff scrub brush (hand or push) | Stiff nylon or polypropylene |
| Natural stone (flagstone, slate) | Light grime, algae | Soft scrub brush or tampico brush | Soft tampico, horsehair, or fine nylon |
| Glazed tile or travertine | Grime, mildew | Soft scrub or grout brush | Soft nylon or natural fiber |
| Composite/synthetic decking | Grime, mildew | Soft deck brush (with grain) | Soft-to-medium nylon only |
| Any surface — paver joints | Weeds, debris in seams | Narrow joint or grout brush | Stiff nylon, narrow head (1–2 in) |
If you want one brush that covers most situations: a medium-stiff, 14-inch wide polypropylene push brush with a threaded 60-inch handle handles concrete, pavers, and brick reliably. Add a narrow joint brush for seam work and a soft deck brush if you have tile or composite areas, and you're equipped for virtually every patio cleaning scenario. If you want a straightforward answer to the best patio broom for most patios, a medium-stiff polypropylene push broom with an appropriate handle length is a reliable starting point.
How to use a patio cleaning brush (step-by-step workflow)
This is the workflow I use and recommend for most standard patio cleanings. Adjust based on how dirty things are and whether you're dealing with moss versus plain grime.
- Clear the patio first. Move furniture, planters, and any rugs off the surface. Use an outdoor broom or leaf blower to remove loose debris, leaves, and dry dirt. Skipping this step means you're pushing wet gunk around instead of actually cleaning.
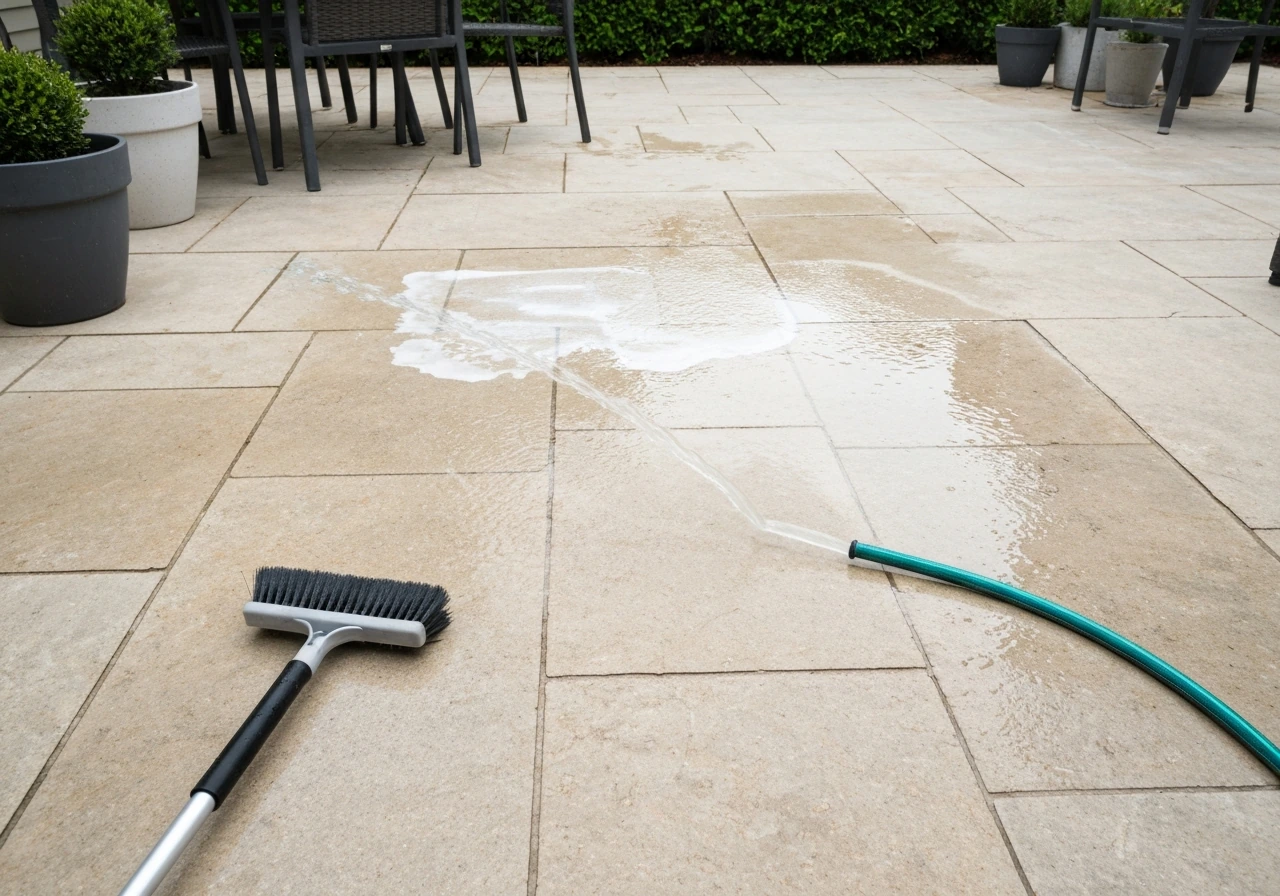
- Pre-wet the surface. Run your patio garden hose over the whole area to saturate the surface before applying any cleaner. This prevents the cleaning solution from absorbing too fast into porous surfaces and helps loosen surface grime.
- Apply your cleaner. For general grime, a diluted dish soap or outdoor deck cleaner works fine. For moss and algae, use a purpose-made solution like Wet & Forget (at 1:5 concentrate to water) applied with a garden sprayer, ideally on an overcast day. For oil or organic stains, apply a degreaser or concrete cleaner and let it dwell 5 to 10 minutes.
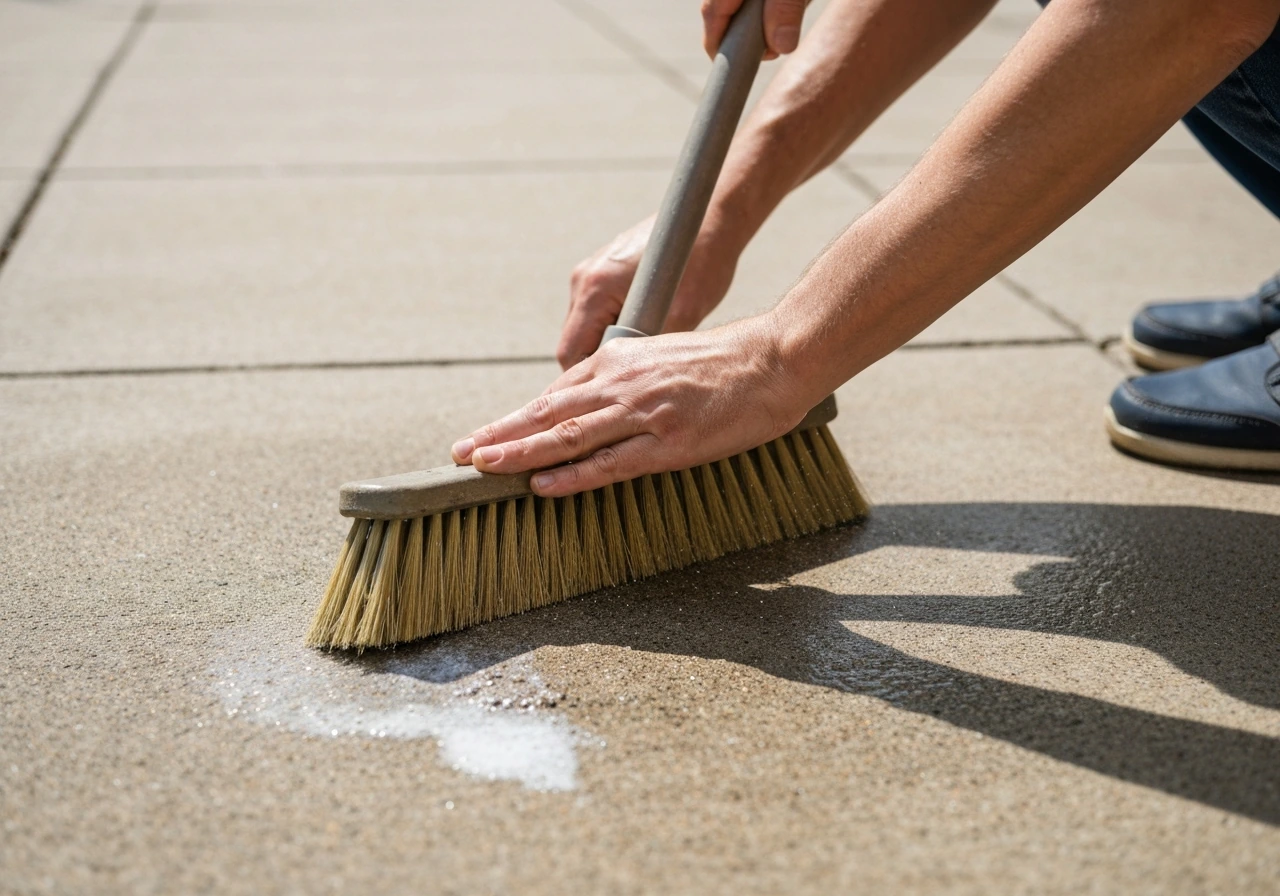
- Scrub in sections. Work in manageable 4 to 6 foot sections rather than trying to cover everything at once. Use your push brush in overlapping back-and-forth strokes with the cleaning solution, applying firm downward pressure. For joints and edges, switch to your narrow joint or grout brush.
- Rinse thoroughly. Use your hose at full pressure or a pressure washer (1,200 to 1,500 PSI is sufficient for most patio surfaces; stay under 1,000 PSI on sealed concrete or tile). Rinse from one end of the patio to the other in overlapping passes, pushing dirty water off the surface edge.
- Check and repeat if needed. Stubborn stains may need a second dwell-and-scrub cycle. Moss and algae treated with a no-scrub product like Wet & Forget will look unchanged immediately but will clear over subsequent days and rain events — that's normal.
- Let it dry fully before replacing furniture. Putting furniture back on a wet surface traps moisture, which encourages the very mold and algae growth you just removed.
One extra note on pressure washing: it's a great complement to brushing, but it doesn't replace brushing for embedded stains or joint debris. The combination of mechanical scrubbing and a good rinse almost always outperforms pressure washing alone, and it's much gentler on jointing sand, sealers, and natural stone surfaces.
Avoid damaging your patio: dos, don'ts, and safety tips
Things to do
- Always test a new brush or cleaning product on a small inconspicuous area before going full coverage, especially on sealed, stained, or natural stone surfaces.
- Pre-wet porous surfaces (brick, concrete, sandstone) before applying cleaners to reduce over-absorption and surface etching.
- Use the lightest effective bristle for the job. You can always go stiffer if a brush isn't working, but you can't undo scratches on a sealed or polished surface.
- Wear rubber-soled shoes when scrubbing a wet patio. Soapy surfaces get slippery fast, especially on smooth tile or sealed concrete.
- Rinse surrounding plants and lawn areas before and after applying cleaning chemicals to minimize runoff damage to landscaping.
Things to avoid
- Don't use wire brushes on sealed concrete, pavers with polymeric sand, natural stone, tile, or any composite material. Reserve wire for bare, unsealed concrete or brick only.
- Don't scrub dry moss or algae aggressively without a chemical treatment first. Dry scrubbing spreads live spores and often just redistributes the problem.
- Don't use bleach-based cleaners on colored pavers or natural stone without checking compatibility first. Bleach can permanently fade pigment and etch soft stone.
- Don't pressure wash at high PSI (above 2,000) on pavers with sand-filled joints. It will displace the sand and you'll be re-sanding the whole patio.
- Don't leave wet cleaning solutions sitting on metal furniture legs or aluminum edging. Some cleaners will corrode or discolor metal on contact.
- Don't skip rinsing the brush itself during use. A brush loaded with grit becomes an abrasive tool that can scratch surfaces it would otherwise clean safely.
Maintenance and storage so the brush lasts longer
A good patio brush can last several seasons if you treat it right. The main enemies are prolonged moisture, UV exposure, and detergent buildup in the bristles, all of which cause bristles to splay, soften, or break down faster than normal use would.
- Rinse the brush head thoroughly after every use. Soap and cleaner residue left in the bristles will degrade them over time, especially with synthetic nylon or polypropylene.
- Shake out as much water as possible and store the brush head-up or hanging so water doesn't pool in the bristle block and cause mold or wood-block rot.
- Keep brushes out of direct sun when not in use. UV exposure breaks down both natural and synthetic bristles over time. A shed, garage shelf, or covered storage area extends brush life significantly. This is a good reason to invest in solid patio storage for your cleaning tools.
- For brushes with wooden handles, dry them fully between uses and apply a light coat of linseed oil once a season to prevent cracking and splitting.
- If your brush has a replaceable head (several quality brands offer this), replace the head when bristles are splayed or worn rather than replacing the whole brush. It's cheaper and reduces waste.
- Inspect bristles before each use. A brush with flared, bent, or tangled bristles cleans poorly and can scratch surfaces. Once the bristle tips are visibly misshapen, it's time to replace.
Storing your patio cleaning gear together, your brush, an outdoor vacuum or broom for dry debris clearing, your garden hose, and any chemical treatments, makes the whole routine faster and means nothing gets left out to deteriorate. If you want faster dry-debris pickup, the best outdoor vacuum for patio can help between brush and rinse sessions. If you also need a place to keep your patio cleaning tools organized and protected from weather, check out the best patio storage options for outdoor gear. The less friction there is in the process, the more likely you are to keep up with regular cleaning instead of letting a season's worth of grime build up into a half-day project.
FAQ
Can I use a wire brush on my patio if I’m careful where I scrub?
It’s safer to reserve wire only for truly bare, unsealed concrete or raw brick. Even with careful technique, wire can snag embedded grit, leave micro-scratches, and trigger rust staining later, especially on surfaces that were sealed in the past or were stained and later resealed. For anything finished, switch to stiff nylon or a medium-stiff polypropylene scrub brush.
What’s the best way to clean paver joints without blowing out the sand?
Use a narrow joint brush with stiff nylon, focus on removing debris you can reach, and avoid aggressive “digging” along the seams. After brushing, rinse gently to carry away loosened dirt, then recheck whether any jointing sand has been disturbed before you top off. If weeds are established, remove roots first, then brush, then refill with the correct jointing sand or stabilizer.
How do I tell if my concrete is sealed before buying a brush?
Do a quick water test: sprinkle water in a small spot. If it beads or darkens very slowly, it’s likely sealed. If it soaks in quickly, it’s probably unsealed. Treat sealed concrete like tile, meaning soft-to-medium bristles, because harsh brushes can dull the sealer and leave permanent texture differences.
Should I brush dry before applying cleaner for moss and algae?
For moss and algae, avoid aggressive dry scrubbing first because it can spread live spores and break growth into smaller pieces. Instead, apply a moss-killing treatment, let it dwell for the recommended time, then do only light brushing to remove the dead growth after it turns brown and releases more easily.
Why do my bristles splay quickly even though I bought a “good” patio brush?
The two biggest causes are leaving the brush in prolonged moisture and letting detergent and organic residue build up in the bristles. Rinse thoroughly after use, shake out excess water, store the brush dry out of direct weather, and periodically wash the bristles so cleaning chemicals don’t harden there.
What brush size is best for a typical patio, 400 square feet or a small balcony?
For broad slab areas, a wider head (around 12 to 18 inches) reduces stroke count and is easier to control over large flat sections. For tight corners, stair risers, and edges, a shorter handle paired with a smaller brush head gives better leverage and reduces the chance of accidentally hitting adjacent surfaces with too much pressure.
Can a deck brush scratch composite or PVC patio boards?
It can if the bristles are too stiff or if you angle the brush across the grain aggressively. Stick to soft bristles, scrub with the grain of the board, and avoid wire brushes entirely because they can leave visible scratches that don’t polish out and may void warranties.
What’s the right approach for grease or oil stains on finished surfaces?
Use a targeted degreaser or concrete cleaner, let it dwell, then scrub with a focused bristle head (often 6 to 8 inches wide) using firm downward pressure. On sealed concrete, pavers, and other finished surfaces, use stiff nylon instead of wire to prevent scratching. Rinse well after dwell and scrubbing so residue doesn’t leave streaks.
Is pressure washing enough, or do I still need a patio brush?
Pressure washing is helpful for rinsing and lifting surface grime, but it often won’t remove embedded dirt in grout lines, joints, and textured areas as effectively as brushing plus rinsing. For algae in corners, joint debris, and set-on stains, mechanical scrubbing with the correct bristle type usually gives better results and is gentler on sealers and jointing sand.
How should I store my patio brush so it lasts multiple seasons?
Rinse out debris and chemicals, then let it fully dry before storage. Avoid leaving it outdoors in constant rain or direct sun, since UV and constant moisture degrade bristles and handles. Keeping it with your hose and cleaning tools in a covered, organized spot also reduces the chance you’ll “skip” brushing because setup is inconvenient.