
The best home patio misting system for most homeowners is a mid-pressure pump kit (around 150 PSI) with brass nozzles spaced every 8 feet, connected to your standard garden hose bib and a basic inline sediment filter. If you want the best patio mister system for your outdoor setup, focus on mid-pressure performance, proper nozzle spacing, and filtration at the water source. It will drop your patio temperature by 7 to 15 degrees Fahrenheit on a hot, dry day, costs between $80 and $300 for a quality DIY kit, and you can install it in an afternoon with basic hand tools. If you're in Phoenix, Albuquerque, or any low-humidity climate, this setup will genuinely transform your outdoor space. If you're in Houston or Miami in August, you need to understand the humidity limits first, because no misting system can cool air that's already saturated.
Best Home Patio Misting System: Buy, Install, Maintain

How patio misting actually works (and when it won't)
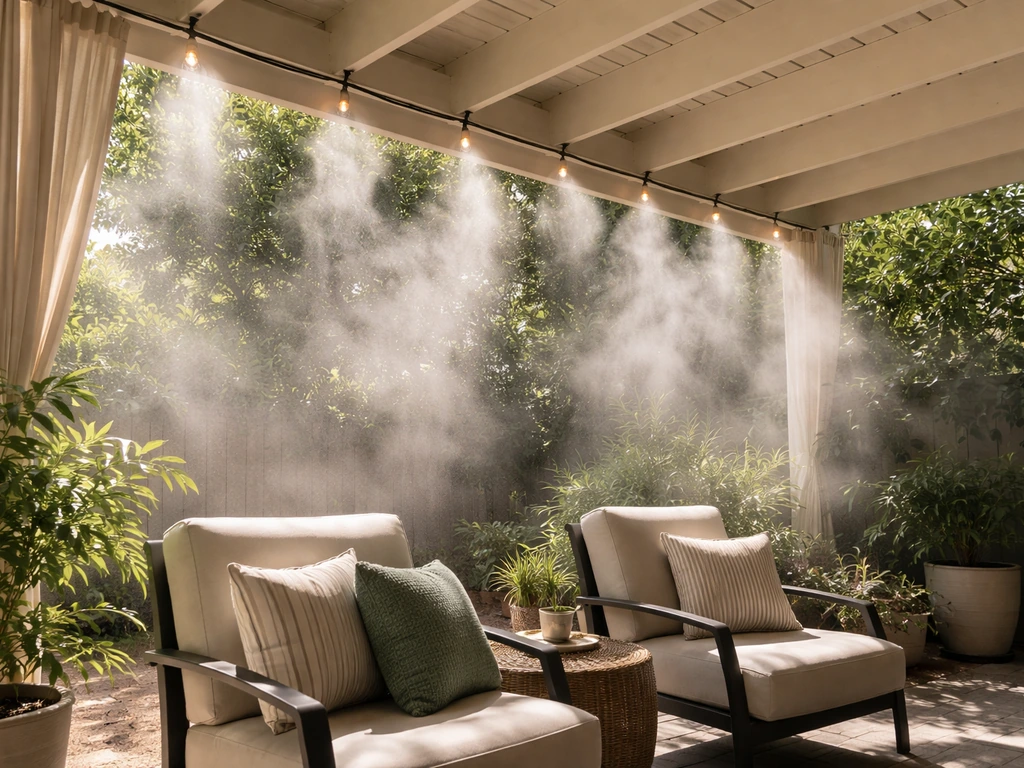
Misting systems cool your patio through evaporative cooling. Tiny water droplets are forced through small nozzles at pressure, creating a fine mist that evaporates almost instantly. As it evaporates, it pulls heat from the surrounding air, dropping the temperature measurably. Studies in semi-outdoor environments have consistently reported average temperature drops of 7 to 8 degrees Celsius (roughly 13 to 14 degrees Fahrenheit) under ideal conditions. The physics is real and well-documented.
The catch is humidity. Evaporative cooling depends entirely on the difference between the dry-bulb temperature (the air temperature you measure with a standard thermometer) and the wet-bulb temperature (a measure tied directly to how much moisture the air can still absorb). When relative humidity climbs toward 100%, the wet-bulb temperature equals the dry-bulb temperature, which means there's no evaporative cooling potential left at all. In practical terms, a misting system in a hot, dry climate can achieve 85 to 95 percent of the maximum possible temperature drop. ASHRAE Handbook notes that for evaporative cooling processes, the sensible temperature decrease is typically about 85, 95% of the maximum available difference between dry-bulb and wet-bulb temperature, depending on the process blank" rel="noopener noreferrer">85 to 95 percent of the maximum possible temperature drop. That same system in a hot, humid climate delivers a fraction of that, plus you end up with water droplets landing on your skin and furniture because they never fully evaporate.
So before you buy anything, check your local average humidity during the hours you use your patio. If you're regularly above 60 to 70 percent relative humidity, a misting fan (which combines airflow with mist) is a better tool than a stationary misting line. For a quick way to compare the best patio mist cooling system options, focus on pressure level, nozzle spacing, and how your local humidity affects evaporation. If you're regularly above 80 percent, you may want to consider a patio cooling fan alone or a shade-and-fan combination instead.
| Climate type | Typical summer RH | Misting effectiveness | Best approach |
|---|---|---|---|
| Hot and arid (Phoenix, Las Vegas, Albuquerque) | 10–30% | Excellent: 10–15°F drop possible | High-pressure kit or pump system |
| Hot and semi-arid (Dallas, Denver, Sacramento) | 30–55% | Good: 7–12°F drop typical | Mid-pressure pump kit |
| Hot and humid (Houston, Miami, New Orleans) | 65–85%+ | Poor to moderate: 3–6°F at best | Misting fan or shade + fan |
| Mild and coastal (San Diego, Seattle in summer) | 50–70% | Moderate: 5–8°F drop | Low-pressure kit or misting fan |
Picking the right system for your patio size and layout
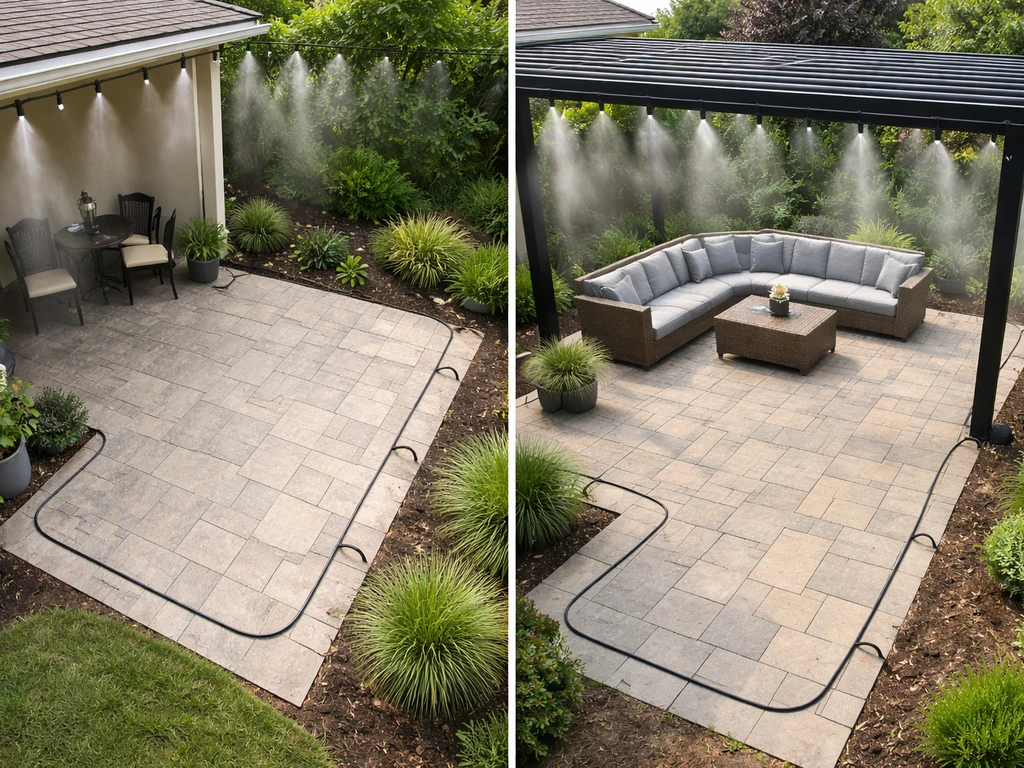
Once you've confirmed misting will work in your climate, the next step is matching the system to your actual patio. If you want the best patio misting system 2020 performance, focus on matching nozzle spacing, pressure level, and your local humidity conditions match the system to your actual patio. Most residential patios fall into one of three size categories, and the system you need scales accordingly.
For a small patio under 200 square feet, a basic low-pressure or mid-pressure kit in the 10 to 20 foot range is enough. These are the simplest systems to install and maintain. For a medium patio from 200 to 500 square feet, look at kits in the 40 to 60 foot tubing range with 8 to 12 nozzles. For a large patio or covered pergola over 500 square feet, you'll want a pump-driven system with 60 to 100 feet of tubing, multiple zones, and at least 12 to 20 nozzles.
Nozzle spacing matters as much as total length. A standard recommendation from misting manufacturers is to space nozzles every 8 feet for overlapping coverage, with each nozzle covering up to about 10 feet of area. Going wider than that creates gaps in the mist curtain and uneven cooling. For L-shaped or wraparound patios, you'll need corner fittings and tee connectors to route tubing along multiple edges.
Height is also important. Mount your misting line 8 to 10 feet above the floor for the best evaporation before droplets reach you. Lower than 7 feet and you start getting wet, especially with larger droplet nozzles or in humid conditions. Higher than 10 feet and the mist disperses too widely and loses cooling concentration in open layouts.
Pressure levels and what they mean for your patio
Misting systems come in three pressure categories, and this is the single biggest factor in how effective your system will be. Low-pressure systems run on standard residential tap pressure (40 to 80 PSI) and require no pump. They're cheap and simple but produce larger droplets that can wet surfaces and people if humidity is moderate. Mid-pressure systems run at 100 to 250 PSI with a small pump and hit the sweet spot for most homeowners: they produce finer mist at a reasonable cost. High-pressure systems run at 800 to 1,200 PSI and produce true flash-evaporation mist with almost no wetness, but they cost significantly more upfront (often $500 to $2,000+ installed) and require professional-grade components.
| Pressure type | PSI range | Pump required | Droplet size | Wetness risk | Typical cost (DIY kit) |
|---|---|---|---|---|---|
| Low-pressure | 40–80 PSI | No (tap only) | Large (200+ microns) | High if used too close | $20–$80 |
| Mid-pressure | 100–250 PSI | Yes (small pump) | Medium (65–120 microns) | Low with correct mounting height | $80–$300 |
| High-pressure | 800–1,200 PSI | Yes (heavy-duty pump) | Very small (<30 microns) | Very low (flash evaporation) | $500–$2,000+ |
Misting kit vs DIY build: which one makes more sense for you
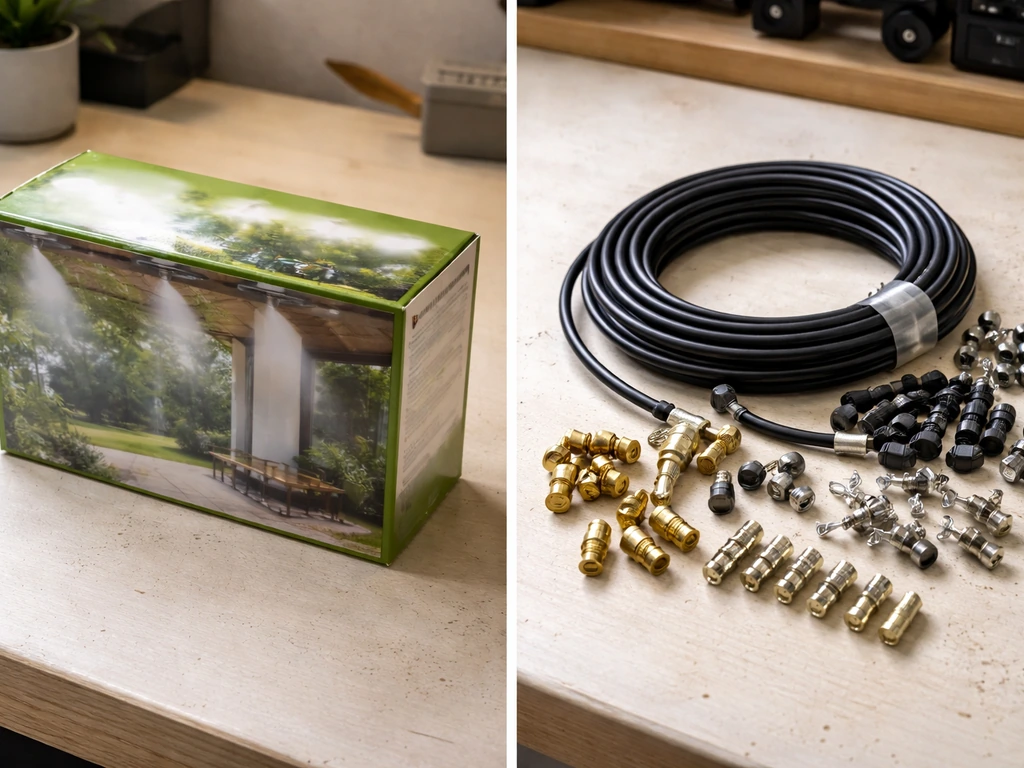
This is where people get tripped up. A "DIY misting kit" and a "DIY-built misting system" are two different things, and the right choice depends on your skill level, budget, and how customized your patio layout is.
Pre-packaged kits
Packaged kits from brands like Advanced Misting Systems, Aermist, and others come with pre-measured tubing (typically in 20-foot or 40-foot runs), a set number of nozzles, fittings, and a filter. Some include a pump; others are tap-pressure designs. The main advantage is that everything is sized and matched to work together. You don't have to calculate pressure drop across nozzle count or figure out if your tubing diameter is right. The typical 40-foot mid-pressure kit costs $150 to $300 and installs in two to four hours. The limitation is that kits work best for straight runs or simple L-shaped layouts. Unusual patios, multiple pergola beams, or large covered outdoor kitchens may require you to buy extension kits or add fittings, which narrows the cost advantage.
Fully DIY-built systems
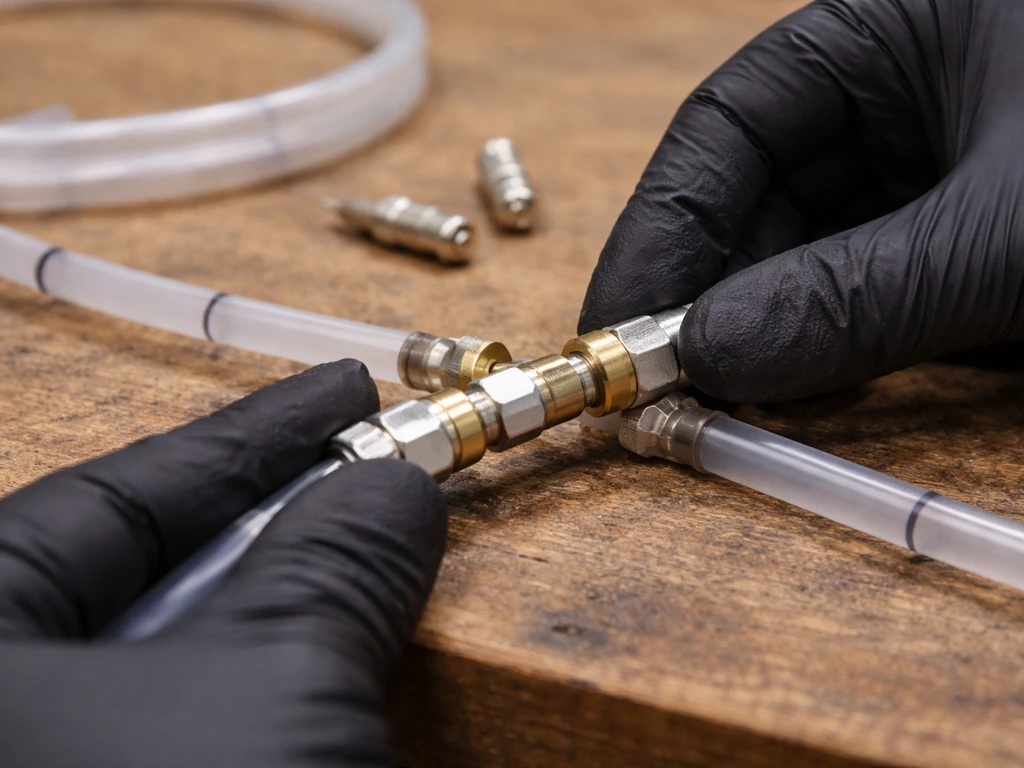
Building from components means buying your own 1/4-inch nylon or polyethylene tubing by the foot, selecting individual brass or stainless nozzles, sourcing a pump (if needed), and assembling everything yourself with compression fittings and a manifold. This approach gives you complete control over layout, nozzle placement, tubing routing, and system length. It's genuinely the better path for large or complex patios. The tradeoff is time and knowledge. You need to understand pressure drop calculations (or use manufacturer guides), match nozzle flow rate to your pump output, and source compatible parts. Budget $100 to $400 for a well-built DIY system, though high-pressure builds with quality pumps can run $600 to $1,200.
| Factor | Packaged kit | DIY component build |
|---|---|---|
| Skill level needed | Beginner to intermediate | Intermediate to advanced |
| Install time | 2–4 hours | 4–8+ hours |
| Cost range | $80–$300 (most kits) | $100–$1,200 (varies widely) |
| Layout flexibility | Limited to kit length/shape | Fully customizable |
| Parts compatibility | Pre-matched by manufacturer | Must verify yourself |
| Best for | Standard rectangular or L-shaped patios | Large, complex, or multi-zone patios |
My honest recommendation: if your patio is under 400 square feet and reasonably rectangular, start with a quality mid-pressure pump kit. If your patio is larger, has multiple zones, or you want zones independently controlled, build it from components. Either way, avoid the bargain-bin no-pump setups for anything larger than a 10-foot balcony. The droplet size from a pure tap-pressure system is too coarse to be comfortable at any meaningful scale.
Water supply, pressure, filtration, and nozzle selection
Standard residential water pressure runs 40 to 60 PSI, which is sufficient to supply the pump on any mid-pressure misting kit without modification. If your home pressure is above 80 PSI, you'll want a pressure regulator at the tap to protect the pump and tubing. If your pressure is below 40 PSI (common in older rural homes or at the end of long supply runs), you may need a pump with higher suction capability or a dedicated supply line.
Filtration is not optional. Misting nozzles have tiny orifices, often less than 0.012 inches in diameter, and they clog fast with sediment, mineral scale, or chlorine deposits. Every misting system should have at least a basic inline sediment screen filter installed at the water source before the pump. The correct installation order is: water source, filter, pressure regulator (if needed), pump, then the misting line. If your water is hard (common in the Southwest), consider adding a carbon filter as well, which reduces chlorine and helps prevent mineral buildup inside nozzles. Some brands like Aermist specifically recommend against using standard garden hoses in their supply line due to chlorine reactivity with hose materials.
For nozzle selection, the main variables are orifice size, material, and thread type. Brass nozzles are the standard choice for residential use: they resist corrosion, handle mineral deposits better than plastic, and are easy to clean or replace. Stainless steel nozzles are better for high-pressure systems but cost more. Plastic nozzles work fine for low-pressure setups but degrade faster. For orifice size, 0.008 to 0.012 inch nozzles are typical for mid-pressure systems and produce droplets in the 65 to 120-micron range, which evaporate well in most dry-to-moderate climates. Avoid larger orifice nozzles (0.020 inch and above) for overhead comfort cooling, they produce heavy droplets that wet furniture and people.
How to install a patio misting system yourself
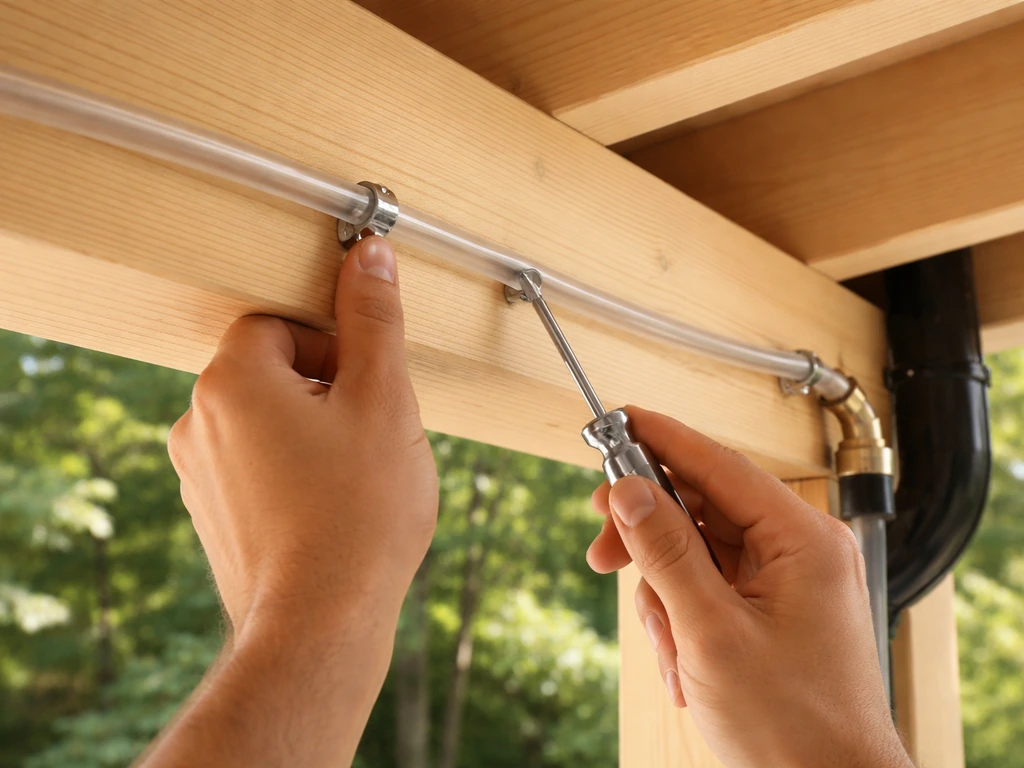
Installation is straightforward if you follow the right sequence. Here's the step-by-step process for a standard mid-pressure pump kit on a covered patio or pergola.
- Plan your layout first. Walk your patio and mark where you want the tubing to run along the roofline, pergola beams, or fascia. Sketch the route and count the nozzle positions, aiming for one nozzle every 8 feet. Note where the water source is and how far the tubing needs to run to reach it.
- Install the filter and pressure regulator at the water source. Thread the sediment filter onto your hose bib or dedicated supply valve. If your tap pressure exceeds 45 PSI and your kit specifies a regulator, install it downstream of the filter.
- Mount the pump near the water source. Place it on a flat surface or use the provided bracket. Connect the supply line from the filter to the pump inlet. Use the manufacturer-specified tubing (typically polyethylene or nylon, not a standard garden hose) to avoid material compatibility issues.
- Run the misting tubing along your patio perimeter. Start from the pump outlet and route the 1/4-inch tubing along your planned path. Secure the tubing with the included mounting clips, zip ties, or ring clamps every 2 to 3 feet to prevent sagging. Keep the line at 8 to 10 feet above finished floor.
- Install nozzles at your planned spacing. Push the nozzle fittings through the tubing at each marked position using the punch tool included in most kits. Hand-tighten brass nozzles firmly but don't over-torque, which can crack the fitting body.
- Cap the end of the tubing. Most kits include an end cap or flush-end fitting. Install it now so the system builds pressure when you test it.
- Connect power to the pump. Plug the pump into an outdoor-rated GFCI outlet. A standard NEMA 5-15R GFCI outlet is the minimum requirement. Do not use an extension cord on a non-GFCI outlet outdoors.
- Commission the system in the correct order. Turn the water on at the source first, wait for the tubing to fill, then power on the pump. Never run the pump dry. Check every nozzle for a fine, cone-shaped mist and inspect all connections and fittings for drips.
- Adjust nozzle direction if needed. Most brass nozzles are adjustable. Angle them slightly downward (15 to 30 degrees below horizontal) to maximize the mist path length before droplets reach head height.
Common mistakes that cause problems later
- Skipping the filter: even one season without filtration will clog nozzles with mineral scale and sediment, especially in hard-water areas.
- Mounting the line too low: anything under 7 feet produces noticeable wetting on people and surfaces, which creates slip hazards and mold risk on wood or fabric.
- Running nozzles into the wind: if prevailing breezes blow the mist directly onto seating or into an open kitchen area, you'll get wet food, wet cushions, and complaints. Position nozzles so the mist blows across the patio, not into it.
- Over-misting a small space: a 60-foot kit on a 10x12 patio will drench it. Match kit length to your actual perimeter, not the maximum the kit allows.
- Powering the pump before filling the line with water: running a dry pump even briefly can damage the pump motor.
- Using the wrong tubing at the supply line: standard garden hose material can react with chlorinated water in ways the manufacturers of polyethylene misting supply tubing specifically design around.
Keeping it running: maintenance, cleaning, and winterization
A misting system that runs clean is nearly maintenance-free. One that's ignored will clog, leak, and eventually fail. The good news is the maintenance schedule is simple.
Routine maintenance during the season
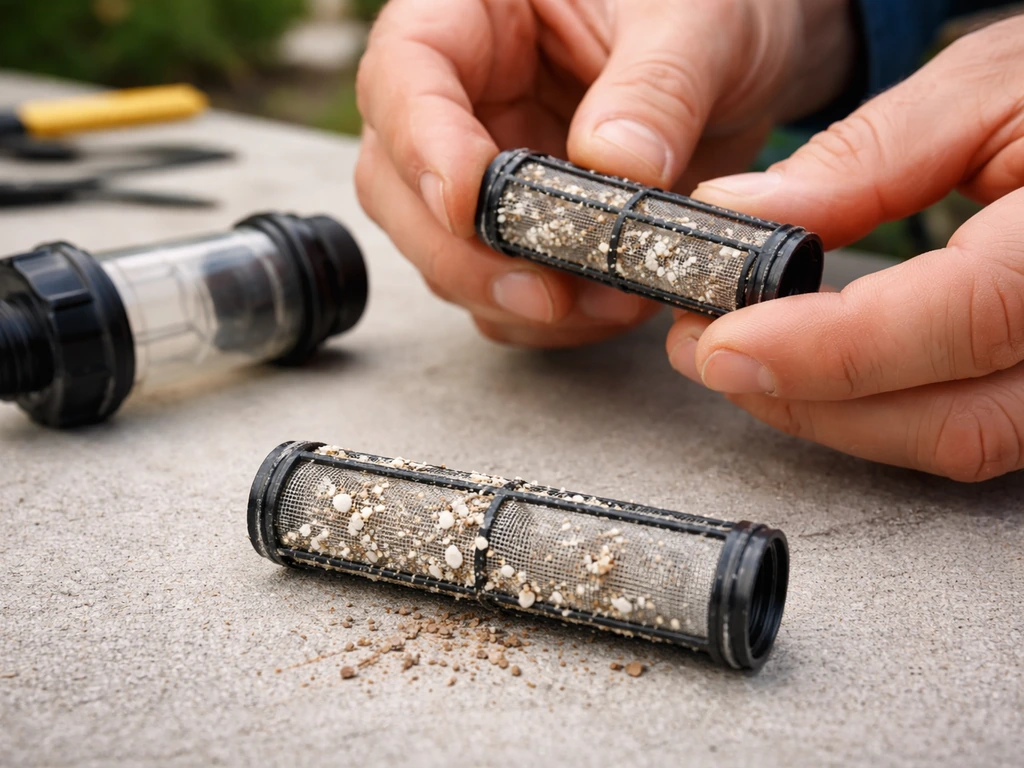
Check your inline filter screen every four to six weeks during regular use. In hard-water areas, check it monthly. A clogged filter starves the pump, shortens its life, and drops your nozzle output. Rinse the filter screen under clean water and reinstall it. If it's coated in mineral deposits, soak it in white vinegar for 30 minutes before rinsing.
If you notice a nozzle producing a drip or a fat spray instead of a fine cone mist, it's clogged. Remove the nozzle (turn off the system first and release pressure), soak it in undiluted white vinegar for 30 to 60 minutes, use a fine wire or needle to clear the orifice if needed, then rinse and reinstall. Mineral-clogged nozzles that don't respond to vinegar should just be replaced: brass nozzles cost $1 to $3 each.
End-of-season winterization
If you're in a region where temperatures drop below freezing, winterizing your system before the first hard freeze is essential. Water left in tubing and pumps will expand when it freezes and crack fittings, tubing, and pump housings. The process takes less than an hour.
- Turn off the water supply and disconnect the supply line from the tap.
- Power on the pump briefly to run out remaining water in the system (have a bucket ready), then turn the pump off and unplug it.
- Remove nozzles one by one and shake out remaining water, or use a low-pressure air compressor to blow out the lines from the inlet end until no water exits the nozzle ports.
- Remove and store the pump indoors, especially if temperatures will fall below 20°F.
- Clean the filter screen, inspect it for damage, and store it with the pump.
- Cap or plug the open ends of the tubing to keep insects and debris out during storage.
- Inspect all fittings and nozzle seats for any cracking or corrosion before spring startup.
Troubleshooting leaks and clogs
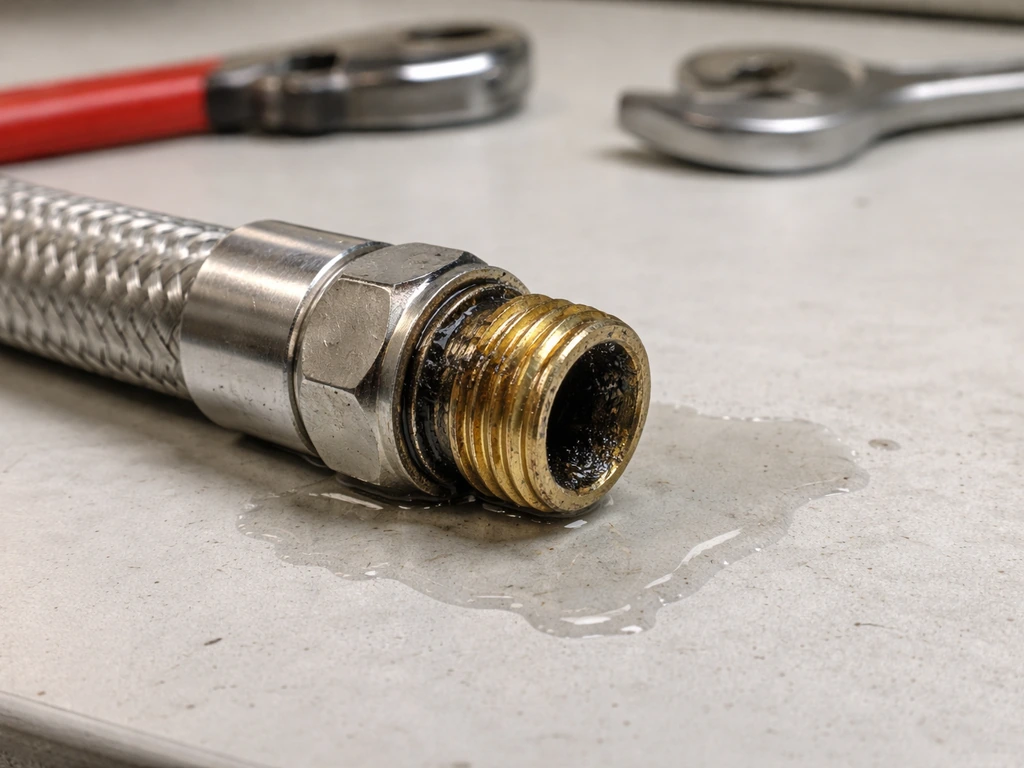
Most leaks happen at nozzle fittings or tubing compression connections. If a fitting leaks, try hand-tightening it first. If it still leaks, remove it, inspect the tubing end for a clean square cut (use a sharp blade to recut if it's ragged), and reinstall. Tubing that keeps slipping or leaking at a compression fitting usually means the tubing has become brittle or the fitting body is cracked, replace the fitting. A clogged intake filter is the most common cause of reduced pressure across the whole system. If your mist looks weak at all nozzles simultaneously, start there before assuming pump failure.
Safety, comfort limits, and how climate changes what you should expect
Misting systems are very safe when installed correctly, but there are a few practical safety points worth taking seriously.
Slip, mold, and overspray risks
If your misting line is mounted too low or your nozzles produce large droplets, wet surfaces accumulate fast. On smooth concrete, tile, or composite decking, this is a genuine slip hazard. Wood decking and outdoor fabric that stays wet can develop mold within a few days in warm conditions. The fix is twofold: mount the line at the correct height (8 to 10 feet) and use a pressure level that produces fine enough droplets to evaporate before reaching surfaces. High-pressure systems nearly eliminate this risk. Low-pressure systems require more careful nozzle placement. If you have a pool, food prep area, or upholstered outdoor furniture directly under your misting line, either adjust the mist direction or use a high-pressure system.
Electrical safety
Always use a GFCI-protected outdoor outlet for pump power. This is non-negotiable when combining water and electricity outdoors. Most modern homes have at least one outdoor GFCI outlet. If yours doesn't, have an electrician add one before installing a pump-driven misting system. Do not use indoor extension cords outdoors.
Wind, rain, and temperature limits
Misting systems lose effectiveness and create drift problems when winds exceed about 10 mph. At that point, the mist blows away from the cooling zone, wets unintended areas, and can carry fine droplets onto neighboring patios, outdoor furniture, or open windows. Turn the system off during rain (it's redundant and just wastes water) and when temperatures fall below 50°F (cooling is unnecessary and nozzles can clog with cold water minerals more quickly). In a misting-related outdoor evaluation, wetted surfaces tend to cool toward wet-bulb temperature, which helps explain why overspray or wetting can strongly affect comfort and perceived temperature overspray or wetting matters for comfort and perceived temperature.
Realistic regional expectations
In Phoenix or Tucson during a dry summer day, a mid-pressure misting system will genuinely feel transformative. You can sit under it comfortably through the hottest afternoon hours. In Dallas or Sacramento, the system is excellent on dry summer days and merely decent on humid ones. In Houston or New Orleans in peak summer, the honest truth is that even the best misting system gives you a modest 3 to 5 degree drop on the most humid days, and you'll feel damp rather than refreshed. Pairing a misting system with a patio fan improves results in moderate humidity because airflow accelerates evaporation from both the mist and your skin. If you want the best patio misting system 2023, focus on a mid-pressure setup and pair it with airflow for stronger evaporation. For truly humid climates, consider a misting fan as your primary investment instead of a stationary misting line.
What to buy and your next steps
Here's how to turn this into a purchasing decision today. If you want to see what to expect before buying, patio misting system reviews can help you compare real-world comfort, mist coverage, and reliability. First, check your climate: pull up your local historical average humidity for the hours you use your patio (typically 2 PM to 8 PM). If it's regularly below 55 percent, a misting system is a great investment. If it's 55 to 70 percent, a pump-driven system with fine nozzles will still give you meaningful relief. Above 70 percent, focus on a misting fan instead.
Second, measure your patio perimeter and decide on mounting height. A 40-foot mid-pressure pump kit (around $150 to $250) covers most patios under 400 square feet. If you are comparing options for the best patio misting system in 2021, start by matching nozzle length, pressure level, and your local humidity to avoid weak cooling 40-foot mid-pressure pump kit. For larger spaces, look at 60 to 100-foot pump kits or build your own from 1/4-inch nylon tubing, brass nozzles, and a 150 PSI pump. Budget $200 to $400 for that approach.
Third, assess your water supply. Confirm you have a hose bib within reasonable reach of your patio and a GFCI outlet for pump power. If your water is hard, budget an extra $15 to $30 for a quality carbon inline filter. That small investment will save you hours of nozzle cleaning over the life of the system.
Finally, install it on a dry morning when you have three to four hours, follow the commissioning steps in order (water first, pump second), and test every nozzle before calling it done. A well-installed mid-pressure misting system will run reliably for several seasons with nothing more than an annual filter change and end-of-season blowout. A good example is choosing a mid-pressure setup that fits your patio size and humidity conditions, then installing it cleanly for the best results in the best patio misting system 2022 category. That's a genuinely good return on a few hundred dollars and an afternoon's work.
FAQ
How do I estimate whether a best home patio misting system will actually cool enough in my area?
Use dew point or relative humidity for your patio hours (often 2 PM to 8 PM). If your average relative humidity is consistently below about 55 to 60 percent, you should see noticeable comfort gains. Between roughly 60 and 70 percent, plan on moderate relief and consider adding a patio fan. Above about 70 percent, expect limited cooling and more wetness, so a misting fan or shade and airflow usually performs better.
Can I run multiple zones, and how does zoning change the tubing and pump sizing?
Yes, zoning lets you control different patio sections independently, which reduces water use and improves comfort. But it often requires either a higher-capacity pump or separate pumps/regulators per zone, plus more detailed layout planning so each zone still delivers the right pressure and nozzle output. If you split zones without adjusting flow, some areas may mist weakly even when others look fine.
What PSI should I choose if my patio layout is long and the nozzles are spaced at the maximum recommended 8 feet?
Start with the mid-pressure target (around 150 PSI) for typical residential runs, but account for pressure loss from longer tubing, more nozzles, and extra fittings. If your planned length pushes past the kit’s rated coverage, you may need a longer-rated kit or component build, otherwise the end nozzles can underperform. A quick decision aid is to treat “max length” as a ceiling, not the plan, and leave some buffer for fittings and turns.
Do I need to avoid garden hose water entirely, or can I use a normal hose bib and hose to supply the pump?
A hose bib is fine, but standard garden hoses can shorten the system’s life depending on the components and water chemistry, especially with chlorinated water. The safest approach is to run the recommended type of supply line and keep filtration at the water source. If you already have a long hose run, consider upgrading the inline filtration and confirm the hose material compatibility with misting manufacturers’ guidance.
How often should I clean the nozzles versus replacing them?
Clean on a schedule based on water quality, not time. In hard-water regions, check and clean the filter more frequently (often monthly) and inspect nozzles when you see any change in spray pattern. Replace nozzles when vinegar soak does not restore a fine mist, or if the orifice remains partially blocked. As a rule, vinegar cleaning works for mineral buildup, but damaged orifice tips usually require replacement.
What’s the correct order for startup and shutdown to reduce clogging and leaks?
For startup, run water flow through the system first (so the pump is not dry-started), then start the pump if your kit uses one. For shutdown, turn off the pump first, then allow the line to stop spraying, and drain or blow out if you are approaching freezing weather. This reduces trapped pressure at fittings and helps prevent drips after turning off the system.
Do I need to worry about slip hazards on concrete or mold on wood and outdoor fabrics?
Yes, especially with low-pressure systems or when the line is mounted too low. Fine mist that evaporates before hitting surfaces is key, mount height should be around 8 to 10 feet, and nozzle droplet size matters. For wood decking, umbrellas, and outdoor fabrics, keep the mist zone away from direct impact areas, because consistent wetting increases mold and mildew risk.
How far does mist drift in windy conditions, and what should I do if my neighbor complains?
Wind above about 10 mph can move mist out of your intended cooling area. That can wet neighboring patios, outdoor furniture, and sometimes open windows. Practical fix options are turning off when windy, reducing active nozzle count by zoning, and adjusting the aim and mounting height so the mist cloud stays within your patio envelope.
What’s the easiest way to prevent nozzle clogging if my water is hard?
Add a proper inline sediment screen plus, for hard or chlorinated water, consider an additional carbon filter depending on your water source. Also verify the installation order, water source first, then filter, then regulator if needed, then pump and line. The best “low effort” habit is frequent filter checks during the season, because a partially clogged filter reduces pressure and can cause poor spray patterns that lead to more localized buildup.
Can I use a misting system near a grill, food prep area, or upholstered outdoor furniture?
It can be done, but you should avoid direct over-misting of food prep surfaces, upholstered fabric, and anything that stays wet. If those items sit under the mist line, use directional aiming, adjust zones so the area is not directly hit, or consider a high-pressure system that produces finer droplets with less surface wetting. Treat it like a “wet risk” placement problem, not just a comfort upgrade.
Is a GFCI outlet required even if I use a small pump?
Yes. Any pump and any electrical component used outdoors near water should be on a GFCI-protected circuit. If you do not have an outdoor GFCI outlet at the installation location, install one before connecting the pump, and avoid indoor extension cords outdoors.
What should I do before winter if I live where temperatures drop below freezing?
Winterize before the first hard freeze by draining the line and protecting the pump from trapped water. Water trapped in tubing and pump housings can expand and crack fittings. Many DIY systems use an end-of-season blowout step, and you should do it before temperatures repeatedly fall below freezing.