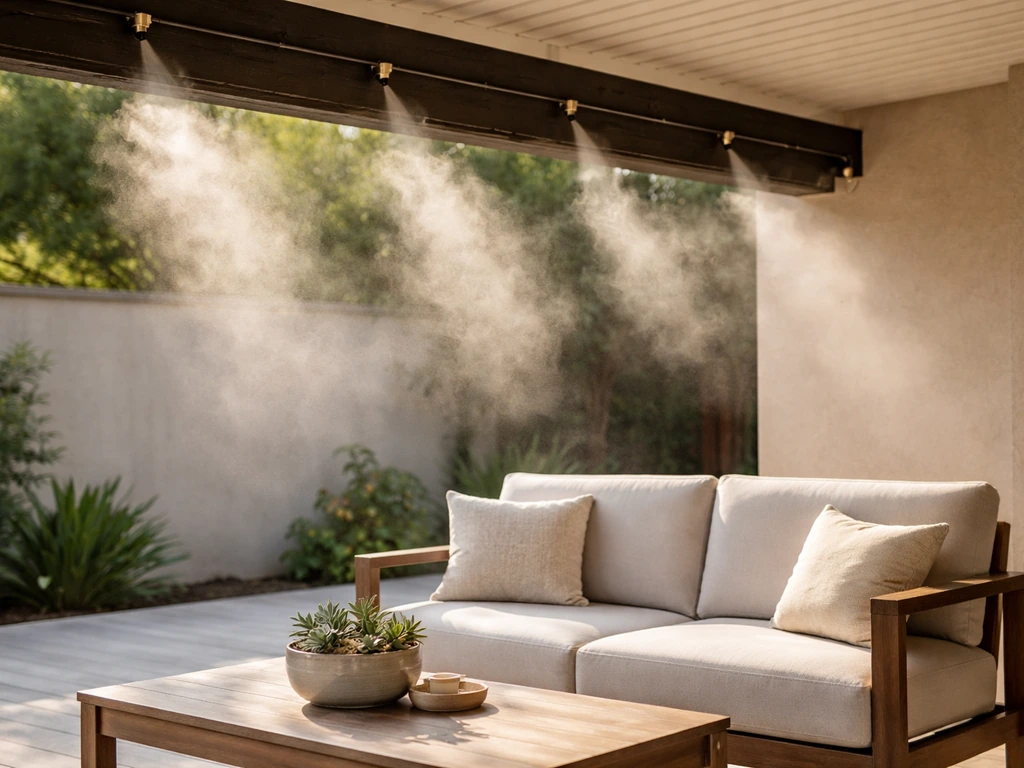
The best patio mister system for most homeowners is a mid-pressure plumbed-in line (around 60–100 PSI) with stainless steel or brass mist nozzles, spaced every 18–24 inches along the perimeter of the patio cover, controlled by a timer or thermostat. That setup cools a typical 200–400 sq ft patio by 15–25°F on a hot, dry day, stays out of the way, and can be installed as a serious DIY project over a weekend. If you're renting, in a high-humidity region, or just testing the waters, a portable low-pressure misting fan is a practical starting point, but it won't match the coverage or cooling power of a properly designed plumbed system.
Best Patio Mister System: Buying Guide and Setup Tips

Elise Prescott
3 May 2026
What a patio mister system actually does (and where it shines)
A misting system forces water through tiny nozzles at high velocity, breaking it into microscopic droplets that hang in the air. blank" rel="noopener noreferrer">As those droplets evaporate, they pull heat from the surrounding air, that's latent heat absorption, the same physics behind sweating. This is the adiabatic evaporation concept, where the energy transfer is tied to the liquid to vapor phase change during evaporative cooling blank" rel="noopener noreferrer">latent heat absorption. The result is noticeably cooler air without actually soaking anyone nearby. At 90°F with 30% relative humidity, a well-designed system can drop the air temperature by up to 25°F. That's a real, dramatic difference on a hot afternoon.
The catch is that evaporative cooling depends entirely on the air being dry enough to absorb more moisture. In Phoenix or El Paso in summer, hot, dry, low humidity, a misting system is extraordinary. In Houston or Miami during July, where relative humidity can sit at 80–90%, you're essentially just spraying water into already-saturated air. It won't evaporate fast enough to cool anything; you'll just end up wet. If you're in a high-humidity climate, you're not out of options, but your expectations and system design need to adjust accordingly. Wind is another factor: a strong breeze can carry mist away before it evaporates and cools the space, so sheltered patios or covered pergolas get much better results.
Sizing and coverage planning before you buy anything
Don't skip this step. The most common mistake I see is someone buying a 12-nozzle misting kit for a 600 sq ft covered patio and wondering why half the space stays hot. Coverage planning comes down to four things: patio square footage, mounting height, nozzle spacing, and whether you're cooling an open or enclosed area.
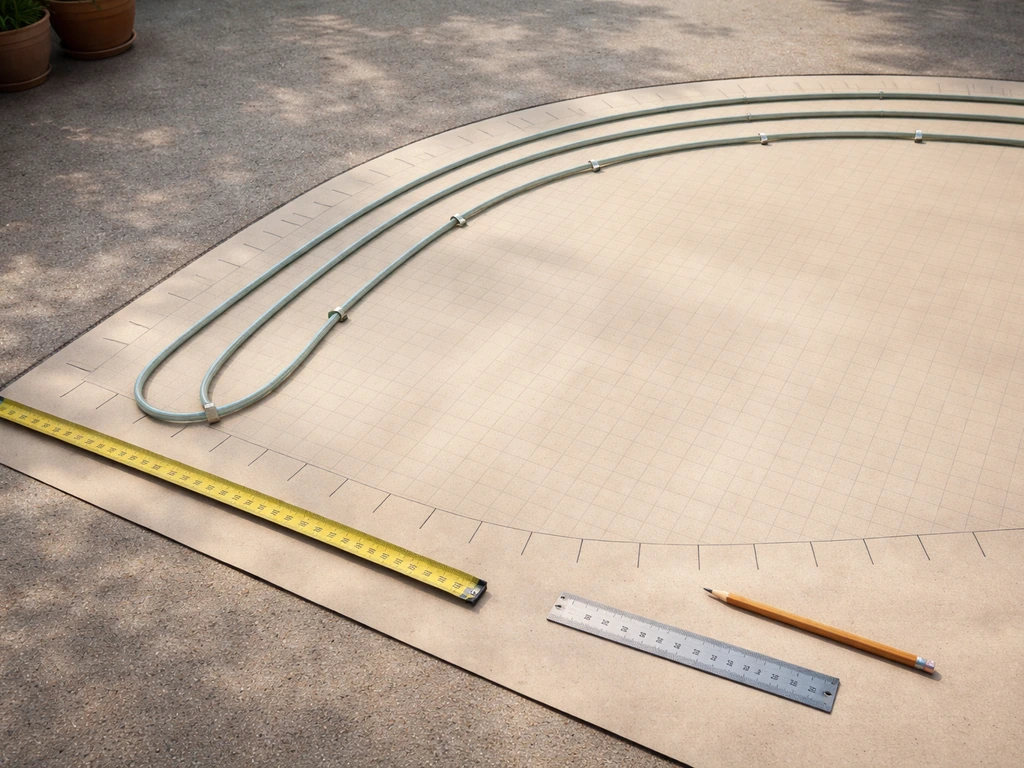
- Measure your patio perimeter in linear feet—this tells you how much tubing and how many nozzles you need. A standard spacing of one nozzle every 18–24 inches along the perimeter is the starting point for most residential systems.
- Mounting height matters: nozzles mounted at 8–10 feet drop mist that evaporates before it reaches seating level in dry climates. If your patio cover sits lower than 8 feet, you risk wetting furniture and floors—consider angling nozzles outward rather than straight down.
- For an open patio (no cover), a portable system or fan-mounted mister makes more sense than a fixed line, since wind and sun will undercut a plumbed system's performance.
- For very large patios (600+ sq ft), plan multiple zones rather than one long run. Long single-line runs lose pressure at the far end, which means the last few nozzles produce uneven mist or just drip.
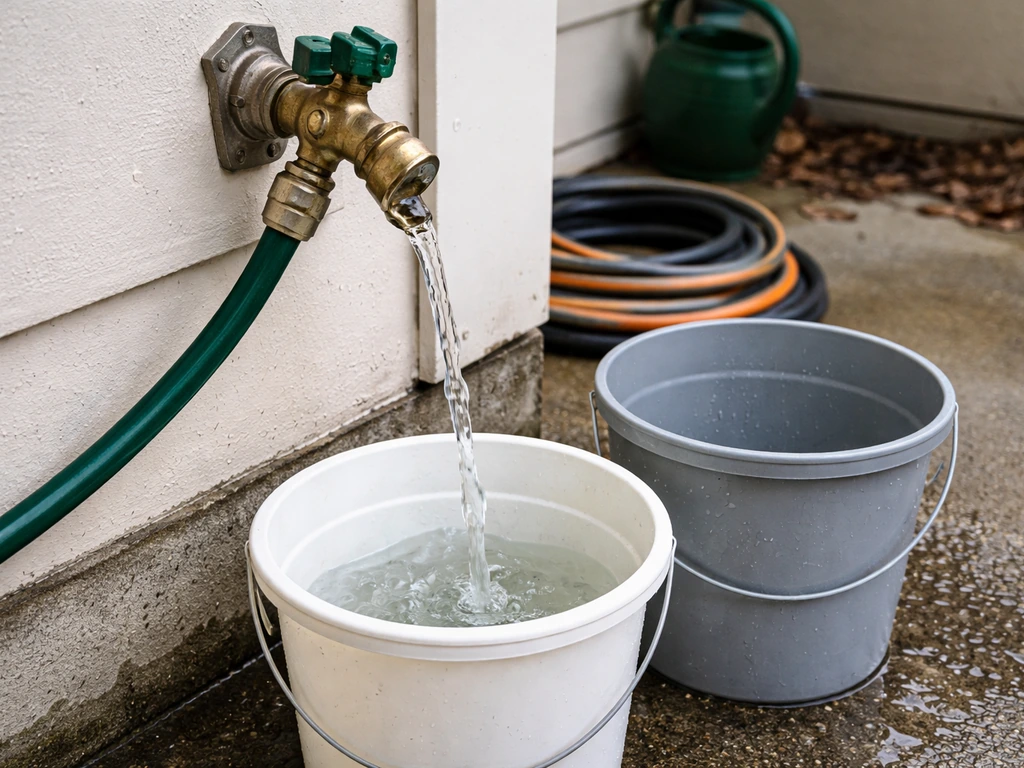
A rough sizing rule: budget one nozzle per 15–20 linear feet of patio perimeter for a mid-pressure system, and verify your home's water supply pressure matches the pump specs of your chosen system before purchasing. Most municipal supplies run 40–80 PSI at the tap, which works fine for low-to-mid-pressure systems but won't drive a high-pressure fogging system without an add-on pump.
Portable vs. plumbed: which type actually fits your situation
There are three main categories of patio misting systems, and they serve very different use cases. Understanding the tradeoffs saves you from buying the wrong one.
| Type | Pressure Range | Cooling Power | Install Effort | Best For |
|---|---|---|---|---|
| Portable / fan-mounted mister | Low (15–30 PSI) | Moderate (5–10°F drop) | None—plug and play | Renters, small patios, high-humidity climates, temporary use |
| DIY low-pressure line kit | Low (30–60 PSI uses garden hose tap) | Moderate (10–15°F drop) | Easy DIY, 1–2 hours | Starter setups, small to medium covered patios, budget-conscious buyers |
| Mid-to-high pressure plumbed system | Mid: 60–160 PSI / High: 800–1000 PSI | Strong (15–25°F drop) | Moderate-to-complex DIY or contractor | Permanent installs, large patios, dry climates, performance-focused buyers |
Low-pressure kits (garden hose hookup) are affordable and DIY-friendly, but the large droplet size means more drip and less evaporative cooling. High-pressure systems (800–1000 PSI) produce true fog particles under 50 microns, tiny enough to stay airborne and evaporate almost instantly, but they require a dedicated pump, professional-grade fittings, and typically a contractor for installation. Mid-pressure systems in the 60–160 PSI range hit the sweet spot for most homeowners: good mist quality with droplets in the 50–100 micron range, manageable DIY install, and meaningful cooling power. For permanent patio upgrades, that's where I'd focus most readers' attention.
The specs that actually separate a great system from a mediocre one
Every misting system listing throws numbers at you. Here's what actually matters and what to verify before buying.
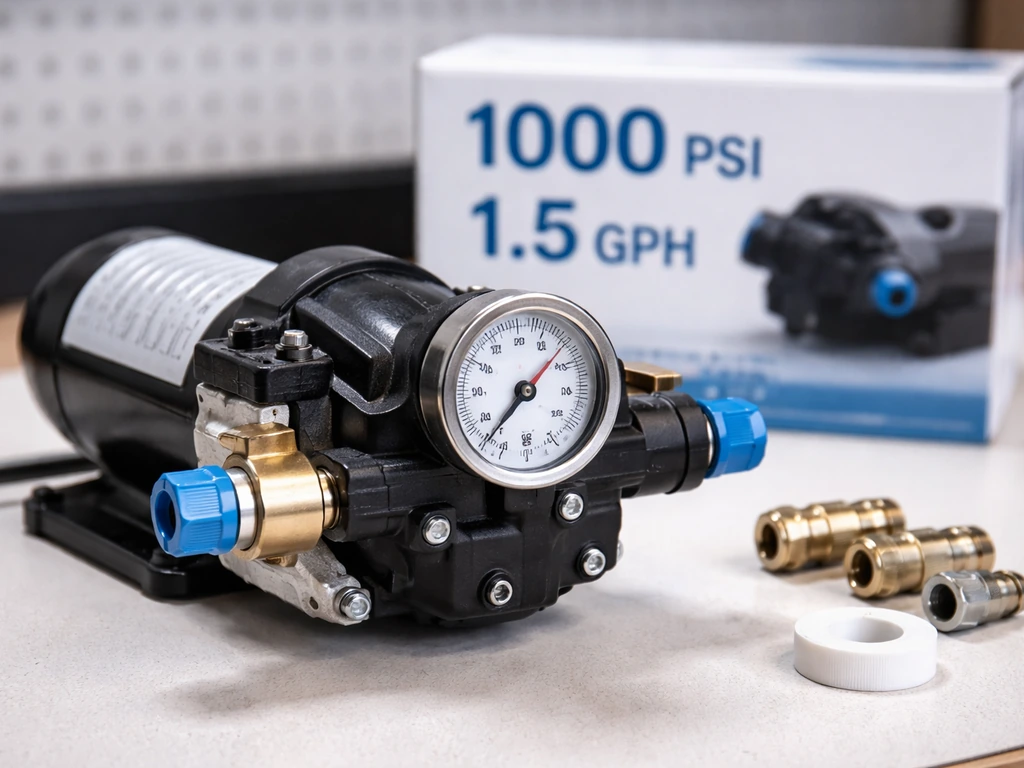
Pump pressure and flow rate
Pump pressure (PSI) determines droplet size: higher pressure forces water through smaller orifices, producing finer mist that evaporates faster. Flow rate (gallons per hour, GPH) tells you how much water the system moves, which must match your nozzle count. A typical residential mid-pressure system running 10 nozzles at 0.012 GPH each uses about 0.12 GPH total, check that the pump can sustain that flow at operating pressure. Undersized pumps lose pressure mid-run and produce uneven, drippy mist at distant nozzles.
Droplet size and nozzle orifice
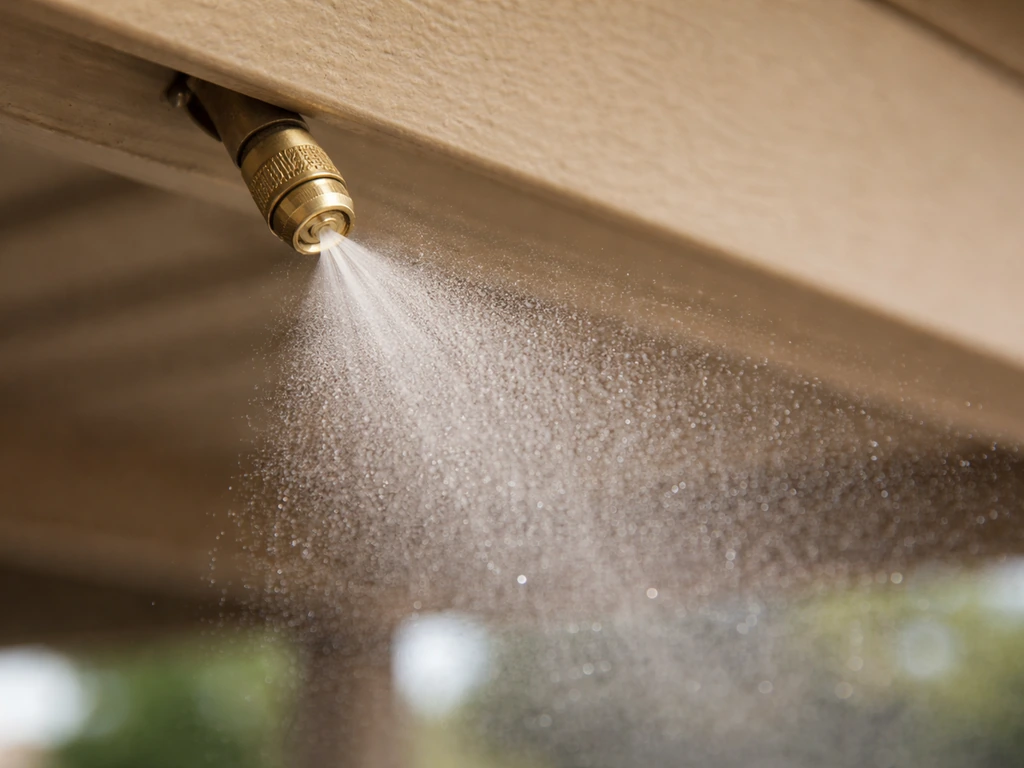
Mist droplets in the 50–100 micron range stay airborne long enough to evaporate and cool the air without soaking surfaces. True fog (under 50 microns) from high-pressure systems evaporates almost instantly, great for cooling, near-zero wetting. Low-pressure systems produce larger droplets (100+ microns) that fall faster and wet furniture, floors, and people. The nozzle orifice size (commonly 0.008 to 0.020 inches) combined with system pressure determines where your droplets land. Look for nozzle specs, not just marketing language like 'ultra-fine mist.'
Controls: timer, thermostat, or manual
A basic manual system is cheap but annoying, you'll forget to turn it off and oversaturate your patio. A timer is the minimum I'd recommend for any permanent install. A thermostat-controlled system is the upgrade worth having: it only runs when ambient temperature exceeds your set point (say, 85°F), which saves water, prevents unnecessary humidity buildup on cooler days, and extends component life. Some premium systems add humidity sensors that cut off the system if relative humidity gets too high, genuinely useful if your climate varies.
Tubing quality and fittings
Nylon or polyethylene tubing (3/8 or 1/2 inch diameter) is standard for mid-pressure systems. Look for UV-stabilized tubing, cheap tubing becomes brittle and cracks after one summer of sun exposure. Compression fittings are easier for DIY installs; threaded brass fittings hold up longer under sustained pressure. Stainless steel or brass nozzle bodies last significantly longer than plastic nozzle housings, which crack and leak after a season or two.
Nozzles, tubing, and the honest truth about DIY vs. hiring a pro
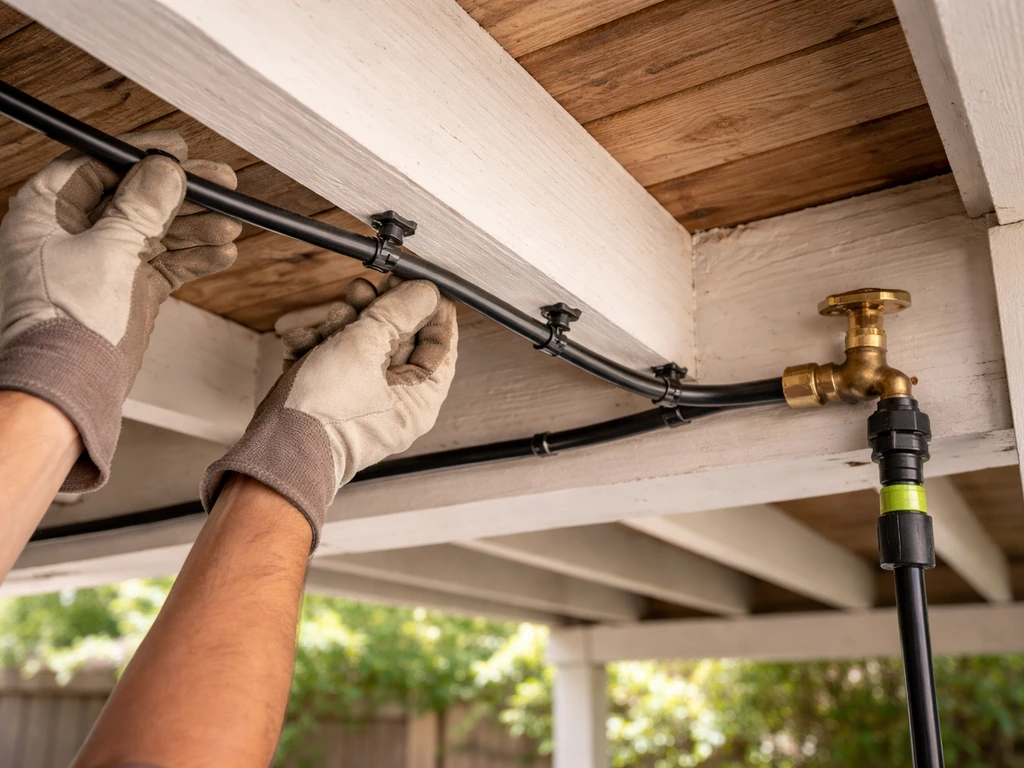
Most mid-pressure kits are genuinely DIY-friendly. You're running flexible tubing along the underside of a patio cover beam, inserting nozzle tees, and connecting to a garden spigot or dedicated water line. The typical homeowner with basic tools can do a 4–6 nozzle perimeter install in an afternoon. Here's where to be careful.
- Route tubing along the inside edge of the patio cover beam (not the outer edge) to protect it from direct sun and wind damage. Secure every 12–18 inches with UV-resistant clips or zip ties.
- Space nozzles evenly and angle them slightly inward and downward so mist falls into the seating zone, not over the edge of the patio. For a 12 x 20 ft patio, four nozzles along each long side and two on each short side is a reasonable starting point.
- Keep nozzles at least 12–18 inches away from overhead light fixtures, ceiling fans, and any wood structural members to reduce moisture damage over time.
- Use thread seal tape on all threaded connections and hand-tighten plus a quarter turn with pliers. Over-tightening brass fittings cracks the nozzle housing.
- Install a filter at the water inlet (most kits include one)—it's the single most effective way to prevent clogged nozzles over the season.
When should you hire a contractor? If you want a high-pressure system (800+ PSI pump, true fogging), a dedicated water line run, or integration with a smart home controller, that's contractor territory. High-pressure pumps require proper electrical hookup, pressure relief valves, and professional-grade fittings that aren't forgiving of DIY mistakes. For large pergolas or covered outdoor kitchens where the misting line needs to integrate with lighting or ceiling fan wiring, a contractor familiar with outdoor electrical and plumbing keeps things clean and code-compliant.
Climate and comfort factors: humidity, wind, and avoiding a wet mess
This is where regional differences really matter. What works brilliantly in Scottsdale needs a completely different approach in Atlanta.
In dry climates (under 40–50% relative humidity), a mid-to-high pressure misting system performs at its best, droplets evaporate before they land, cooling is dramatic, and you stay dry. In transitional climates (50–65% humidity), a high-pressure system with smaller droplets is important so evaporation still happens before wetting occurs. In high-humidity climates (consistently above 65–70% RH), misting systems add more humidity without meaningful cooling, leading to wet surfaces, slippery pavers or decking, and accelerated mold growth on cushions and wood.
In those environments, a misting fan that combines airflow with light mist can help because the wind speeds up evaporation. If you're in the Southeast or Gulf Coast, honestly evaluate whether a ceiling fan or evaporative fan is the better primary cooling solution.
Wind is a nuisance for misting systems on open patios. Even a moderate breeze of 10–15 mph can carry mist sideways out of the patio zone before it cools anyone. A covered patio or pergola with partial side screening dramatically improves system performance by keeping mist in the space. If your patio is very exposed, a portable misting fan positioned strategically is smarter than a perimeter line system.
To avoid turning your patio into a slippery, moldy hazard: run the system only when temperatures justify it (a thermostat controller automates this), give the patio 30–60 minutes of air-dry time after the system shuts off before heavy foot traffic, and choose non-porous, slip-resistant pavers or composite decking if you're designing or upgrading the surface alongside a misting install.
Maintenance, winterization, and keeping it running for years
A misting system that isn't maintained becomes a dripping, clogged headache by midsummer. The good news is that maintenance is straightforward if you do it on a schedule.
During the season
- Inspect nozzles every 2–4 weeks during peak use. Clogged nozzles drip instead of misting—remove them, soak in white vinegar for 30 minutes, rinse, and reinstall. If mineral buildup is severe, replace the nozzle (they're typically $1–3 each).
- Check the inline filter monthly and rinse or replace the filter screen when it shows buildup. A dirty filter starves the system of pressure and flow.
- Look for micro-leaks at fittings after the first few uses and after any temperature swings—tubing expands and contracts and can loosen compression fittings.
- Clean pump strainers (if your system has a pump) at the start and midpoint of the season to maintain consistent pressure.
End of season and winterization
- Shut off the water supply, then open the lowest nozzle or a drain valve to release pressure and drain standing water from the lines.
- In climates where temperatures drop below freezing, blow out the lines with compressed air (low pressure, 30 PSI max) to clear any remaining water—trapped water freezes, expands, and cracks tubing or splits nozzle bodies.
- Remove and store nozzles and the filter cartridge indoors for the winter to prevent frost damage and UV degradation.
- Coil and store any removable tubing sections indoors. For permanently mounted lines, ensure all water is cleared and leave drain valves or the lowest nozzle slightly loose to allow any residual moisture to escape.
- Inspect the pump (if present) for corrosion or wear before storing, and follow the manufacturer's flush procedure to prevent mineral scale from hardening inside the pump head over winter.
Mold and mildew on furniture, cushions, or wood beams near nozzles is a sign the system is running too long, nozzle placement is too close, or droplet size is too large for the climate. Reduce run time, move nozzles further from surfaces, or step up to a higher-pressure nozzle to improve evaporation before you start treating mold on expensive outdoor furniture.
Budget vs. premium: what to buy and how to choose right now
Here's a honest breakdown by budget tier so you can make a decision today rather than spiral into endless research.
| Budget Tier | Typical Cost Range | What You Get | Best Fit |
|---|---|---|---|
| Entry / Portable | $30–$100 | Misting fan or garden-hose kit with 6–12 plastic nozzles, low pressure, manual control | Renters, high-humidity regions, small patios under 150 sq ft, or seasonal testing |
| Mid-range DIY | $100–$350 | Mid-pressure kit with brass/stainless nozzles, UV tubing, inline filter, timer control | Most homeowners with a covered patio under 500 sq ft in a moderate climate |
| Premium DIY or Pro Install | $350–$800+ DIY / $800–$2,500+ installed | High-pressure pump system, true fog nozzles, thermostat + humidity control, dedicated water line | Large patios, dry climates, permanent installs, homeowners prioritizing performance and longevity |
For most homeowners reading this, the mid-range DIY tier hits the sweet spot. If you want the most practical option for the season, compare candidates using a dedicated guide for the best patio misting system in 2022 best patio misting system 2022. Something like a 60–100 PSI system with 10–15 stainless or brass nozzles, UV-rated polyethylene tubing, an inline sediment filter, and a programmable timer will cool a standard covered patio reliably for multiple seasons with minimal fuss.
A 60, 100 PSI system with 10, 15 stainless or brass nozzles, UV-rated polyethylene tubing, an inline sediment filter, and a programmable timer is often the best home patio misting system style for a standard covered patio. If you're shopping for the best patio misting system 2020, a mid-pressure setup like this is often the most reliable way to get strong cooling without constant wetting 60–100 PSI system.
If you want the most dependable pick for the best patio misting system 2021 season, focus on mid-pressure performance, reliable nozzles, and a timer or thermostat. That's the recommendation I'd give a neighbor.
Before you buy, verify these five things: (1) your home's water supply pressure at the tap where you'll connect (use a $10 pressure gauge from a hardware store), (2) that the system's nozzle count matches your patio's linear perimeter with 18–24 inch spacing, (3) that nozzle material is stainless steel or brass, not plastic, (4) that the kit includes an inline filter, and (5) that a timer or thermostat control is either included or can be added. If a system checks all five, you're in good shape.
If you want to dig deeper into specific product comparisons and real-world reviews before committing, the detailed patio misting system reviews and year-specific buying guides on this site (covering systems tested in recent seasons) break down individual models side by side. For patios where airflow is the bigger issue alongside cooling, pairing a misting system with the right patio misting fan can fill in the gaps that a line-only setup leaves on windier or partially open patios. The best patio misting fan can extend the cooling effect, especially on partially open or breezy patios.
FAQ
How do I calculate how many nozzles I actually need for my patio mister system?
Start with the total linear perimeter you want to cool (measure around the open edge or the perimeter under the cover). Then divide that length by your planned spacing, typically 18 to 24 inches for a mid-pressure line. Finally, account for obstacles by adding one or two extra nozzles near corners, grill zones, or seating transitions where the mist tends to thin out.
What happens if my water pressure is higher than the system’s required PSI?
If the supply is significantly above the system rating, you can end up with finer mist and uneven wetting patterns, plus faster nozzle and fitting wear. The practical fix is to use a regulator rated for outdoor plumbing, set it to the system’s operating PSI, and re-check pressure at the spigot after the regulator is installed.
Can I use a patio mister system on well water or water with high sediment?
Yes, but you should not skip filtration. Use an inline sediment filter sized for the system’s flow rate, and consider adding a second finer filter if your nozzles clog quickly. If your water has high hardness, periodic flushing helps prevent scale buildup that reduces mist quality over time.
Will a mid-pressure patio mister system leave my floors or furniture wet?
It can, especially if droplets are too large for your climate or if you aim the nozzles too low. To reduce wetting, mount nozzles higher on the underside of the patio cover, keep spacing within 18 to 24 inches, and run for shorter cycles using a timer or thermostat so surfaces have time to air dry.
How long should I run a patio mister system each time?
For many homes, short cycles work better than long continuous runs. Use the thermostat cutoff as your baseline, and if you are using a timer, start with 10 to 20 minutes on and then observe condensation and any slippery spots. If you see mildew or persistent dampness, reduce run time and verify nozzle-to-surface positioning.
What temperature and humidity range is actually most effective for misting?
Misting performs best in hot, relatively dry conditions because droplets need time to evaporate. If your relative humidity stays consistently above roughly 65 to 70 percent, expect much less cooling and more wetting. In those cases, prioritize a smaller droplet approach or consider an airflow-focused fan as the primary cooling tool.
Do I need a dedicated water line, or can I connect to a garden hose spigot?
A garden spigot connection often works for small to medium DIY perimeter systems, but long hose runs can cause pressure drop. If the spigot is far away, you may need thicker hose, higher flow capacity at the spigot, or a dedicated line to maintain consistent nozzle output across the whole patio.
How do I prevent nozzle clogs and scale buildup?
Install an inline sediment filter, and flush the line before peak season (and after any long off periods). If you notice reduced mist output or uneven coverage, remove and soak nozzles in a manufacturer-recommended cleaning solution (avoid harsh solvents on plastic components). Also, make sure the system is winterized properly so debris does not sit inside nozzle orifices.
Can I winterize a patio mister system myself?
Often yes. The key is preventing freeze damage by draining lines, relieving pressure, and ensuring water is not trapped at low points. If you cannot fully drain the tubing, an approved air-blow or antifreeze approach may be needed, and you should avoid methods that leave chemical residue on stainless or brass nozzles.
Is it safe to install a patio mister near outdoor electrical fixtures?
You need to treat it as an outdoor wet-location setup. Keep mist lines and nozzle spray patterns away from outlets, junction boxes, and ceiling fan wiring, and use weather-rated components where the plumbing crosses near electrical. For any integration with smart controllers or wiring, follow local electrical codes and use a qualified electrician if you are unsure.
Should I choose stainless steel or brass nozzles, and does it really matter?
Both are typically durable, but brass often resists corrosion well and is common in long-running systems. Stainless generally holds up extremely well and is less prone to certain types of pitting. The bigger difference for performance is matching orifice size and droplet behavior to your pressure range and climate, not just nozzle material.
How do I troubleshoot uneven cooling, drippy mist, or dry spots?
First verify that your nozzle count and spacing match the perimeter you measured. Then confirm pump or supply pressure at operating conditions, since an undersized pump can lose pressure mid-run and cause droppiness. Finally, check nozzle height and angles, and inspect for partially clogged nozzles that can create dry zones.