
If you are choosing between the Polk Audio Atrium 5 and the Patio 200, here is what you need to know upfront: these two speakers share the same core driver platform, the same nominal specs, and nearly identical dimensions. The Patio 200 was effectively a retail-channel variant of the Atrium line, sold primarily through Best Buy, and it is now archived and discontinued by Polk. The Atrium 5 is the current, actively supported model. For most homeowners upgrading or building out a patio sound system in 2026, the Atrium 5 is the clear and obvious pick simply because you can still buy it new, it carries a five-year warranty, and replacement parts and support exist. If you already own Patio 200s and they still work, keep using them. If you are shopping today, buy the Atrium 5. For a concise side-by-side comparison and purchase guidance, see polk patio 200 vs atrium 5.
Polk Audio Atrium 5 vs Patio 200: Outdoor Speaker Buyer's Guide

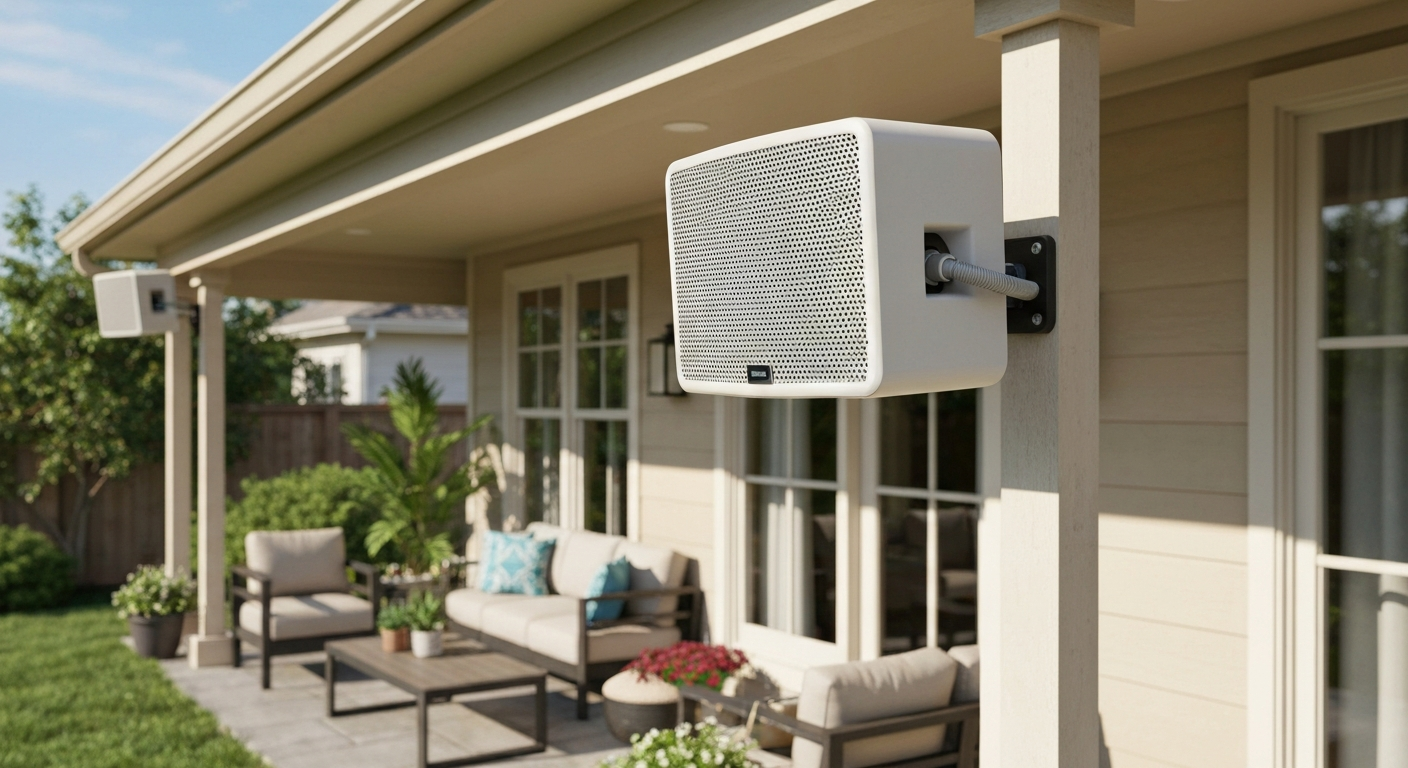
Quick verdict: which one should you buy?
The Atrium 5 wins by default for anyone buying new. The Patio 200 is discontinued and no longer in production, so availability is limited to used and open-box units. That said, understanding what separates them (and what does not) helps you make sense of the full Polk outdoor lineup, especially if you are comparing the Patio 200 to the Atrium 4 or Atrium 6 while shopping secondhand.
- Buy the Atrium 5 if you are purchasing new, want full warranty coverage, and need a weatherproof 5" two-way satellite for a small to medium patio, deck, or covered pergola.
- Consider the Patio 200 only if you find it used at a significant discount, are comfortable with no manufacturer warranty, and just need a spare pair to replace a failed unit in an existing Patio 200 setup.
- Go up to the Atrium 6 if your patio is large, open, or you need more low-end output from the satellite speaker alone.
- Drop down to the Atrium 4 if you are wiring a very long multi-speaker run and want more pairs for the same budget.
- Add the Polk Atrium Sub100 to either speaker if you want real bass outdoors — no five-inch satellite fills a large open yard with low frequencies without help.
At-a-glance specs comparison
| Spec | Polk Atrium 5 | Polk Patio 200 |
|---|---|---|
| Status | Current / active | Archived / discontinued |
| Woofer | 5" Dynamic Balance® polypropylene | 5" Dynamic Balance® polypropylene |
| Tweeter | 0.75" anodized aluminum dome | 0.75" anodized aluminum dome |
| Frequency Response | 60 Hz – 25 kHz | 60 Hz – 25 kHz |
| Sensitivity | 90 dB (1 W/1 m) | 90 dB (1 W/1 m) |
| Impedance | 8 Ω nominal | 8 Ω nominal |
| Power Handling (RMS/Peak) | 10–100 W per channel | 50 W RMS / 100 W peak |
| Dimensions (H×W×D) | 10.31" × 6.75" × 7.75" | 10.31" × 6.75" × 6.69" |
| Weight (each) | 4.6 lb | 4.6 lb |
| Enclosure Type | Sealed, mineral-filled polypropylene | Sealed, polypropylene |
| Grille Material | Powder-coated aluminum | Powder-coated aluminum |
| Mounting Bracket | Speed-Lock 180° adjustable aluminum | Adjustable aluminum bracket |
| Weather Rating / Certification | Polk All-Weather Certified (ASTM D5894, MIL-STD-810) | All-Weather rated (same platform testing) |
| IP Rating (published) | Not formally IP-rated; All-Weather Certified | Not formally IP-rated; All-Weather rated |
| MSRP (pair) | $349 (Polk storefront, 2026) | Discontinued; used market only |
| Warranty | 5 years (cabinet and drivers, original purchaser) | No active manufacturer warranty (archived) |
The depth difference is the only hardware distinction between the two. The Atrium 5 is 7.75" deep versus 6.69" for the Patio 200. Everything else matches precisely. Both use the same driver family, same enclosure material, same tweeter, same sensitivity, and the same frequency response window. The cabinet depth difference is minor and likely reflects a small enclosure refinement Polk made at some point. It has no audible impact at this cabinet volume.
Design, hardware, and intended use cases
Both speakers follow the same Polk Atrium design philosophy: a compact sealed two-way cabinet in mineral-filled polypropylene, a powder-coated aluminum grille, and an adjustable aluminum Speed-Lock bracket that swings 180 degrees so you can mount the speaker in a horizontal or vertical orientation and aim it toward your listening zone. The sealed enclosure keeps moisture out more reliably than ported designs, and polypropylene resists UV degradation far better than painted wood or MDF. The powder-coated aluminum grille protects the drivers from direct water and debris while remaining acoustically transparent enough not to significantly muffle the sound.
The Patio 200 was positioned as an indoor/outdoor speaker for exactly this type of application: covered patios, deck soffits, screened porches, poolside walls, and garage overhangs. The Atrium 5 targets the same spaces with identical hardware and a slightly refined cabinet. Neither speaker is designed for full subterranean burial or full-sun speaker rock placement. Both are best served under an eave, overhang, or pergola roof where they get some protection from direct downpour and intense UV.
Where the Patio 200 is no longer a practical choice for new installs is the support situation. Polk archived the product, meaning no active warranty, no firmware updates (not that speakers need them), and no guarantee of bracket or grille availability as replacement parts. If the mounting bracket cracks in two years, you are hunting eBay. With the Atrium 5, you have a five-year cabinet and driver warranty backed by Polk directly. For a permanent outdoor install where replacing a $175 speaker means climbing a ladder with a drill on a hot afternoon, that warranty matters.
Real-world sound performance and listening scenarios
Coverage pattern and SPL expectations
At 90 dB sensitivity, both speakers produce comfortable background-to-moderate listening levels with 20–50 watts per channel driving them. A 50-watt receiver channel will get you approximately 107 dB peak at one meter, but practical outdoor listening at conversational levels typically means you are running them at a fraction of that. Outdoors, sound disperses quickly with distance (roughly 6 dB drop per doubling of distance in free-field conditions), so a single pair on a 400-square-foot open patio will cover that space adequately at moderate volumes but will struggle to fill a large open lawn without sounding thin in the far corners.
For a covered 200–400 square foot patio, one pair of Atrium 5s mounted 8–10 feet high under the eave, aimed down at roughly 30 to 45 degrees toward the primary seating area, delivers good coverage for background and social listening. For a larger open space (pool area, sprawling deck over 600 square feet), plan on two pairs and aim each toward a different zone rather than cranking one pair louder.
Placement and spacing guidelines
- Mount speakers 8–10 feet high on eaves or walls for the best downward dispersion toward seated listeners.
- Space a stereo pair 8–12 feet apart for a small patio; for a long narrow deck, consider running them in mono or as a distributed multi-speaker line rather than a wide stereo setup.
- Aim the speaker axis down 30–45 degrees toward the primary listening zone using the Speed-Lock bracket adjustment.
- Keep speakers 12+ inches away from adjacent walls or soffits when possible to avoid flutter echo buildup in covered spaces.
- For pool surrounds or large lawns, add a second pair spaced 15–20 feet from the first rather than relying on volume alone.
Indoor vs open-air vs covered patio behavior
Covered patios are where these speakers shine. Best Buy customer reviews for the Polk Atrium5 report solid sound for small-to-medium patios, surprising bass when paired with a sub, and multi-year outdoor durability when installed under eaves. The overhang or pergola roof reduces weather exposure and also provides a reflective surface that helps project sound downward toward the listening area. Fully open-air installs (freestanding posts with no overhang) work, but sound dissipates faster in all directions and the speakers are exposed to more direct UV and moisture. Indoors, the sealed polypropylene cabinet can seem a bit tonally dry compared to wood-cabinet indoor speakers designed specifically for room acoustics, but it gets the job done in a garage, sunroom, or workshop.
Pairing with subwoofers and amplifiers
Neither the Atrium 5 nor the Patio 200 has meaningful bass extension below 60 Hz. On a patio, that sounds like a speaker with no real thump or warmth in the low end. If you want music that feels full and satisfying outdoors, add the Polk Atrium Sub100. It uses a 10-inch long-throw driver in a weatherproof down-firing enclosure rated at 200 watts. One Sub100 paired with a set of Atrium 5s transforms a small-to-medium patio system from background music to something you actually want to sit in front of. Bury it in a landscaped area pointed toward a hardscape surface or place it under a deck to keep it out of sight. For amplification, any quality A/V receiver or stereo amp rated 40–80 watts per channel at 8 ohms will drive these speakers well without stress. Avoid ultra-cheap class-D mini amps that clip early, Polk's own guidance is clear that audible distortion from an undersized amp damages tweeters faster than a cleanly clipped but powerful amp would.
Weatherproofing, materials, and climate-specific concerns
Polk markets the Atrium line as All-Weather Certified and cites three specific standards in its product documentation: ASTM D5894 for cyclic salt fog and UV exposure on coated metals, MIL-STD-810 for environmental immersion and stress testing, and MIL-STD-883 Method 1009.8 for salt and corrosion resistance. These are real, recognized test standards, not marketing labels. ASTM D5894 specifically cycles salt spray and UV exposure in alternating phases to simulate years of outdoor exposure on painted metal components. The powder-coated aluminum grille and bracket are the components most at risk for corrosion, and these standards directly address that vulnerability. Polk does not publish the full lab reports publicly, but citing compliance with these standards is a meaningful benchmark.
The enclosure itself is mineral-filled polypropylene. This material resists moisture absorption, does not rot, and handles UV exposure better than most painted wood or MDF alternatives. It will not crack in a single freeze-thaw cycle the way a poorly sealed wood cabinet might. That said, no consumer outdoor speaker is entirely impervious to repeated extreme abuse, and Polk's own manual recommends storing speakers indoors during extreme weather events.
Region-specific considerations
| Climate / Region | Primary Risk | Recommended Action |
|---|---|---|
| Coastal / salt-air (Florida, Gulf Coast, Pacific Coast) | Salt corrosion on aluminum grille and bracket hardware | Rinse speakers with fresh water quarterly; inspect bracket screws annually; apply corrosion inhibitor to fasteners |
| Desert / high UV (Arizona, New Mexico, West Texas) | UV degradation of polypropylene cabinet and bracket over long term | Mount under eave or shade structure; avoid full-sun south-facing exposure |
| Freeze/thaw (Minnesota, Colorado, Northeast) | Water intrusion into sealed enclosure during freeze cycles; bracket stress | Remove or cover speakers if storing through winter; check sealant around mounting holes annually |
| High humidity / rain (Pacific Northwest, Southeast) | Mildew on grille fabric (if any); sustained moisture on bracket | Keep under eave; clean grille with diluted mild soap annually; ensure no standing water in mounting cavity |
| Hot/humid mixed (Texas, Georgia, Louisiana) | Combination UV and humidity stress | Mount under cover, use stainless steel fasteners, inspect annually |
One thing I have noticed after testing outdoor speakers across different climates: the bracket is usually the first thing to fail, not the driver or enclosure. The adjustable knob on aluminum brackets can seize or strip if water gets in and cycles through freeze-thaw repeatedly. Apply a thin coat of anti-seize compound or white lithium grease to the bracket knob threads when you first install, and re-check them every season. This five-minute step has kept brackets functional for me in Colorado winters where they would otherwise seize up solid by February.
DIY installation guide: step-by-step mounting and wiring
Step 1: site planning and speaker placement
Before you drill anything, walk your patio with the speaker in hand and hold it at the intended mounting height. Aim it toward where people will actually sit or stand. Identify the mounting surface: wood fascia, concrete soffit, or stucco wall. Check for studs, blocking, or existing anchors. Note the run path the speaker wire will travel from the speaker back to your amplifier or receiver. Measure the total wire run length for each speaker from the amp location to the mounting point. This determines your wire gauge choice.
Step 2: wire gauge and cable routing
For 8-ohm speakers like the Atrium 5 and Patio 200, use 16 AWG speaker wire for runs up to approximately 50 feet, 14 AWG for runs up to 80 feet, and 12 AWG for anything over 80 to 100 feet. Retail installation guides (see blank" rel="noopener noreferrer">How to choose speaker wire gauge/length (Crutchfield learning center)) recommend 16 AWG for typical 8 Ω speaker runs up to ~50 ft, 14 AWG up to ~80 ft, and 12 AWG for very long runs to keep resistance and power loss low. Heavier gauge keeps DC resistance low and prevents power loss that would otherwise soften your sound at the speaker end of a long run. Route wire through conduit wherever it is exposed on an exterior wall or run through a chase to keep it protected from UV and physical damage. Use weatherproof outdoor-rated PVC conduit (gray schedule 40 or liquid-tight flexible conduit at the last few feet near the speaker) and seal conduit entry points with weatherproof caulk or an outdoor-rated gel sealant.
Step 3: mounting the Speed-Lock bracket
- Thread the speaker wire through the hole in the Speed-Lock bracket before you mount it to the wall.
- Hold the bracket against the mounting surface and mark both screw hole locations with a pencil.
- If mounting into a wood stud or blocking, use two #10 wood screws (3-inch length for solid bite into a 2x4). If mounting into stucco, concrete, or masonry, use #10 concrete anchors or masonry screws rated for outdoor use.
- Drill pilot holes, install anchors if needed, and fasten the bracket firmly. Check that it does not wiggle or rock. The speaker and bracket together weigh under 5 pounds per side, but vibration from music will stress a loose mount over time.
- Attach the speaker to the bracket using the Speed-Lock mechanism and tighten the knob until it holds the aim angle securely.
- If you applied anti-seize to the threads, use only moderate torque — you want secure, not stripped.
Step 4: wiring to the binding posts
- Strip approximately 1/2 inch of insulation from both conductors of the speaker wire at the speaker end.
- Loosen the gold-plated 5-way binding posts on the rear of the speaker. These accept bare wire, pin connectors, or banana plugs.
- Connect the positive (usually red or striped) conductor to the red binding post and the negative (black or solid) to the black post. Maintain consistent polarity across all speakers in your system.
- Tighten binding posts firmly. Loose connections cause intermittent noise, corrosion over time, and in extreme cases arcing.
- Tuck any excess wire back through the bracket hole and seal the conduit entry point at the wall with weatherproof sealant.
- At the amplifier end, connect wire to the corresponding speaker terminals, again maintaining polarity.
Step 5: amplifier and transformer sizing
For a simple two-speaker stereo setup, any receiver or stereo amplifier rated 40–80 watts per channel at 8 ohms works well. If you are running multiple pairs in a distributed system (four or more speakers on a single zone), consider either an impedance-matching volume control at each speaker location or a 70-volt distribution system with a step-up transformer at the amp and matching autoformers at each speaker. The 70V approach avoids impedance stacking problems when wiring multiple speakers in parallel. For a typical two-pair patio installation without 70V, wire each pair to its own amplifier channel rather than wiring both pairs to a single stereo channel in parallel, which drops the impedance to 4 ohms and can stress budget receivers.
Contractor-hiring checklist and spec sheet for your installer
If you are hiring an AV installer, electrician, or custom integration contractor rather than doing this yourself, give them this information upfront to avoid scope gaps and callback visits.
- Speaker model: Polk Audio Atrium 5 (pair), 8 Ω nominal, 10–100 W per channel recommended, sealed polypropylene cabinet with Speed-Lock aluminum bracket.
- Mounting surface type and height: specify wood fascia, stucco, concrete, or composite, and confirm mounting height (target 8–10 feet AFF).
- Wire run lengths: measure and provide the total run from each speaker location back to the amplifier or receiver location. Specify whether conduit is required or if in-wall / in-soffit routing is acceptable.
- Wire gauge required: 16 AWG for runs under 50 feet; 14 AWG for 50–80 feet; 12 AWG for runs over 80 feet.
- Conduit requirement: ask whether local code requires conduit for low-voltage speaker wire on exterior surfaces. In many jurisdictions it is not required for speaker wire, but confirm for your region.
- Amplifier location: confirm whether the receiver/amp is inside a weatherized cabinet, an interior equipment closet, or an exterior weatherproof enclosure. Outdoor-rated amplifier enclosures are required for amps in exposed locations.
- Permit considerations: most low-voltage speaker wire installations do not require an electrical permit, but if the project involves cutting into soffits, running conduit through finished walls, or adding a new dedicated circuit for an outdoor AV rack, verify permit requirements with your local building department.
- Subwoofer rough-in: if you are adding a Polk Atrium Sub100, note its placement location and the need for a dedicated 120V outlet nearby rated for outdoor use (GFCI-protected).
- Ask the contractor: What brand of conduit fittings and sealant do you use at penetrations? How do you handle water drainage in conduit runs on sloped exterior walls? Have you installed Polk Atrium series speakers before?
- Request a written spec sheet from the installer listing wire gauge used, conduit type, fastener type and size, and the amplifier model and output rating. This protects you if warranty issues arise.
How the Patio 200 fits into the broader Polk Atrium family
The Polk Atrium lineup spans from the compact Atrium 4 (4-inch woofer) up through the Atrium 5 (5-inch woofer) and the Atrium 6 (6.5-inch woofer), plus the Atrium Sub100 outdoor subwoofer. The Patio 200 sat alongside the Atrium 5 as a retailer-channel variant built on the same driver and cabinet platform. Here is how these models compare when you are deciding which to buy or whether to mix and match. For a detailed side-by-side, see the Polk Patio 200 vs Atrium 6 comparison for model-specific differences and recommendations. See our Polk Patio 200 vs Atrium 4 comparison for side-by-side specs and buying guidance. For a focused side-by-side look at differences in driver size, output, and intended use, see our Polk Audio Patio 200 vs Atrium 6 comparison.
| Model | Woofer Size | Freq. Response | Sensitivity | Best For | Status |
|---|---|---|---|---|---|
| Atrium 4 | 4" | 65 Hz – 25 kHz | 89 dB | Small patios, long multi-speaker runs on a budget, accent zones | Current |
| Atrium 5 / Patio 200 | 5" | 60 Hz – 25 kHz | 90 dB | Small-to-medium patios, decks, covered porches, primary stereo zones | Atrium 5 current; Patio 200 archived |
| Atrium 6 | 6.5" | 45 Hz – 25 kHz | 91 dB | Large patios, open decks, pool surrounds, higher SPL needs | Current |
| Atrium Sub100 | 10" subwoofer | 35 Hz – 150 Hz | N/A | Adding bass to any Atrium satellite system | Current |
The Atrium 4 is the right pick when you need more coverage points for the same dollar. Its 4-inch driver handles less low-end than the Atrium 5 and is slightly less sensitive, but for a background music zone in a side yard or along a walkway where you are hanging four to six speakers on a distributed amplifier, the cost savings add up meaningfully. The Atrium 6 is worth the step up in price if your patio is genuinely large and open, if you sit far from the speaker locations, or if you prefer not to add a subwoofer. Its 6.5-inch driver extends meaningfully lower (45 Hz versus 60 Hz) and its 91 dB sensitivity means more output per watt.
The Patio 200 occupies the same performance tier as the Atrium 5. There is no meaningful reason to choose a used Patio 200 over a new Atrium 5 unless the price difference is substantial and you understand the trade-offs. For a side-by-side look at specs, support, and buying guidance, see our Polk Patio 200 vs Atrium comparison. A new Atrium 5 at $349 per pair with a five-year warranty is a better value than a used Patio 200 at anything above $150 per pair, given the warranty void and support limitations. Related comparisons, including the Patio 200 versus the Atrium 4 and the Patio 200 versus the Atrium 6, dig deeper into those specific match-ups and are worth reading if you are still deciding which size class fits your space. For a related retailer-channel and model-difference comparison, see our Polar Patio standard vs premium guide.
Price, value, and alternatives worth considering
The Atrium 5 at $349 per pair puts it in a competitive but not cheap segment for outdoor speakers. At this price point you are buying a genuinely durable speaker from a reputable brand with verifiable weatherproofing standards and a meaningful warranty. Competing alternatives at similar prices include the Klipsch AW-650 and the Sonos Outdoor Speakers, though the Sonos carries a significantly higher price tag and locks you into the Sonos ecosystem. The Klipsch AW-650 offers horn-loaded tweeter efficiency at a slightly higher sensitivity rating and is worth considering if you want more volume from a lower-powered amp.
If budget is the primary driver and your patio is small, consider the Atrium 4 instead. It retails lower, covers small spaces effectively, and uses the same All-Weather Certified build quality. If you want to spend more for noticeably better outdoor performance, the Atrium 6 is the logical upgrade within the Polk family. Adding the Sub100 to either an Atrium 5 or Atrium 6 system transforms the outdoor listening experience more dramatically than upgrading the satellites alone, so if you have budget flexibility, allocate some of it toward the subwoofer rather than just going for larger satellites.
Maintenance, testing tips, and accessory recommendations
Ongoing maintenance
- Inspect bracket screws and knobs each spring and fall. Apply anti-seize or white lithium grease to knob threads if you live in a freeze-thaw climate.
- Rinse the aluminum grille with fresh water if you are in a coastal salt-air environment. Do this two to four times per year.
- Check the conduit entry sealant at the wall penetration annually. Exterior silicone sealant degrades in UV over three to five years and should be touched up when it begins to crack or peel.
- If you remove speakers for winter storage, use masking tape or a plastic bag sealed with a rubber band over the binding post area to keep moisture and insects out of the enclosure during storage.
- Listen for buzzing or rattling after severe storms. A loose grille or bracket vibration is usually fixable with a quarter-turn of a screwdriver.
How to demo or A/B test before you commit
If you have the option to demo before buying, bring your own music on a phone or portable DAP, use tracks that you know well and that include both low-frequency content and clear high-frequency detail (acoustic guitar, vocals, and something with bass are a good combination). Play each speaker at the volume level you expect to use on your patio and listen from the distance where you will actually sit or stand, not from one meter in a quiet showroom. Outdoor demos at a retailer are rare, but some specialty AV dealers will set up outdoor demo stations on request. If you are buying online, most major retailers offer return windows of 15–30 days, which gives you time to install and genuinely evaluate in your actual outdoor environment.
Accessories worth adding
- Polk Atrium Sub100: the single best upgrade for either speaker system if you want real outdoor bass.
- Stainless steel #10 mounting screws: replace standard zinc-plated fasteners if you are in a coastal or high-humidity environment.
- Weatherproof outdoor speaker volume controls: impedance-matching in-wall or surface-mount volume knobs for each zone in a multi-pair setup.
- Liquid-tight flexible conduit (last 12–18 inches at speaker): protects wire at the flex point where rigid conduit meets the speaker bracket.
- Exterior-grade 100% silicone sealant: seal every wall penetration and conduit entry point. Clear silicone from a hardware store is fine.
- Banana plugs (gold-plated): optional but makes connecting and disconnecting speakers for seasonal removal much faster than bare wire at binding posts.
FAQ
Which is better for my patio: Polk Audio Atrium 5 or Polk Patio 200 — quick recommendation?
Short answer: they’re effectively the same-sounding platform. The Atrium 5 is Polk’s current marketed SKU with a 5" Dynamic Balance woofer, 0.75" anodized‑aluminum tweeter, 60 Hz–25 kHz response, 90 dB sensitivity and 8 Ω nominal impedance. The Patio 200 is an older/archived retail SKU that shares nearly identical drivers, specs and real‑world performance. Best‑for scenarios: choose Atrium 5 if you want current support/warranty and retail availability; Patio 200 is acceptable only if you find a well-priced new/like‑new pair. Both are best for small‑to‑medium covered patios, pergolas and near‑house mount locations; add a sub for deep bass or open‑air poolside coverage.
How do their verified specs compare (power handling, sensitivity, impedance, drivers, dimensions, weight, weather rating, materials, mounting, warranty)?
Core verified specs summary: - Drivers: 5" Dynamic Balance polypropylene woofer + 0.75" anodized aluminum dome tweeter (both). - Frequency response: 60 Hz–25 kHz. - Sensitivity: 90 dB (1 W/1 m). - Nominal impedance: 8 Ω. - Recommended amp power: Atrium 5: 10–100 W per channel; Patio 200 listed RMS ~50 W/peak 100 W (archived). - Dimensions/weight: ~10.31" H × 6.75" W × 6.69–7.75" D; ~4.6 lb each. - Weathering: Polk “All‑Weather Certified” (marketing cites ASTM D5894, MIL‑STD‑810 and related tests). - Materials: mineral‑filled polypropylene cabinet, powder‑coated aluminum grille and mounting bracket. - Mounting: Speed‑Lock adjustable bracket (180° aim). - Warranty: Polk lists a 5‑year cabinet/driver warranty for the Atrium line. (Use the Atrium product page and archived Patio pages for exact model listings.)
Real‑world sound performance: what should homeowners expect (coverage, SPL, bass, pairing)?
Real-world notes: - Tonal character: clear midrange and detailed highs typical of Polk’s Dynamic Balance drivers; good presence for speech and music. - Bass: limited below ~60 Hz for a single 5" satellite—acceptable for background music, but add an outdoor sub (e.g., Atrium SUB100) for palpable low end. - SPL & dynamics: 90 dB sensitivity means good loudness with modest amplifiers; recommended 10–100 W gives headroom for peaks without distortion. - Coverage/placement: aim speakers ~30°–45° down toward the listening area for even coverage; a single pair covers small patios well; medium/large patios or pool areas usually need multiple pairs spaced to avoid dropouts. - Indoor vs open air vs covered patio: in covered/under‑eave installs you’ll get fuller perceived bass and better directivity; in open lawn/pool areas you’ll lose low end and need more speaker count and higher amplifier power or subwoofer support.
What are practical placement, spacing and pairing tips for patios and open yards?
Placement/spacing guidance: - Mount under eaves or on posts when possible; keep speakers aimed at listening zones, not directly across long open lawns. - Small patio (10–15 ft): one pair facing the primary seating works. - Medium patio (15–30 ft) or open area: use two pairs (front and rear or left/right pairs) spaced every ~12–20 ft to avoid coverage gaps. - Long runs: stagger and angle to reduce combing; avoid pointing at reflective glass without angling down. - Pairing: use a weatherproof outdoor sub or the Atrium SUB100 for bass; match amp power to recommended 10–100 W per channel and prioritize clean headroom over max RMS. - Wire gauge: 16 AWG up to ~50 ft, 14 AWG up to ~80 ft, 12 AWG for 100+ ft runs to limit loss.
How weatherproof are these speakers and what should I consider for climate extremes (salt‑air, UV, freeze/thaw)?
Weatherproofing summary: - Polk labels the Atrium line All‑Weather Certified and cites accelerated test standards (ASTM D5894, MIL‑STD‑810). That indicates resistance to salt, UV and moisture in accelerated lab tests but is not a lifetime guarantee. - Materials (polypropylene cabinet, powder‑coated aluminum grille) resist rot and corrosion better than standard indoor speakers. - Best practices by climate: For salt‑air/coastal installs, mount under eaves and rinse periodically with fresh water; check fasteners for corrosion annually. For high UV/sun exposure, add shade or UV‑resistant covers where possible. For freeze/thaw: avoid mounting where water can collect; store speakers indoors if you expect prolonged sub‑freezing conditions and heavy ice/snow exposure. - Long‑term durability: many owners report multiple years of service when installed under cover; continuous direct exposure reduces lifespan and may not be fully covered under damage from neglect.
Step‑by‑step DIY installation and wiring guidance (tools, fasteners, conduit, wire gauge, hookups)?
DIY installation steps: 1) Plan layout and measure run lengths—decide pair count and amp/sub location. 2) Choose wire gauge: 16 AWG ≤50 ft, 14 AWG ≤80 ft, 12 AWG >100 ft. 3) Run weather‑rated speaker cable (CL2/CL3 or outdoor‑rated) from amp location to each speaker; use conduit for buried or exposed runs. 4) Feed wire through the bracket hole before mounting (Polk manual). 5) Strip ~1/2" insulation, connect to gold‑plated 5‑way binding posts or banana/spade connectors per manual. 6) Secure bracket to structure with recommended fasteners (#10 into studs or proper anchors for masonry), use two fasteners where possible. 7) Aim speakers and tighten knobs; seal cable entry with silicone/foam gaskets if exposed. 8) Test at low volume, slowly raise; avoid distortion—if distortion occurs, back off volume or check amp gain/clipping. Tools/fasteners: drill, screwdrivers, appropriate masonry anchors, fish tape, silicone sealant. Conduit: use PVC or flexible conduit for buried or long exposed runs. Transformer/amp: home amps should be 10–100 W/channel (per Polk recommendation); for multiple pairs or long runs, size amplifier to drive total load—use one amp channel per pair or a 70V transformer/line amp if needing many speakers over long cable runs (choose outdoor-rated 70V amps or distributed audio solutions).