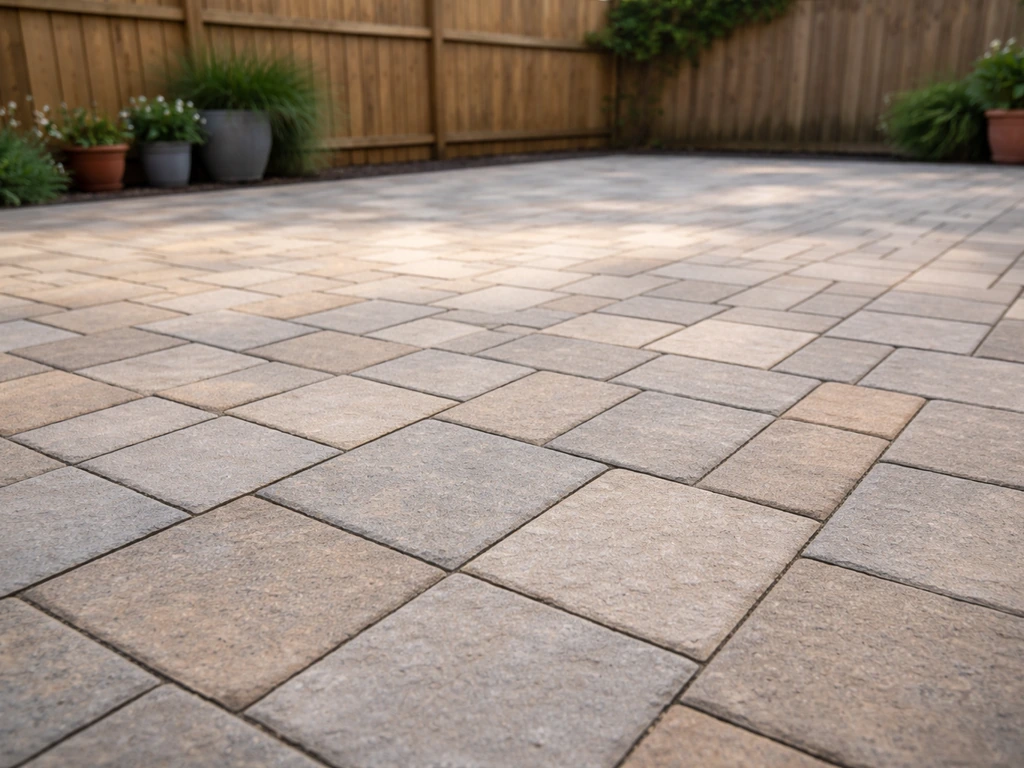
Concrete pavers are the best all-around surface for most outdoor patios. They drain well, stay cooler than solid concrete in hot climates, hold up through freeze-thaw cycles better than poured slabs, and when one cracks or stains you replace just that piece instead of patching an entire slab. That said, "best" really does depend on where you live, how you'll use the space, and how much upkeep you're willing to do.
Best Surface for Outdoor Patio: Choose by Climate and Use

Elise Prescott
29 Apr 2026
Stamped concrete wins on upfront cost if you want a premium look without the paver price tag. Natural stone is hard to beat aesthetically but demands a bigger budget and more careful installation. Gravel and decomposed granite are the easiest DIY options but the worst for bare feet and furniture stability. The guide below walks through every mainstream option so you can match the right material to your actual situation.
How to choose the best surface for your weather and use
Before you fall in love with a material on Pinterest, answer four questions: What does your climate throw at you? How will you actually use the space? How much maintenance will you realistically do? And what's your real budget, installed, not just material cost? Those answers will eliminate most options before you ever get a quote.
Climate is the biggest filter. If you're in Minnesota, Wisconsin, or anywhere with hard freeze-thaw cycles, poured concrete slabs are risky because water gets into micro-cracks, freezes, expands, and the slab heaves or spalls. [Freeze-thaw deterioration in concrete commonly shows up as scaling, map cracking, spalling](https://www. fhwa.
dot. gov/publications/research/infrastructure/pavements/pccp/01163/02. cfm), and other damage that often starts near joints and free edges where moisture is available. Pavers and brick handle frost much better because the individual units can move slightly and be reset.
In Texas, Arizona, or Southern California, heat retention is your enemy. Dark surfaces like charcoal concrete or certain natural stones can get so hot they're painful to walk on barefoot. In wet climates like the Pacific Northwest or the Southeast, slip resistance and drainage become the dominant concerns.
Use matters just as much. A patio where kids and dogs run around barefoot demands a surface that's forgiving, not too hot, and slip-resistant when wet. A grill station or outdoor kitchen area needs something that won't stain from grease drips, which rules out unfinished natural stone and unsealed pavers without a good topcoat. Heavy furniture, especially cast iron or concrete-topped tables, does best on a firm, level surface like concrete or set pavers, not gravel. If you're entertaining regularly, aesthetics and a smooth surface for chairs dragging across matter more than they would for a utilitarian BBQ pad.
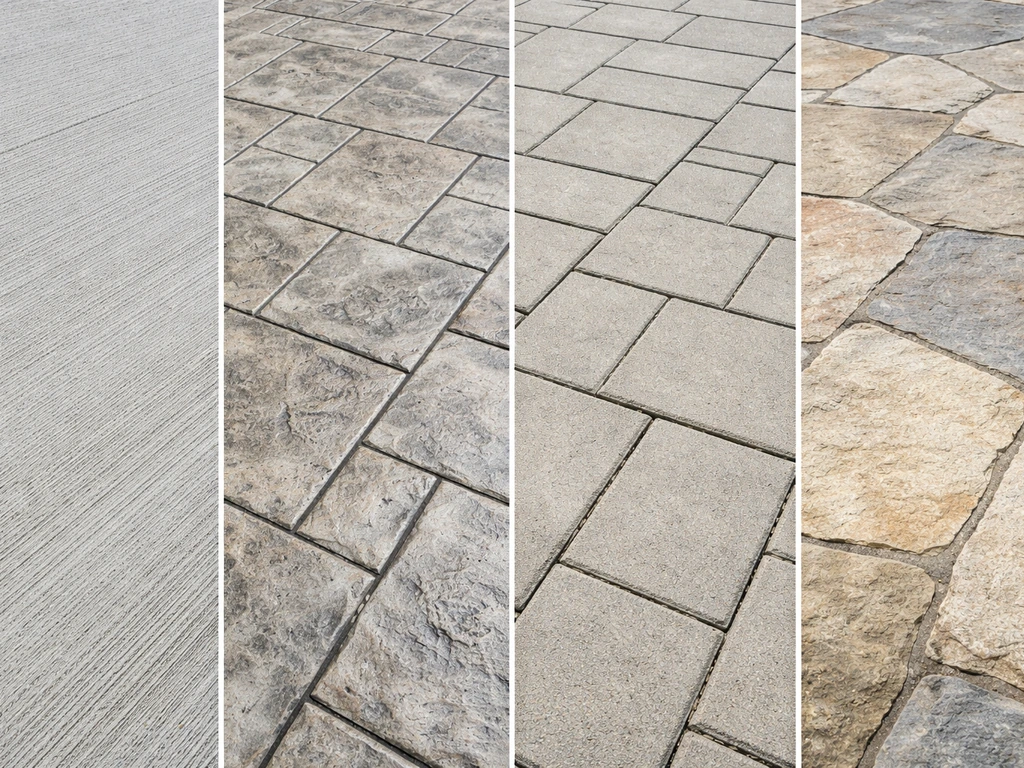
Top patio surface options: the real tradeoffs
Poured concrete
Poured concrete is the most common patio surface in the US for a reason: it's relatively affordable installed, it's durable when done right, and it gives you a flat, firm platform for furniture. A standard broom-finished slab runs roughly $6 to $10 per square foot installed depending on your region. The broom finish adds texture that improves slip resistance. The catch is that poured concrete is basically permanent.
When it cracks, and it will eventually crack, you repair the slab or live with it. In freeze-thaw climates, that's a near certainty within 10 to 15 years without proper base prep and control joints. It also retains heat: a south-facing concrete slab in Texas in July is not somewhere you want to walk barefoot at 3pm.
Stamped concrete
Stamped concrete gives you the look of pavers, brick, or stone at a lower material cost, typically $12 to $20 per square foot installed. It looks genuinely good when done by a skilled contractor. The downside is that it's still a monolithic slab, so all the crack and frost-heave risks of plain concrete still apply. The textured surface can be harder to clean than smooth concrete, and the color fades over time without resealing every two to three years. If you're in a wet or shady climate, the textured surface can also harbor algae and get slippery. It's a great pick in mild, dry climates where you want a high-end look without paying for real pavers or stone.
Concrete pavers
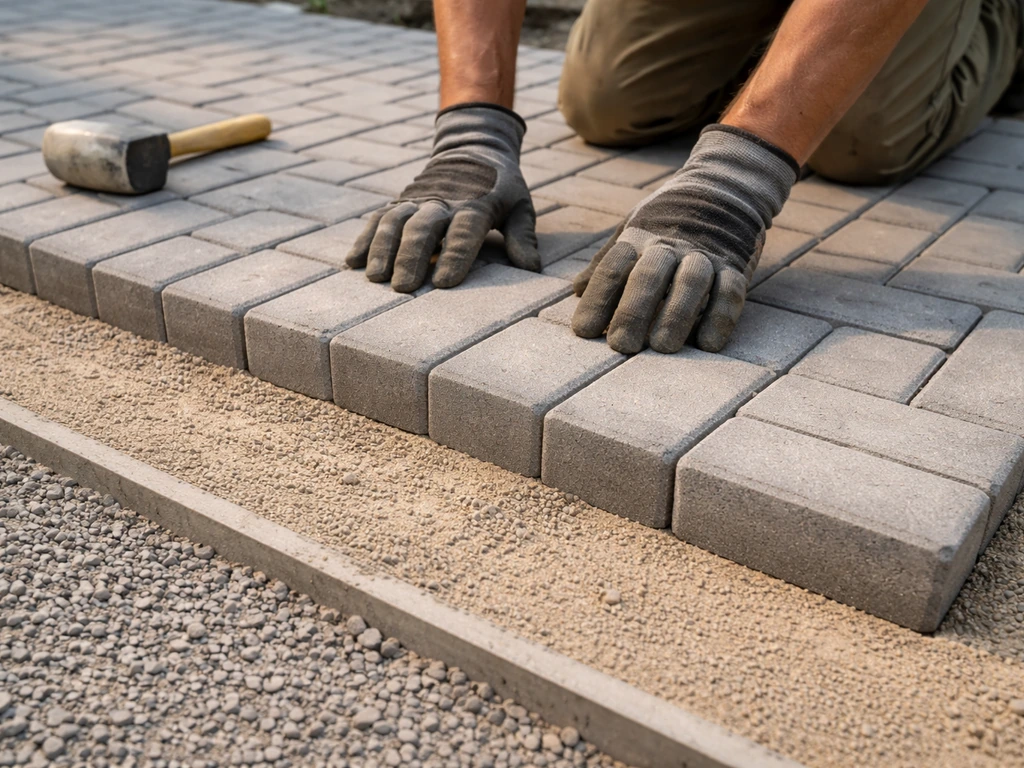
Concrete pavers are the most versatile choice for most homeowners. They're installed on a compacted gravel base with a sand setting bed, which means they flex slightly with ground movement instead of cracking. If one unit cracks or stains badly, you pull it out and replace just that piece. They're available in dozens of colors, textures, and sizes.
Installed costs run from about $10 to $20 per square foot depending on complexity and pattern. They do require jointing sand maintenance and occasional re-leveling in areas with poor drainage or active soil, but overall they're among the most repair-friendly surfaces you can pick. Permeable paver systems (with wider, gravel-filled joints) also handle drainage elegantly, which is a real advantage if you're dealing with runoff or have a patio cover that concentrates water.
The ASCE/T&DI/ICPI 68-18 standard (Permeable Interlocking Concrete Pavement) provides design, construction, and maintenance guidance for PICP systems to meet stormwater management goals while accommodating anticipated vehicular loading Permeable paver systems (with wider, gravel-filled joints) also handle drainage elegantly, which is a real advantage if you're dealing with runoff or have a patio cover that concentrates water. .
Brick
Brick is timeless, and clay pavers specifically have excellent durability, though they're harder to find in some regions than they used to be. Traditional brick patios are typically set in sand, similar to concrete pavers, so they share the same repair advantages. Brick does get slippery when wet and mossy in shady, damp climates, so plan for regular cleaning or a penetrating sealer. The natural color variation in clay brick actually hides dirt and stains well, which is a practical advantage most people don't think about until they've had a light-colored concrete paver patio for a few years.
Natural stone
Bluestone, flagstone, travertine, slate, and quartzite all fall into this category. Natural stone is the premium option aesthetically and price-wise, typically $20 to $35+ per square foot installed for quality material and professional setting. Travertine is a popular choice in warm climates because its porous surface stays relatively cool underfoot. Slate and bluestone can be slippery when wet if they don't have a honed or textured finish.
Natural stone generally needs to be sealed to resist staining, especially around food and grill areas. In freeze-thaw climates, porous stones like travertine or certain flagstones can absorb water, freeze, and spall without proper sealing. If your patio is adjacent to a pool, stone choices overlap with what works for pool surrounds, which is worth thinking through together.
Porcelain tile
Outdoor porcelain pavers are having a real moment right now, and they deserve it. Large-format porcelain (often 24x24 inches or 24x48 inches) looks stunning, resists staining extremely well because the surface is essentially non-porous, and doesn't need sealing. For slip resistance, look for tiles with a wet DCOF (Dynamic Coefficient of Friction) of at least 0. 42, which is the threshold referenced by ANSI A137.
1 for wet floor surfaces. Exterior use needs a higher rating than interior, so specifically ask for tiles rated for exterior wet areas under ANSI A326. 3. The downsides: installation is more demanding (requires a perfectly flat, stable base and proper mortar), and cracked tiles in the middle of a large-format installation can be hard to match and replace later.
Installed costs are typically $15 to $30+ per square foot.
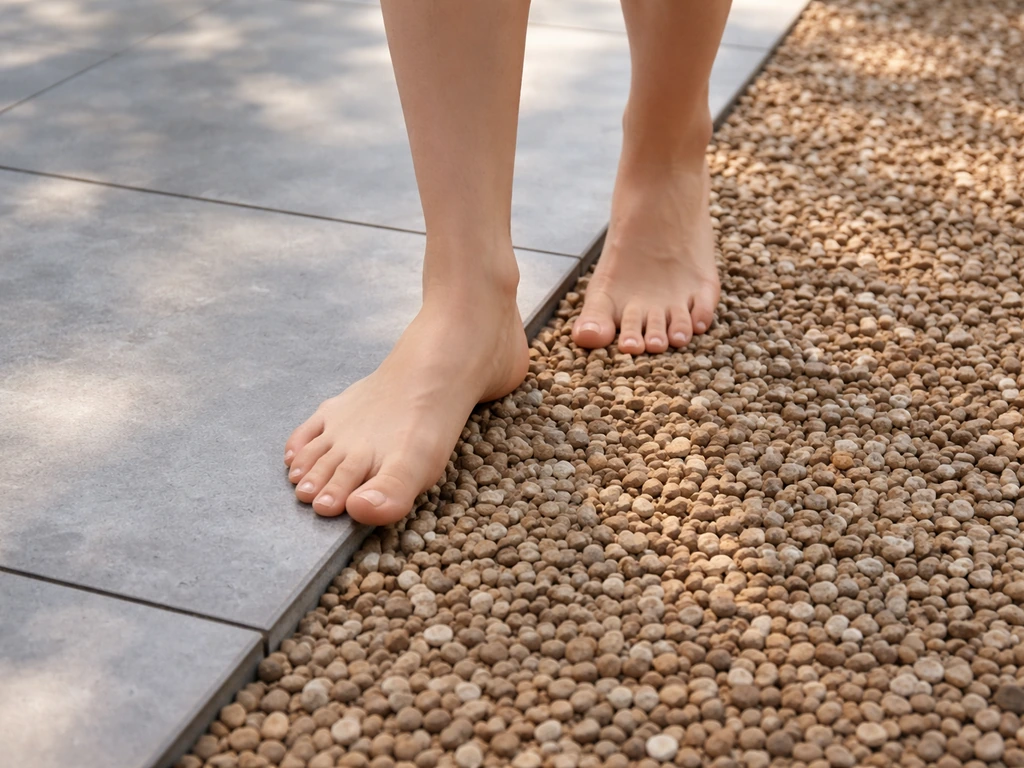
Gravel and pea stone
Gravel and pea stone are the easiest DIY patio surfaces by a wide margin. You excavate, lay landscape fabric, edge it, and spread 3 to 4 inches of gravel. Material cost is often $1 to $3 per square foot. The real-world problems: furniture legs sink in unless you use wide-foot furniture pads or composite deck tiles on top, rocks track into the house, and walking barefoot is uncomfortable for most people. Pea gravel works beautifully as a filler between stepping stones or as a low-use pathway, but as a primary entertaining surface for chairs and tables it's frustrating. It's genuinely better as a zone of the patio rather than the whole thing.
Decomposed granite (DG)
Decomposed granite is popular in the Southwest and California because it looks natural, drains well, and is cheap to install. Stabilized DG (with a binder added) is firmer and tracks less than loose DG. It works reasonably well for low-traffic patios in dry climates and holds up poorly in wet climates where it erodes and gets muddy. It's not a good surface for outdoor dining furniture unless you're using wide-base pieces. Cost is typically $1 to $4 per square foot for stabilized DG installed.
Wood and composite decking
Decking is technically a different structure than a patio surface (it's elevated, requires framing), but it's worth including because many homeowners choose it as an alternative to a ground-level patio. Composite decking like Trex stays cooler than concrete in summer because the material has lower thermal mass, though dark-colored composite boards still get warm. Proper board gapping is critical for drainage and expansion management. Composite decking requires minimal maintenance compared to natural wood, which needs annual sealing and periodic sanding. For ground-level applications, composite deck tiles over a flat surface offer a DIY-friendly way to cover existing concrete or transform an outdoor space quickly without major construction.
Outdoor rugs and mat systems
Outdoor rugs over an existing hard surface are the most affordable instant upgrade. They add comfort underfoot, define zones, and can tie a space together visually. The practical issues: they trap moisture underneath if not moved regularly, which can lead to mold or staining on the underlying surface. In wet climates, rugs need to be brought in or elevated to dry. They're not a substitute for a real patio surface, but they're a great complement. Modular deck tiles and snap-together mat systems work similarly and offer more durability.
| Surface | Best For | Frost-Thaw | Heat Retention | DIY Friendly | Installed Cost/sq ft |
|---|---|---|---|---|---|
| Poured Concrete | Budget builds, flat lots | Moderate risk | High | No | $6–$10 |
| Stamped Concrete | Premium look, mild climates | Moderate risk | High | No | $12–$20 |
| Concrete Pavers | Most climates, repair-friendly | Low risk | Moderate | Intermediate | $10–$20 |
| Brick (clay pavers) | Traditional look, durability | Low risk | Moderate | Intermediate | $12–$20 |
| Natural Stone | Premium aesthetics | Varies by stone | Moderate–High | No | $20–$35+ |
| Porcelain Tile | Low maintenance, modern look | Low risk (thick format) | Moderate | No | $15–$30+ |
| Gravel/Pea Stone | Low-use areas, DIY | No risk | Low | Yes | $1–$3 |
| Decomposed Granite | Dry climates, naturalistic | No risk | Low | Yes | $1–$4 |
| Composite Decking | Elevated structures, comfort | Low risk | Low–Moderate | Intermediate | $15–$30+ |
Slip resistance, comfort, and heat: what it actually feels like underfoot
This is the section that gets skipped in most patio guides, and it's the one that matters most if you're barefoot, have kids running around, or live somewhere that gets summer-hot surfaces. The three things to evaluate for any surface are slip resistance when wet, comfort underfoot (texture, temperature, hardness), and heat absorption.
Slip resistance
For hard surfaces, the relevant standard is DCOF (Dynamic Coefficient of Friction) as tested under ANSI A326.3. A wet DCOF of 0.42 or higher is the minimum for level interior wet areas per ANSI A137.1, and exterior wet surfaces should be rated even higher. When you're shopping tile or porcelain pavers, ask specifically for the wet DCOF rating and confirm it's suitable for exterior use. Broom-finished concrete, textured concrete pavers, and tumbled or sandblasted stone all perform well for slip resistance. Polished stone, glazed tile, and smooth concrete are the worst offenders when wet. If you live somewhere with frequent rain or are covering an area that gets misting system overspray or irrigation runoff, texture is non-negotiable.
Heat retention and surface temperature
Dark surfaces absorb more solar radiation and re-emit it as heat, which is why a charcoal concrete patio in Phoenix is genuinely dangerous to walk on barefoot at midday. Research on cool pavements points to two main strategies for managing this: high-albedo (light-colored, reflective) surfaces that reject more sunlight, and permeable or porous surfaces that use evaporative cooling. Travertine and light-colored concrete pavers stay meaningfully cooler than dark concrete.
Permeable paver systems can help when moist, but research notes they can actually run hotter than impermeable surfaces during dry periods when there's no moisture to evaporate. The practical takeaway: in hot climates, choose the lightest color you can tolerate aesthetically, and consider a pergola or patio cover over the surface as a paired strategy. A misting system overhead also drops perceived ambient temperature dramatically and helps keep the surface itself cooler.
Comfort underfoot
Comfort goes beyond temperature. Gravel and DG are hard on bare feet. Smooth concrete is cold in winter and hard on joints if you're standing for long periods grilling. Composite decking has some give to it. Brick and pavers with sand joints have very slight flex that makes them more comfortable for long periods of standing than a rigid concrete slab. If you're building a space where people will be standing around a bar or cooking area for hours, that slight give matters more than you'd expect.
Drainage, base prep, and preventing weeds and settlement
The single most common reason patios fail early, whether they crack, heave, settle unevenly, or grow weeds constantly, is inadequate base preparation. The actual surface material is almost secondary. Get the base wrong and no surface will perform well long-term.
Slope and drainage
Every exterior hard surface needs to slope away from your house to drain water. ACI 302.1R recommends a minimum 2% slope (1/4 inch per foot) for exterior concrete slabs, and that's the standard most contractors and inspectors reference for patios in general. In practice, slope your patio so water flows toward the yard or a designated drainage point rather than pooling near your foundation. If your lot is flat or slopes toward the house, you need a drainage solution (channel drain, French drain, or permeable surface) designed in from the start, not added as an afterthought.
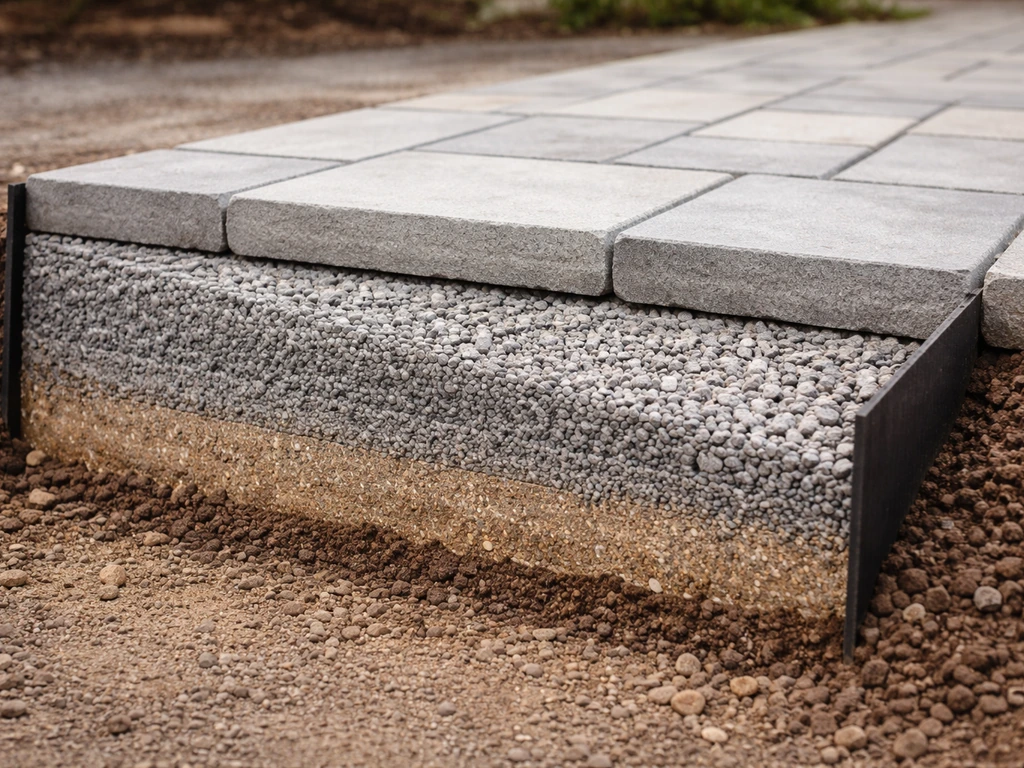
Base and subbase
For pavers and brick, the standard system is: compacted subgrade, 4 to 6 inches of compacted crushed gravel base (more in freeze-thaw climates, sometimes 8 to 12 inches), 1 inch of bedding sand, and then the paver. ICPI installation guidelines are the industry reference here. The gravel base is what handles frost movement and drainage. Skimping on it to save money is the single most expensive shortcut in patio construction because you'll be re-leveling or re-setting pavers within a few years. Geotextile fabric between the subgrade and gravel base helps prevent fines migration and base contamination over time.
Weed control
Weeds in paver joints are one of the biggest complaints homeowners have. Polymeric sand (joint sand with a binder) dramatically reduces weed germination in joints compared to regular sand and also resists ant nesting and erosion. It's worth using from day one. For gravel and DG patios, a quality woven geotextile fabric under the material controls weeds effectively but doesn't eliminate them entirely because wind-blown soil accumulates on top over time. Nothing is completely weed-proof, but polymer sand in pavers and geotextile under loose materials are the two most effective practical tools.
Edging
Edge restraints for paver systems are critical and frequently skipped by inexperienced installers. Without a solid edge, pavers migrate outward over time, joints open up, and the whole field becomes uneven. Plastic paver edging spiked into the base, concrete edging, or existing structures like a house foundation or retaining wall all work. This is a detail that separates a 10-year patio from a 30-year one.
Maintenance, sealing, repairs, and what it all actually costs over time
Homeowners consistently underestimate long-term maintenance costs when choosing a patio surface. The material with the lowest install cost often has the highest ongoing cost, and vice versa. Here's what each main category actually demands.
Sealing: when you need it and when you don't
Poured concrete and stamped concrete should generally be sealed to protect color, resist staining, and reduce dusting. Acrylic membrane sealers need reapplication every one to three years depending on traffic and UV exposure. Penetrating sealers (silane/siloxane chemistry) last longer and don't change the surface appearance, but they don't add the wet-look sheen some people want on stamped concrete. Natural stone, especially porous types like travertine and certain sandstones, needs sealing to resist staining and freeze damage.
Porcelain tile generally doesn't need sealing because the surface is non-porous. Concrete pavers are optional: sealing enhances color and can lock in polymeric sand, but many well-installed paver patios go years without sealing and perform fine. The practical guideline: reseal when water no longer beads on the surface or when staining becomes more difficult to remove.
Repairs
Pavers and brick win on repairability, full stop. Cracked unit? Pull it and replace it. Settled area? Re-excavate, add base material, reset. Concrete slabs are significantly harder to repair cleanly. Cracks can be routed and filled but are rarely invisible. Major heaving typically requires saw-cutting and replacing sections. Stamped and colored concrete repairs almost always show because matching the original color and texture exactly is nearly impossible. Natural stone repairs depend on the stone: common stones like bluestone are usually available for matching; unusual or discontinued stones can leave you with a visible patch. Porcelain tile matching is the hardest repair scenario, especially with large-format tiles that may be discontinued.
Long-term cost reality
A poured concrete slab might cost $7 per square foot installed and last 15 to 20 years before major crack issues develop. Pavers cost $15 per square foot installed but can realistically last 30 to 50 years with joint sand maintenance and occasional re-leveling. Natural stone at $25 per square foot installed can last indefinitely with proper sealing. Gravel at $2 per square foot needs topping up every few years. When you look at a 20-year window, mid-to-high quality pavers often beat concrete on total cost when you factor in repair and replacement. Porcelain tile, when properly installed, also has excellent long-term economics because it needs almost no maintenance.
DIY vs. hiring a pro: where the line really is
Some of this work is genuinely DIY-accessible for a motivated homeowner with the right tools. Some of it really isn't, and getting it wrong is expensive to fix.
Good DIY candidates
- Gravel or pea stone patio installation (excavate, fabric, edge, spread, compact)
- Decomposed granite with stabilizer on a flat site with good natural drainage
- Concrete paver installation on a small to medium flat patio where you can rent a plate compactor
- Outdoor deck tiles or snap-together modular surfaces over existing concrete
- Outdoor rug installation and zone definition over existing hard surfaces
Hire a pro for these
- Poured concrete: getting consistent slope, control joint placement, and finish right requires experience; a bad pour is very expensive to fix
- Stamped or colored concrete: timing and technique on stamping is unforgiving; mismatched color is common with DIY attempts
- Large natural stone or large-format porcelain tile: setting these level and flat requires professional equipment and experience; lippage (tile edges that don't align) is a trip hazard and looks terrible
- Any patio with drainage challenges: grading and drainage engineering is where amateur mistakes create foundation and flooding problems
- Patios over 300 to 400 square feet with complex patterns or slopes
What to ask contractors
Ask specifically about base depth and compaction specifications, what they use for edge restraints, whether they use polymeric sand, what slope they'll provide for drainage, and whether they pull a permit if required in your jurisdiction. A contractor who can't answer those questions clearly is a red flag. Also ask whether the surface you're choosing is compatible with any patio covers, misting systems, or fans you're planning to add. For example, a misting system overhead that cycles on and off will keep a patio surface consistently damp, which affects slip resistance planning and sealer durability. A patio cover changes drying dynamics, so drainage design under a covered area is different from an open patio.
Quick decision guide by budget, climate, and style
Use this as a shortcut to narrow your options before diving deeper into any specific material.
| Situation | Best Surface Pick | Runner-Up |
|---|---|---|
| Tight budget, any climate | Poured concrete (broom finish) | Gravel with stepping stones |
| Best value long-term | Concrete pavers | Brick |
| Hot climate, barefoot use | Light travertine or light concrete pavers | Light porcelain tile |
| Freeze-thaw climate | Concrete pavers (deep base) | Brick on sand |
| Wet/rainy climate | Textured concrete pavers or porcelain tile (high DCOF) | Broom concrete with good slope |
| Low maintenance forever | Porcelain tile | Concrete pavers with polymeric sand |
| Premium look, any climate | Natural stone (bluestone/travertine) or large-format porcelain | Stamped concrete |
| Kids and pets, barefoot | Light concrete pavers (tumbled or textured) | Composite deck tiles over existing slab |
| DIY only, no contractors | Gravel, DG (dry climates), or concrete paver kit | Snap-together deck tiles |
| Outdoor kitchen/grill area | Concrete pavers or porcelain tile (sealed, stain resistant) | Poured concrete (sealed) |
If you're still torn between two options after working through that grid, the tiebreaker is usually repairability. The surface that lets you fix a problem area without replacing the whole patio is almost always the smarter long-term call. That's why concrete pavers end up as the default recommendation for most homeowners who aren't locked in by budget or a specific aesthetic goal.
They're not the most beautiful option or the cheapest option, but they handle the widest range of climates, uses, and future changes gracefully. From there, you can explore related considerations like the best outdoor floor tile options for a more finished look, how pool patio surfaces compare if your patio is adjacent to water, or alternative flooring ideas if you're working over an existing slab and want to avoid a full demo.
Alternative patio flooring can give you the same functional benefits as pavers while matching your climate, style, and maintenance goals. For a more finished look, you can also explore the best outdoor patio floor tiles that match your climate, slip needs, and maintenance preferences. If your patio is adjacent to a pool, choosing the right surface matters for comfort and slip resistance pool patio surfaces. Getting the surface right is the foundation.
Everything else, the cover, the fans, the misting system, works better when the surface underneath is solid, drains properly, and was built to last.
FAQ
What is the best surface for an outdoor patio if I want minimal long-term headaches but still want furniture that doesn’t wobble?
Choose concrete pavers or brick set in sand on a properly compacted base. They provide a firm, level surface for heavy tables, have good repairability, and avoid the sinking and shifting you get with gravel or loose DG. The key detail is using the right base depth for your climate, so the surface stays level enough for furniture year after year.
Can I use polymeric sand or paving sand for any patio surface, or only for pavers?
Polymeric sand is specifically for paver and brick jointing. It is not a substitute for a proper base or bedding layer, and it generally should not be used under loose gravel or DG as a stabilizer. If you’re considering pavers, confirm the contractor will specify polymeric sand (and the correct joint fill setup), since weed control and joint stability depend on it.
What should I do if my patio is on a slope or my yard drains toward my house?
Plan drainage and slope design from the start, not as an afterthought. For concrete slabs, aim for at least about 2% slope away from the home, then direct runoff to a drainage outlet (channel, French drain, or a planned permeable area). If the lot drains toward the house, you may need perimeter drainage or a redesigned flow path even if you choose a “best” surface.
Is sealing always necessary for patio surfaces?
Not always, but many surfaces benefit from it depending on porosity. Concrete pavers are often optional, while poured or stamped concrete usually needs periodic sealing to manage staining and dusting. Porous natural stone generally requires sealing, especially near food and grill areas. A practical test is watching how water behaves on the surface, if it stops beading and stains spread faster, resealing is overdue.
How do I choose between light and dark pavers or stone in a hot climate?
In very hot regions, prioritize the lightest color you can reasonably tolerate aesthetically, because color strongly affects surface temperatures. If you want a darker look, pair it with a shade strategy like a pergola or patio cover and consider a surface with evaporative or permeable behavior. Also confirm your slip rating for wet conditions, because texture that helps slip can change how cleaning works.
What’s the best surface for kids playing barefoot, especially if it rains often?
Look for slip-resistant texture and comfortable underfoot feel, broom-finished concrete, textured pavers, or properly finished stone are usually better than polished stone, glazed tile, or smooth concrete. Also consider comfort seasonally, smooth concrete can feel cold in winter and gravel or DG can be harsh on feet. The practical approach is choosing a surface with an appropriate wet slip rating and then adding shade if summer heat is a concern.
Are outdoor rugs a good substitute for choosing the right patio surface?
Rugs are a helpful comfort upgrade but not a replacement for a properly designed patio surface. They can trap moisture underneath and lead to staining or mold if they stay damp. In wet climates, plan to remove, elevate, or move rugs often enough to keep the underlying surface dry and reduce long-term damage.
What wet slip rating should I look for if I’m shopping porcelain pavers or outdoor tile?
When the product is intended for exterior wet use, ask for the wet DCOF value and confirm it is rated for exterior conditions. Do not rely on interior ratings, and do not assume all tiles labeled “outdoor” meet the same wet slip requirements. For large-format installations, also confirm the installation method and base flatness requirements, because cracks and unevenness can be harder to correct.
How important is base preparation, and can a contractor “fix it later” if the patio settles?
Base preparation is the difference between a long-lasting patio and one that settles, heaves, or weeds constantly. If the base depth, compaction, or drainage slope is wrong, you will usually pay later with re-leveling, joint failure, or repeated repairs. “Fix later” typically means re-excavating and rebuilding sections, which is far more expensive than doing base work correctly upfront.
What’s the easiest patio surface to repair if I expect future damage or want the option to replace sections?
Pavers and brick are the simplest to repair because you can lift out a single damaged unit and re-set it. Concrete slabs can be patched, but matching texture and color is difficult, and major heaving usually requires replacing larger sections. For best results, maintain the jointing system (like polymeric sand where used) so future spots are easier to stabilize.
If I’m installing a patio near a pool, what should I prioritize besides looks?
Slip resistance and drainage. Poolside areas tend to stay wet or experience splashing, so choose a surface that is appropriately textured and rated for wet conditions, and avoid smooth or glazed finishes. Also consider comfort, stone and pavers can differ in heat retention, so color and shade matter for barefoot use.