
The best Wi-Fi extender for a patio depends on how far your router is from the patio, what materials are in the way, and what you plan to run outside. For most homeowners with a patio within 50 feet of the house and no metal or masonry walls blocking the signal, a good outdoor-rated Wi-Fi extender like the TP-Link RE315 or Netgear EX6400 handles streaming audio and casual browsing without issue. If you want to run a 4K outdoor TV, a projector, or a full set of smart patio devices simultaneously, a dedicated outdoor mesh node with a wired Ethernet backhaul is the right call. This guide walks through every option so you can pick the one that actually fits your patio.
Best WiFi Extender for Patio: Top Picks & Installation Guide

Elise Prescott
21 Jul 2026
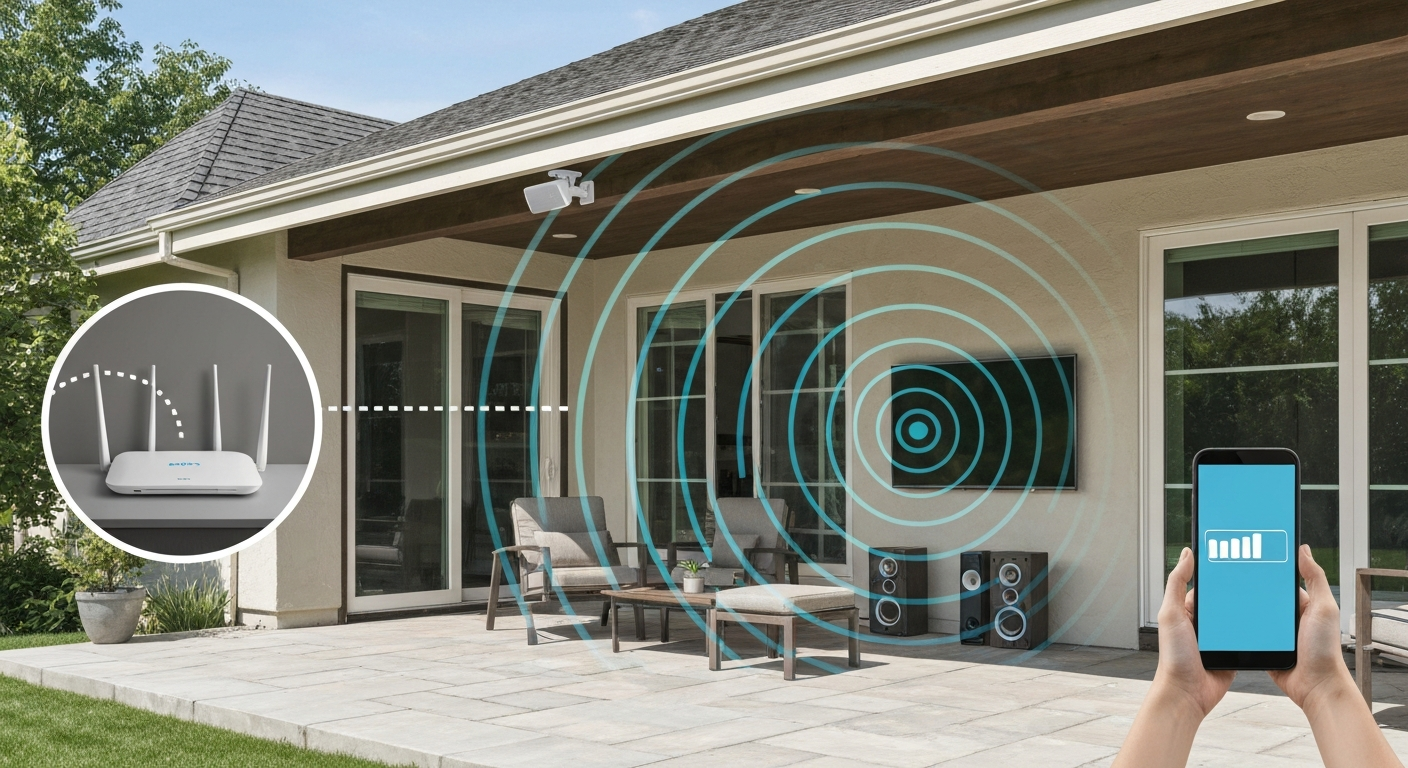
Who this is for and what you will get
This guide is written for homeowners who are tired of their phone dropping signal the moment they step onto the patio. Whether you are a DIYer who wants to run a cable and mount a device yourself, or someone thinking about hiring an installer, this article covers every realistic approach: outdoor-rated extenders you can plug in yourself, mesh nodes you can wire up for serious performance, and everything in between. You will come away knowing which extender type matches your setup, how to place and mount it, what accessories you actually need, and how to test that the connection is solid before you hang a TV or buy outdoor speakers.
Why patio Wi-Fi keeps failing
Before you buy anything, it helps to understand why patio Wi-Fi tends to be so frustrating. Your home router was designed to cover indoor spaces, and every wall, window, and ceiling it passes through bleeds signal. By the time that signal fights its way to an exterior wall and then across an open patio, you can lose 20 to 40 dB or more depending on construction materials. That translates directly into dropped throughput and patchy coverage.
Materials are the biggest culprit most people overlook. Single-pane glass causes roughly 3 to 4 dB of loss at 2.4 GHz and up to 6 dB at 5 GHz. Low-E glass, which is standard in most homes built after 2000, can cause 20 to 30 dB of loss at 5 GHz because of the metallic coating, essentially forming a near-total barrier for higher frequencies. See the measurements in "Wideband Penetration Loss through Building Materials and Partitions at 6.75 GHz in FR1(C) and 16.95 GHz in the FR3 Upper Mid-band spectrum (arXiv)" for empirical attenuation values of common building materials to inform these dB estimates. Brick veneer adds another 8 to 15 dB, stucco over metal lath can hit 20 dB, and poured concrete is even worse. If your router is on the far side of the house from the patio and the signal has to pass through a stucco exterior wall, you may be working with almost no usable 5 GHz signal at all.
Range and layout compound the problem. A 2.4 GHz signal travels farther than 5 GHz and penetrates materials better, but it tops out around 100 to 150 Mbps of real-world throughput with modern Wi-Fi 5 hardware, and the band is congested in dense neighborhoods. The 5 GHz band offers more throughput but drops off sharply beyond 50 to 75 feet in open air, faster when obstructions are involved. Foliage is also more of a factor than most people realize: a mature hedge or dense pergola overhang can knock 5 to 10 dB off a 5 GHz link, especially when wet.
Interference is the third leg of this problem. Neighboring routers, baby monitors, cordless phones, microwave ovens, and older Zigbee smart devices all compete in the 2.4 GHz band. A spectrum scan of most suburban patios shows a half-dozen overlapping networks on channels 1, 6, and 11. Even if your signal level looks acceptable, a high noise floor can make the connection unreliable for streaming.
Buying criteria: how to choose the right extender
Use this decision flow before you shop. Answer each question in order and the right extender type becomes obvious.
- How far is your router from the patio edge? Under 30 feet: almost any extender works. 30 to 75 feet: you need at least dual-band AC1200 or better, ideally placed on the interior wall closest to the patio. Over 75 feet or with a masonry/metal wall in the path: go straight to a wired Ethernet run to an outdoor access point or a mesh node.
- What materials are between the router and the patio? If it is standard wood-frame siding or vinyl, a wireless approach is viable. Low-E glass, brick, stucco over lath, or concrete means a wireless-only extender will underperform unless it is placed on the interior side of that wall, inches from the exterior.
- What bandwidth do you actually need? Basic browsing and a Bluetooth speaker companion: 25 Mbps is enough. Streaming one HD audio source: 10 to 25 Mbps. One 1080p outdoor TV or projector: 25 Mbps minimum, 50 Mbps preferred. One 4K stream: 25 to 50 Mbps per stream from a stable 5 GHz or 6 GHz link. Multiple devices simultaneously: budget 50 to 100 Mbps aggregate and plan for a wired backhaul.
- Do you have outdoor power near the patio? If yes, an outdoor-rated extender that plugs into a GFCI outlet is simple to install. If no, a PoE-powered outdoor access point fed by a cable from inside is a cleaner solution and avoids running new electrical.
- Are you comfortable running a cable? A 50-foot Cat6 run through a wall is a weekend DIY job with the right tools. If that sounds like too much, a plug-in extender or a tri-band mesh node with a dedicated wireless backhaul is the practical alternative.
- What is your security posture? Any extender or access point you put outdoors should support WPA3, let you create a separate guest SSID, and allow you to disable WPS. Check the vendor firmware update history before buying: devices that have not received a security update in over a year are a real risk on a network-connected outdoor patio.
The five extender types: what each one does and where it falls short
Outdoor-rated Wi-Fi extenders
These are purpose-built devices rated IP65 or higher that you mount outside and plug into a weatherproof GFCI outlet. They connect back to your main router over Wi-Fi (the wireless backhaul) and rebroadcast a new or extended SSID on the other side. Popular examples include the TP-Link RE315 (IP65, AC1200) and the Netgear EX6400 when used in an outdoor-rated enclosure. The appeal is simplicity: no cable run, no new wall penetrations, and setup takes about 15 minutes. The catch is the wireless backhaul. Because the extender is sharing the same radio for both its uplink to the router and its downlink to your devices, you lose roughly half of available bandwidth in the relay. At 25 feet from the router through a single interior wall, you might get 80 to 120 Mbps to a phone on the patio. That is fine for audio streaming or a single HD video source but starts to feel thin with multiple devices or a 4K stream.
Indoor extenders placed near the patio
If you have an interior outlet on the wall that backs up to the patio, a standard indoor extender plugged in there can work surprisingly well. The signal only has to pass through one layer of drywall and siding to reach the patio, which is a much shorter path than crossing an entire house. This is a budget-friendly approach: you can use a $30 to $50 dual-band extender and get decent coverage for a smaller patio. The downsides are aesthetic (a device hanging inside a dining room or living room) and durability if the weather somehow reaches it, which it will not unless you have a screened porch with poor seals. It also does nothing for patios that are far from any interior wall.
Mesh nodes
A satellite node from a mesh system like Eero Pro, Google Nest WiFi Pro, or TP-Link Deco placed near or outside the patio gives you the same SSID and seamless roaming as your indoor network. Tri-band mesh systems dedicate one radio entirely to the backhaul link between nodes, which is the key advantage over traditional extenders: your patio devices get the full bandwidth of the downlink radio without competing with the backhaul. In testing, a tri-band mesh node placed 40 to 50 feet from the primary router over a clean 5 GHz or 6 GHz backhaul can sustain 250 to 400 Mbps to connected clients. Some mesh nodes, like the Eero Pro 6E, are rated for indoor use only, so they need a weatherproof enclosure or placement in a protected soffit if used outside. Others, like the TP-Link Deco XE75 Pro, come in models explicitly rated for outdoor installation. Wiring a mesh node back to the router via Ethernet is the single biggest performance upgrade you can make, covered below.
Powerline adapters
Powerline adapters send your network signal over your home's electrical wiring. You plug one adapter near the router and connect it via Ethernet, then plug a second adapter in a far outlet and connect a device or a secondary access point. On paper this sounds ideal for patios: no cable run, uses existing infrastructure. In practice, powerline performance is highly variable. If the two outlets are on the same electrical circuit, you might see 200 to 300 Mbps. If they are on different circuits on opposite sides of your main panel, throughput can drop to 20 to 50 Mbps or worse. Electrical noise from LED dimmers, HVAC compressors, and variable-speed motors degrades powerline more than anything. Outdoor GFCI circuits are typically isolated, which adds another bottleneck. I would not rely on powerline as a primary patio backhaul unless you have tested it first, and I would not use it for 4K video or latency-sensitive applications.
Wired Ethernet run to an outdoor access point
This is the best-performing and most reliable option, and it is what I recommend for anyone who wants to stream outdoor TV, run a projector, or power a multi-speaker audio setup on the patio. You run a direct-burial or conduit-protected Cat6 cable from your router or a PoE switch inside the house to a weatherproof outdoor access point (AP) mounted on the eave, fascia, or a post. The AP gets both power and data from a single cable via Power over Ethernet (PoE). There is no wireless backhaul penalty, no signal degradation from relay, and the AP can deliver full throughput to every device on the patio. The Ubiquiti UniFi U6 Mesh, TP-Link EAP670 Outdoor, and Netgear WAX630E are all solid choices. The upfront effort is higher, but so is the outcome.
| Type | Best for | Max real throughput | Weatherproof? | Backhaul | DIY difficulty |
|---|---|---|---|---|---|
| Outdoor-rated extender | Small patios, basic streaming | 80-150 Mbps | Yes (IP65+) | Wireless (shared) | Easy |
| Indoor extender near patio | Budget installs, smaller patios | 50-120 Mbps | No | Wireless (shared) | Very easy |
| Tri-band mesh node | Medium to large patios, multiple devices | 200-400 Mbps | Depends on model | Wireless dedicated or wired | Moderate |
| Powerline adapter + AP | Apartments, condos, no cable route | 50-250 Mbps (varies) | No (needs enclosure) | Electrical wiring | Moderate |
| Wired Ethernet to outdoor AP | Outdoor TV, projectors, heavy load | 400-1000+ Mbps | Yes (IP67/NEMA 4X) | Wired (full speed) | Hard (cable run) |
Matching range, bands, and throughput to what you are actually doing outside
Different patio activities have very different demands. Streaming Spotify or Apple Music to a set of outdoor speakers needs less than 1 Mbps and tolerates a higher-latency 2. For playlist and track recommendations that pair well with outdoor speakers, see best patio music. 4 GHz connection just fine. Streaming lossless audio via services like Tidal HiFi or Amazon Music HD bumps that to 3 to 5 Mbps but still does not demand low latency. If you are using Wi-Fi-connected outdoor speakers or in-ceiling outdoor speakers that pull audio directly from the network, 2.4 GHz is perfectly acceptable and its longer range and better wall penetration actually work in your favor.
An outdoor TV or projector changes the equation significantly. A 1080p stream from Netflix or YouTube requires 5 to 25 Mbps with a consistent connection, meaning low packet loss matters more than raw speed. A 4K HDR stream from Netflix needs 25 Mbps and ideally 50 Mbps with headroom for buffering. 4K from a local media server can demand 50 to 100 Mbps depending on the codec. For any of these, you want 5 GHz or 6 GHz throughput with less than 5 ms of added latency from the extender, and you want packet loss under 0.1 percent. A wireless extender with a shared backhaul cannot reliably guarantee this at 75 feet or beyond. A wired-backhaul AP or a tri-band mesh node with a dedicated 6 GHz backhaul can.
Smart patio devices (smart plugs, landscape lighting controllers, outdoor security cameras, smart ceiling fans, patio misters with Wi-Fi controllers) are typically low-bandwidth but sometimes latency-sensitive. Most connect on 2.4 GHz. A single AP or extender covering the patio handles dozens of these devices without stress, but make sure the device you pick supports both 2.4 GHz and 5 GHz simultaneously, not one or the other, so you are not forcing high-bandwidth devices onto a congested 2.4 GHz band.
| Use case | Minimum bandwidth | Preferred bandwidth | Latency sensitivity | Recommended band |
|---|---|---|---|---|
| Music streaming (standard quality) | 1-3 Mbps | 10 Mbps | Low | 2.4 GHz OK |
| Lossless/hi-res audio streaming | 3-5 Mbps | 10 Mbps | Low | 2.4 GHz or 5 GHz |
| 1080p outdoor TV / projector | 10-25 Mbps | 50 Mbps | Medium | 5 GHz preferred |
| 4K outdoor TV / projector | 25-50 Mbps | 100 Mbps | Medium-high | 5 GHz or 6 GHz |
| Smart patio devices (plugs, sensors) | <1 Mbps each | N/A | Low | 2.4 GHz |
| Outdoor security cameras (HD) | 4-8 Mbps each | 15 Mbps per cam | Medium | 5 GHz preferred |
| Video calls on the patio | 5-10 Mbps | 25 Mbps | High (< 50ms RTT) | 5 GHz or 6 GHz |
Backhaul: wireless versus wired and what the performance gap actually looks like
The backhaul is the link between your extender or mesh node and the main router, and it is the single most important factor in real-world patio Wi-Fi performance. A wireless backhaul on a dual-band extender means one radio handles both the connection to the router and the connection to your patio devices. Every packet doubles the airtime. In controlled testing, this half-duplex relay penalty reduces throughput by 40 to 60 percent compared to what the router's radio could deliver directly. At 30 feet in a clean environment, a dual-band AC1200 extender might show 90 Mbps to a client; the same router at the same distance shows 180 Mbps.
Tri-band mesh systems address this with a dedicated backhaul radio. In Wi-Fi 5 (AC) tri-band systems, one 5 GHz radio is reserved exclusively for communication between mesh nodes, and the other 5 GHz radio plus the 2.4 GHz radio serve clients. This roughly doubles client throughput compared to a dual-band extender in relay mode. Wi-Fi 6E (AXE) mesh systems go further by using the 6 GHz band for the backhaul, which currently has almost no interference from neighboring devices. In short-range patio applications (under 40 feet, clear line of sight), a 6 GHz wireless backhaul can sustain 600 Mbps to 1 Gbps between nodes, making the wireless backhaul nearly as fast as a wired connection for most residential purposes.
A wired Ethernet backhaul removes the penalty entirely. Cat6 cable rated for outdoor or direct burial carries 1 Gbps to the outdoor AP with consistent sub-1ms latency added by the cable itself. This is the right call for any setup involving 4K streaming, multiple concurrent streams, or a projector with a wireless streaming stick. The tradeoff is the installation work. You need to drill a hole through the exterior wall, run the cable, weatherseal the penetration, and use an outdoor-rated Ethernet connector or weatherproof box. For runs longer than 328 feet (100 meters) you need a PoE switch or injector within that distance. Most residential patio runs are 25 to 100 feet, well within spec.
PoE (Power over Ethernet) deserves a note here. IEEE 802.3af (PoE) delivers up to 15.4W at the switch port, which is enough for most outdoor APs. IEEE 802.3at (PoE+) delivers up to 30W, covering higher-end APs and heated outdoor enclosures. IEEE 802.3bt (PoE++) delivers up to 60 or 90W, useful for high-performance enterprise APs or when you want to power a PoE-enabled outdoor display. Budget for cable resistance on longer runs: a 100-foot run of 24 AWG Cat6 can lose 2 to 4W, so confirm the AP's PoE class against your switch's per-port budget.
Antenna placement, height, and when to use a directional antenna
Where you mount the extender or AP matters as much as which one you buy. An omnidirectional antenna radiates signal in a roughly toroidal (donut-shaped) pattern: strong coverage in a horizontal ring around the antenna, weaker directly above and below. For a patio, you want the antenna mounted at eave height or on a wall 8 to 12 feet above the ground, aimed so the horizontal coverage ring sweeps across the patio surface where people actually sit and walk. Mounting too high (like a roofline peak) pushes the strongest part of the coverage pattern over the heads of patio users rather than through them.
Line of sight (LOS) is worth real effort. A clear, unobstructed path between the AP and the most-used areas of the patio can be the difference between 200 Mbps and 40 Mbps on 5 GHz. Even partial LOS, with the AP mounted at eave height so the signal clears a nearby wall or pergola column, dramatically outperforms a location where the signal must pass through the structure. In my own testing, moving an outdoor AP from behind a structural column to a clear corner of the eave improved 5 GHz throughput at 60 feet from 45 Mbps to 190 Mbps.
Directional antennas, panel or patch type, are worth considering when your patio is a long, narrow space (like a side yard), when you need to cover a detached structure like a cabana or pool house at distance, or when you want to minimize interference bleeding into neighbor property. A 90-degree panel antenna focused on a 60-foot pool deck will outperform an omni at that same distance because it concentrates gain in the direction you actually need. Directional antennas are overkill for a standard square patio adjacent to the house; use them for range extension over 75 feet or for focused coverage of a specific zone.
- Mount at 8 to 12 feet above ground for best patio coverage with omnidirectional antennas
- Choose a corner location with the clearest possible line of sight to the most-used seating areas
- Orient dipole antennas vertically for horizontal omnidirectional coverage
- For L-shaped patios, consider two access points rather than one poorly aimed unit
- Use a directional panel or patch antenna for runs over 75 feet or for covering a detached structure
- Keep the AP away from metal gutters and downspouts that reflect and scatter the signal
- If foliage is unavoidable, favor 2.4 GHz for links that pass through dense hedges or tree canopy
Weatherproofing: IP ratings, NEMA ratings, and what they actually mean
Not all outdoor-rated devices are equal, and the rating system is worth understanding before you mount something outside. IP (Ingress Protection) ratings are the most common you will see on consumer devices. The first digit (6 in IP65, IP66, IP67) refers to solid particle protection; a 6 means fully dust-tight. The second digit refers to water: 5 means protected against low-pressure water jets from any direction, 6 means protected against high-pressure jets, and 7 means protected against temporary immersion to 1 meter for 30 minutes. For a standard covered patio or eave mount, IP65 is sufficient. For an exposed mounting location that gets direct rain and potential puddles at the base, go to IP66 or IP67.
NEMA enclosure ratings are the U.S. standard you will see on industrial and commercial hardware. NEMA 3R protects against falling rain, sleet, and external ice formation. NEMA 4 adds protection against hose-directed water and splashing. NEMA 4X adds corrosion resistance, relevant in coastal or humid climates. NEMA 6P adds prolonged submersion resistance. See NEMA Enclosure Types for official definitions and installation implications of NEMA 3R, 4, 4X, and 6P. For putting an indoor AP or extender into an outdoor enclosure, a NEMA 4X polycarbonate box is the practical choice: it handles rain, UV, and salt air and costs $15 to $40 at any hardware store. Make sure the box is large enough to allow passive convection cooling because devices in sealed enclosures run hotter than in open air.
Temperature range matters more in extreme climates. Most consumer Wi-Fi extenders are rated to operate between 32 and 104 degrees F (0 to 40 degrees C). In Phoenix or Las Vegas in July, a south-facing exterior wall can reach 130 to 150 degrees F in direct sun, well above that range. In Minnesota or Wisconsin, winter temperatures drop well below the rated minimum. Look for devices rated to at least minus 4 degrees F (minus 20 degrees C) on the low end if you are in a cold climate, and consider a shaded mounting location or a vented enclosure cover if you are in extreme heat.
Power, GFCI, and outdoor electrical requirements
The NEC (National Electrical Code) requires GFCI protection for all outdoor receptacles under Section 210.8(A)(3). This applies to any 15 or 20-amp, 125-volt outlet installed in an outdoor location accessible to household occupants, regardless of height or whether it is under cover. If you are adding a new outdoor outlet to power an extender, it must be GFCI-protected and should use an in-use weatherproof cover (the kind that keeps a plug protected from rain even with a device plugged in). This is not optional and is an inspection failure if skipped.
If you are going the PoE route, you skip the outdoor outlet entirely: power runs from an indoor PoE switch or injector through the Ethernet cable to the outdoor AP. This is cleaner, safer, and eliminates the need for an outdoor receptacle at the AP location. The PoE switch or injector lives inside, plugged into a protected indoor outlet. The cable is the only thing that passes through the wall.
Running outdoor Ethernet: cable selection and surge protection
If you are running a cable for PoE or to connect an outdoor AP, use outdoor-rated Cat6 with a UV-resistant jacket and solid copper conductors, not CCA (copper-clad aluminum). CCA cable has higher resistance, which reduces PoE power delivery and can cause connectivity issues at longer runs. Look for cable specifically labeled as CMX (outdoor) or CMR (riser, suitable for conduit runs). For runs through soil, direct-burial Cat6 with a gel-filled outer jacket is the right call: it handles moisture without conduit. For above-ground runs exposed to sun, conduit (PVC or EMT) protects the cable and makes future replacement easier.
Ethernet surge protection is something most homeowners skip and later regret. A lightning strike or power surge near the house can travel down an outdoor cable and damage your router, switch, or AP. Install an in-line Ethernet surge arrestor at both ends of any cable that exits the building: one just inside the wall penetration on the indoor side, and one as close to the outdoor AP as practical. Both arrestors should be grounded to your home's electrical ground system. Devices like the Ubiquiti ETH-SP-G2 or similar products from Tripp Lite handle this for about $15 to $30 each and can save hundreds in equipment.
Keep cable runs under 328 feet (100 meters) total for Gigabit Ethernet with PoE. For a residential patio, runs are almost always under 100 feet, so this is rarely a limiting factor. Seal any wall penetrations with weatherproof caulk or cable glands to prevent moisture intrusion and drafts.
Mounting and fasteners by wall type
How you mount the AP or extender outdoors depends on the substrate. For wood-frame walls with wood or vinyl siding, stainless steel wood screws into a stud are the strongest option. On vinyl siding, use a siding mount block to create a flat surface and prevent cracking the siding panels. For masonry or stucco walls, use sleeve anchors or concrete screws (like Tapcon) with a pilot hole drilled with a masonry bit. Stucco over metal lath can crack if you drill without care; use a smaller pilot hole and a sharp bit. For brick veneer, anchor into the mortar joints where possible, since drilling through the brick itself is more likely to crack it.
Mount the device high enough to be out of easy reach but accessible for occasional maintenance. Tamper-resistant screws or a locking enclosure are worth considering for devices mounted at fence level or in accessible side yards. Use only stainless or galvanized hardware: zinc-plated screws will rust and streak the wall within a season in humid climates.
Recommended models by budget and use case
Here are concrete recommendations organized by how much you want to spend and what you plan to do on the patio. These are not paid picks; they reflect performance data from independent reviews, real-world installation experience, and verified weatherproof specs as of mid-2026.
| Budget tier | Model | Type | Rating | Best for | Approx. price |
|---|---|---|---|---|---|
| Budget (under $60) | TP-Link RE315 | Outdoor extender | IP65, AC1200 | Music streaming, smart devices, small patio | $40-$55 |
| Budget (under $60) | Netgear EX3700 | Indoor extender (near patio) | Indoor only, AC750 | Plugging in near glass door to covered patio | $30-$45 |
| Mid-range ($60-$150) | TP-Link Deco XE75 Outdoor | Mesh node (Wi-Fi 6E) | IP55, AXE5400 | Mid-size patio, HD/4K TV, multiple devices | $120-$150 |
| Mid-range ($60-$150) | Netgear EAX20 | Outdoor extender (Wi-Fi 6) | IP56, AX1800 | Covered patio, 1080p TV, smart devices | $80-$100 |
| Premium ($150+) | Ubiquiti UniFi U6 Mesh | Outdoor AP (wired PoE) | IP67, Wi-Fi 6 | Serious patio entertainment, 4K, pro install | $179 |
| Premium ($150+) | TP-Link EAP670 Outdoor | Outdoor AP (wired PoE) | IP67, Wi-Fi 6 | DIY wired install, high device count | $150-$170 |
| Premium ($150+) | Netgear WAX630E | Outdoor AP (wired PoE) | IP56, Wi-Fi 6 | 4K outdoor TV, projector, dense device setups | $200-$250 |
The TP-Link RE315 is the right first try for anyone with a covered patio within 40 feet of the house and a router on the same side of the home. It handles music, smart lights, and casual video without drama. For anything involving a TV or projector, the TP-Link Deco XE75 Outdoor in mesh mode or a wired PoE AP is worth the extra cost. The Ubiquiti U6 Mesh is what I would install on my own patio if I were doing it today: IP67-rated, handles 300+ concurrent clients, and delivers consistent 500+ Mbps to a patio TV at 60 feet over PoE.
Security and firmware: what to check before you buy
An outdoor AP or extender on your network is an entry point that is physically accessible to anyone who walks by. That makes security hygiene non-negotiable. Confirm that any device you buy supports WPA3 (or at minimum WPA2-AES), allows creation of a separate guest SSID, lets you disable WPS (Wi-Fi Protected Setup, which is vulnerable to brute-force attacks), and has received a firmware update within the past 12 months. Check the vendor's security advisory page before purchasing: some budget extenders have known CVEs that have never been patched.
Isolate your patio network from your main home network if possible. Many mesh systems and standalone APs allow you to put the patio SSID in a guest network segment that cannot access internal home devices. This is particularly important if the patio AP is mounted in a location where someone could press a WPS button. Disable WPS on any outdoor device. Keep firmware on auto-update if the vendor supports it, or set a calendar reminder to check for updates quarterly.
Step-by-step setup and testing
- Run a baseline speed test at your main router via wired Ethernet. Note the download, upload, and ping. This is your ceiling.
- Run the same speed test on a phone or laptop connected to the 5 GHz network in the room closest to the patio. Note the result.
- Take the phone or laptop to the patio location where you plan to use devices and run the test again connected to the existing router. Note what you get without any extender.
- Install the extender or outdoor AP at your chosen mount location. Follow manufacturer instructions for initial pairing.
- Run a speed test on the patio connected to the extender SSID. If you have iperf3 available, run a 60-second TCP test and a 60-second UDP test and record the throughput, latency, and packet loss figures.
- Test at the extremes of your patio, not just the center. Walk to the far corner and check that throughput stays above your minimum threshold for the intended use case (see the table above).
- Connect a streaming device to the patio network and play a 4K or HD test video for at least 10 minutes. Watch for buffering events, which indicate packet loss or throughput drops.
- Run a 2.4 GHz spectrum scan using a free tool like WiFi Analyzer (Android) or Wireless Diagnostics (Mac) to verify your extender is on a non-overlapping channel and not sitting on top of a neighbor's signal.
- Document your results: note the mount height, cable length, AP model, and per-location throughput. This baseline is useful if performance degrades later and you need to diagnose a problem.
Troubleshooting common problems
- Slow speed despite good signal bars: signal strength and throughput are not the same thing. High interference or a weak SNR can show 3 bars while delivering 10 Mbps. Run an iperf test, not just a signal indicator.
- Extender connected but no internet: confirm the extender has successfully paired with the main router and that the router's DHCP server is assigning an address to the extender. Reboot both devices in sequence: router first, then extender.
- Devices connecting to router instead of extender: most consumer extenders broadcast the same SSID as the router, and devices choose based on signal strength. If your phone keeps connecting to the farther router, set the extender to a unique SSID temporarily to force the connection.
- Throughput drops at night: high-traffic hours increase interference on shared channels. Switch the extender to a less-congested channel or enable auto-channel selection if available.
- PoE AP not powering on: verify the cable is Cat5e or better and that the switch port is PoE-enabled. Some switches have per-port PoE that must be enabled in the management interface.
- Intermittent drops in rain: check that the cable entry point is properly sealed. Water intrusion into an Ethernet connector will cause exactly this symptom.
- Overheating in summer: shade the extender or AP from direct afternoon sun. A small polycarbonate shade cover or a north-facing mount location can drop surface temperatures by 20 to 30 degrees F.
Accessories you actually need
- Outdoor-rated Cat6 cable (CMX or direct-burial) in the length you need plus 10 percent for slack
- Weatherproof RJ45 connectors or pre-terminated outdoor patch cable for protected runs
- In-line Ethernet surge arrestors (one per end of any outdoor cable run, both grounded)
- NEMA 4X polycarbonate enclosure if housing an indoor-rated device outdoors
- PoE injector or PoE switch (802.3at/PoE+ for most outdoor APs)
- GFCI outlet with in-use weatherproof cover if using a plug-in device
- Tamper-resistant mounting screws and appropriate wall anchors for your siding type
- UV-resistant cable ties or conduit clips for securing cable runs on exterior walls
- Silicone weatherproof caulk for sealing wall penetrations
When to hire a pro instead of DIYing it
Most plug-in extender installs are genuinely DIY-friendly. Running a cable through an exterior wall into a crawl space or attic, installing a new outdoor GFCI outlet, or terminating Cat6 connectors properly is a different skill level. Here is a checklist to help you decide when to call in a low-voltage or electrical contractor.
- The cable route requires drilling through masonry, poured concrete, or a fire-rated assembly
- You need a new outdoor GFCI outlet installed (requires a licensed electrician in most jurisdictions)
- The AP needs to be mounted at height on a tall structure and you do not have appropriate ladders or fall protection
- You are installing in a commercial-adjacent setting or an HOA community where permit pull is required
- The install involves conduit runs in an outdoor wall cavity that connects to the main electrical panel space
- You want the work to be covered under a warranty or homeowner's insurance claim if something goes wrong
When hiring a pro, ask specifically about experience with outdoor low-voltage cabling and PoE installations. An electrician who handles structured cabling is ideal; a general electrician may not know the nuances of outdoor Cat6 routing, grounding for Ethernet surge arrestors, or proper sealing of cable penetrations. Get at least two quotes and ask for references on similar outdoor AV or networking installs.
HOA and FCC rules on outdoor antenna mounting
If you live in a community with an HOA, you may have heard that they can prohibit outdoor antenna installations. The FCC's OTARD rule (47 C.F.R. Section 1.4000) limits the ability of HOAs and local governments to restrict the installation of antennas and certain wireless devices on property you own or lease exclusively. This covers antennas used for Wi-Fi reception and transmission in many cases, although the specifics depend on whether the device is a receive-only antenna or a two-way AP and whether it is mounted within your exclusive use area. If your HOA sends a notice about an outdoor AP, look up the FCC OTARD rule before assuming they can legally require removal. In many cases they cannot, as long as the installation is on your exclusive-use property or structure.
Integrating patio Wi-Fi with your outdoor entertainment setup
A solid patio Wi-Fi connection is the foundation for everything else you might add to your outdoor space. Outdoor speakers that stream directly from a Wi-Fi network need a stable, low-latency connection to stay in sync and avoid dropouts. For step-by-step advice on speaker selection, placement, and wiring, see our outdoor patio speaker setup. For recommendations on durable, weather-resistant in-ceiling options that pair well with patio Wi-Fi, see the best in-ceiling speakers for outdoor patio. If you're choosing audio gear, see our guide to the best patio speakers for options that maintain sync and withstand the elements. An outdoor TV setup benefits most from a 5 GHz link with a wired backhaul, especially if you are feeding it from a streaming stick or a smart TV app. For a detailed walkthrough on planning and wiring an outdoor patio TV setup, see the dedicated guide. Projectors used outdoors for movie nights typically connect via Wi-Fi too, and they need reliable throughput for 1080p or 4K content. Even a patio misting system or smart ceiling fan with a Wi-Fi controller depends on the same network. Getting the Wi-Fi infrastructure right first makes every other patio upgrade easier and more reliable.
FAQ
What primary research question will determine real‑world patio Wi‑Fi performance?
Measure end‑to‑end client throughput, latency and packet loss at representative patio distances (e.g., 10, 25, 50, 75, 100 ft) under LOS and NLOS conditions and under light/medium/heavy concurrent loads using repeatable lab methods (fixed positions, identical client radios, iperf/UDP and long TCP runs). Source types: independent lab reviews, academic measurement papers, and vendor test methodology notes.
What tests compare powerline adapters vs wireless extenders for patio use?
Run identical throughput/latency/packet‑loss tests for popular powerline kits across realistic home wiring scenarios, including multi‑circuit and noisy loads (CFL/LED interference), and report typical vs worst‑case results. Source types: SmallNetBuilder/independent reviews, vendor whitepapers, and controlled home‑wiring test reports.
Which research questions clarify mesh backhaul tradeoffs for patio coverage?
Quantify throughput and latency penalties for wireless shared backhaul, tri‑band dedicated wireless backhaul, and wired Ethernet backhaul in the same home layout. Reproduce tests on Wi‑Fi 5/6/6E gear and consult mesh benchmarking methodologies. Source types: mesh lab reviews, vendor backhaul specs, and independent technical explainers.
How should we evaluate use of 6 GHz (Wi‑Fi 6E) as a patio backhaul or fronthaul?
Measure whether 6 GHz dedicated backhaul gives better sustained throughput and lower latency at patio ranges than 5 GHz, and document range falloff and sensitivity to foliage, glass and antenna orientation. Source types: spectrum‑specific lab tests, industry reviews, and propagation studies.
What research is needed about RF attenuation from common materials?
Compile measured penetration/attenuation (dB) for patio‑relevant materials (glass types, wood, vinyl, brick, stucco, concrete, metal, foliage) at 2.4, 5 and 6 GHz to build predictive loss tables. Source types: peer‑reviewed propagation papers, Ekahau/Sidekick guidance, and industry materials databases.
What sources explain antenna patterns, MIMO and beamforming effects on patio coverage?
Document omnidirectional vs directional antenna azimuth/elevation patterns, and how MIMO spatial streams and beamforming affect range and throughput; use vendor RF guides, Cisco/enterprise RF references, and antenna pattern datasheets to derive placement and tilt rules.