
The best outdoor patio projector for most homeowners is the Anker Nebula X1: it throws a bright, sharp 4K image, handles triple-laser output well enough to start the movie before the sky is fully dark, and it's built to survive outdoor humidity and temperature swings. But it's also expensive, and honestly, a BenQ TH575 or Epson EpiqVision Flex CO-FH02 will do the job just fine for most backyard movie nights at a fraction of the price. This guide walks you through every decision you need to make, from lumen counts and throw distances to screen types and weatherproofing, so you land on the right pick for your actual patio and budget.
Best Outdoor Patio Projector: Top Picks, Setup & Buying Guide

Elise Prescott
23 Jul 2026
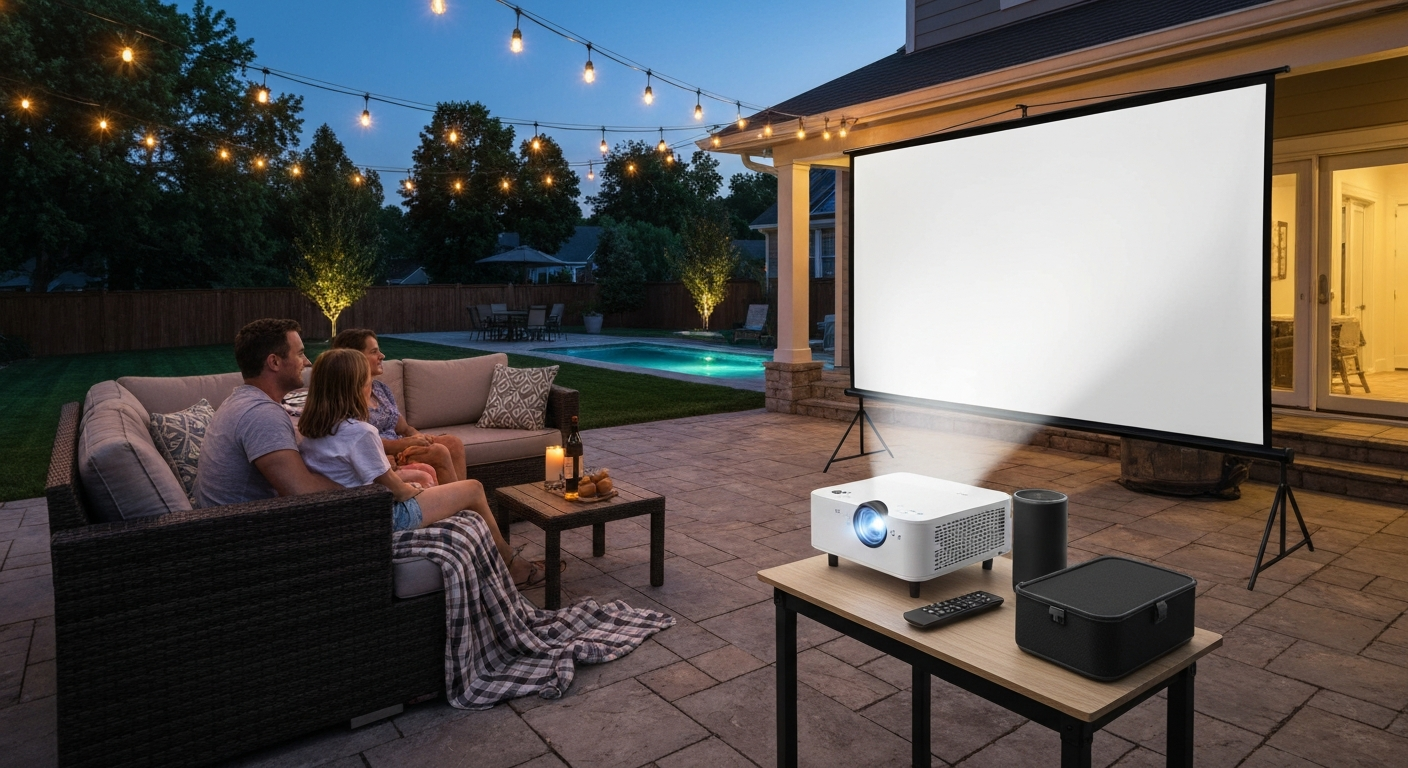
Who this guide is for and how to use it
This article is written for homeowners setting up an outdoor movie or entertainment space, whether you're a DIYer running your own extension cord and picking up a portable projector this weekend, or you're planning a permanent install with a contractor, ceiling mount, and dedicated outdoor outlet. I've tested projectors in hot Texas summers and chilly fall evenings, and I've talked through installs with AV pros who do this for patios across every climate. Whether you're spending $200 or $2,000, the core decisions are the same: how bright does it need to be, how far will it sit from the screen, and how much hassle are you willing to manage season to season.
Use this guide from top to bottom for a full education, or jump to the section that matches your current sticking point. The top picks give you a fast answer. The buyer's checklist helps you compare specs. The throw-distance section lets you measure your patio before you buy. The screen and mounting sections handle the rest of the setup. If audio or Wi-Fi are your other open questions, the guide points you toward those resources at the right moments.
Top picks at a glance
Here are my current recommendations across the most common budget levels and use cases. These are based on my own testing, independent lab data from RTINGS (updated June 2026), and real-world feedback from homeowners who've run these setups across multiple seasons.
| Use Case | Model | Resolution | Brightness (ANSI lumens) | Light Source | Best For |
|---|---|---|---|---|---|
| Best Overall | Anker Nebula X1 | 4K (eShift) | ~2,400+ (triple-laser) | Laser | Bright patios, dusk-to-dark viewing, premium image quality |
| Best Budget | BenQ TH575 | 1080p | ~3,800 (manufacturer-rated) | Lamp (UHP) | Value buyers, bright backyard nights, gaming |
| Best Portable/Casual | Epson EpiqVision Flex CO-FH02 | 1080p | 3,000 (manufacturer-rated) | Lamp | Easy setup/teardown, occasional use, smaller patios |
| Best Upper-Mid | JMGO N3 Ultimate | 4K | High-brightness laser | Laser | Regular use, good image quality, step up from budget |
| Best Mid-Range | XGIMI Horizon 20 Pro | 4K | Mid-range laser | Laser | Smart features, outdoor smart platform integration |
| Best Short-Throw | UST models (e.g., 0.2–0.4:1 ratio) | Varies | 3,000+ | Laser | Small patios, tight wall-to-seating setups |
| Best Ultra-Bright/Premium | Anker Nebula X1 | 4K (eShift) | Triple-laser | Laser | Large screens (120"+), dusk starts, demanding conditions |
A quick note on brightness numbers: manufacturer-claimed lumens and independently measured ANSI lumens often differ, sometimes by a wide margin. The BenQ TH575, for example, is rated at 3,800 ANSI lumens by BenQ, but reviewers measuring it in accurate picture modes may see different numbers. I'll cover this in detail in the brightness section. Use the table above for directional guidance, not as a hard spec sheet.
Buyer's checklist: what to compare before you buy
Before you start comparing models, get familiar with the specs that actually matter outdoors. The marketing materials are full of noise, so here's what to look at and why.
Brightness (ANSI lumens)
ANSI lumens is the industry-standard measurement for projector brightness, specified under ANSI IT7 methodology and adopted in related IEC and ISO standards (including IEC 61947-1 and ISO 21118). It measures light output across a 9-point grid on the screen, giving a consistent, comparable number. The problem is that many manufacturers, especially in the budget portable segment, use alternate labels like 'LED lumens' or 'display lumens' that are not standardized and routinely overstate brightness compared to genuine ANSI-measured output. A projector labeled '7,000 LED lumens' may deliver fewer than 1,000 ANSI lumens in real use. Always look for ANSI-measured figures, and when independent review sites publish measured lumen data, trust those over the box.
Resolution
1080p (Full HD) is the practical minimum for a watchable outdoor image. At 100 inches and normal seating distances of 10 to 15 feet, 1080p looks fine for movies and sports. 4K adds meaningful detail at larger screen sizes or closer viewing, but outdoors you're usually not close enough to see every extra pixel. That said, many current laser projectors come in 4K as a standard, and the image quality benefits of a better laser light source often matter more than the resolution bump anyway.
Throw distance and throw ratio
Throw ratio tells you how far the projector needs to sit from the screen to produce a given image size. I'll walk through the math in full detail in a later section, but the short version: measure your patio, figure out where the projector will sit, and confirm the throw ratio works before you buy. Standard projectors sit 8 to 15+ feet from the screen. Short-throw units sit 3 to 6 feet. Ultra-short-throw (UST) units sit just inches to 2 feet away.
Contrast ratio
Contrast matters most indoors in a dark room. Outdoors, ambient light floods the screen and dramatically flattens perceived contrast no matter what the spec sheet says. For outdoor setups, prioritize brightness over contrast ratio. A projector with 3,000 ANSI lumens and a 'modest' contrast ratio will look better on a summer evening than a dim unit with a sky-high contrast specification.
HDR support
HDR (High Dynamic Range) delivers better highlight and shadow detail in supported content, but its benefits are most visible in a dark, light-controlled room. Outdoors, ambient light limits how much of that HDR range you can actually see. It's still worth having in 2026 since most streaming content is HDR-encoded, but don't pay a heavy premium purely for HDR performance in an outdoor setup.
Laser vs LED vs lamp
Laser projectors typically offer the longest light-source life (commonly rated at 20,000 hours or more by manufacturers like Epson), consistent brightness over time, and fast startup. LED light sources are also long-lived and maintenance-free, though they've historically traded peak brightness for longevity in smaller form factors. Traditional UHP/mercury lamp projectors can deliver high brightness per dollar up front, as the BenQ TH575 demonstrates, but you'll replace the lamp eventually, usually at $50 to $150 or more depending on the model. For a permanent outdoor setup used regularly, laser is the cleaner long-term choice. For occasional backyard use, a lamp-based unit is a perfectly reasonable and often more budget-friendly option.
Keystone correction and lens shift
Keystone correction fixes a trapezoidal distortion when the projector isn't perfectly centered or level with the screen. Digital keystone does this in software and reduces effective resolution, brightness, and edge sharpness in proportion to how much correction is applied. Optical lens shift moves the image mechanically without degrading quality, and it's the right choice for permanent installs where precise alignment matters. For a table or tripod setup where you're roughly centering the projector each time, a modest amount of digital keystone correction is fine. For a ceiling-mounted permanent setup, prioritize lens shift.
Ports and connectivity
At minimum, look for HDMI 2.0 or later for connecting a streaming stick, Blu-ray player, or gaming console. USB-A ports for powering streaming sticks and playing media from drives are useful. An audio output (3.5mm or optical) matters if you're connecting external speakers, which you almost certainly will be outdoors. Check that the projector you're considering has the outputs you actually need for your setup.
Wireless streaming capability
Many current projectors include built-in Android TV, Google TV, or similar smart platforms, letting you stream Netflix, Disney+, or YouTube without any external device. This is genuinely convenient for a patio setup where you want to minimize cables. If the projector doesn't have built-in streaming, a Chromecast, Fire TV Stick, or Roku plugged into the HDMI port works just as well. Just make sure your Wi-Fi signal reaches the patio reliably, which ties directly into the wifi extender question I'll touch on later.
Brightness, ambient light, and picking the right lumens for your region
This is the single most important decision in the whole buying process, and it's the one most people get wrong. They buy a projector rated at 700 ANSI lumens because the box said something impressive, take it outside, and wonder why the image looks washed out. Here's the honest breakdown.
Buyer guides and reviewer consensus converge on these rough ANSI-lumen thresholds for outdoor use on a 100 to 120-inch screen: around 1,000 to 1,800 ANSI lumens works in a genuinely dark backyard after full dark (no patio lights, away from street lights); 1,800 to 3,000+ ANSI lumens lets you start the movie around dusk or watch with modest patio lighting; 3,000+ ANSI lumens is what you want for brighter twilight conditions, large screens (120 inches or more), or patios with string lights and ambient light you can't fully kill. Reviewer and buyer guides converge on these ANSI-lumen heuristics: ~1,000–1,800 ANSI lumens for dark-night-only viewing on moderate screens; ~1,800–3,000+ ANSI lumens to watch earlier at dusk or with modest patio lighting; 3,000+ ANSI lumens for bright twilight or large screens and for greater ambient-light tolerance. These ranges shift based on screen gain (more on that in the screen section) and how dark your specific yard gets.
Regional conditions matter more than most guides acknowledge. If you're in Phoenix or Houston, summer evenings are warm and light lingers past 8:30 PM, meaning you need more lumens to start at a reasonable hour. In Minnesota or Colorado, your usable season may be shorter, but dark skies and cool evenings mean you can get away with less brightness for the same image quality. If you have a covered patio that blocks overhead ambient light, a moderately bright projector punches above its weight. If you're projecting under an open sky next to a well-lit pool deck, push toward 3,000 ANSI lumens or above.
One practical tip: always look for independently measured lumen values from review sites rather than relying solely on manufacturer specs. Measured ANSI lumens in an accurate or cinema picture mode are typically lower than the maximum or eco modes used in marketing, but they're what you'll actually watch at.
Resolution, HDR, and image quality outdoors
1080p is the functional baseline for enjoyable outdoor viewing. At a 100-inch screen with seating 12 to 15 feet back, it's plenty sharp. Jump to a 120-inch screen and you're still fine. Move much bigger than that or seat guests closer, and 4K starts to earn its place. In my testing, the more noticeable image quality difference outdoors usually comes from color accuracy, contrast performance in dark scenes, and overall brightness consistency, not the resolution jump from 1080p to 4K.
Color matters more than most buyers think. A projector with wide color gamut coverage (commonly cited as DCI-P3 coverage) will render reds, greens, and blues more vividly than one hitting only sRGB. Laser projectors generally have an advantage here, which is part of why the Anker Nebula X1's triple-laser engine is so appealing for a premium setup.
On HDR: it's worth having, but temper expectations for outdoor use. HDR's strength is showing extremely bright highlights and very deep shadows simultaneously, and that requires a dark viewing environment to appreciate the full range. Outdoors, ambient light raises your effective black level and compresses the dynamic range you can perceive. The brightness of the image matters far more than the HDR metadata in those conditions. Still, since most current streaming content is HDR-encoded and most current projectors in this price range support it, it's not something to specifically avoid; just don't pay a big premium for HDR features at the expense of raw lumens.
Throw distance, throw ratio, and sizing your image
This is where a lot of first-time buyers make an expensive mistake: they buy a projector before measuring their patio. The math is simple once you know the formula.
The core calculation is: Throw Distance = Throw Ratio x Screen Width. Note that this uses screen width, not diagonal. For a standard 16:9 image, a 100-inch diagonal screen is about 87.2 inches (2.22 meters) wide. A 120-inch screen is about 104.6 inches (2.66 meters) wide.
Here's how that plays out with a couple of common throw ratios. At a 1.5:1 throw ratio with a 100-inch screen (87.2 inches wide), the lens needs to sit about 130.8 inches from the screen, which is roughly 10.9 feet. At a 1.2:1 throw ratio with the same screen, the distance drops to about 104.6 inches, or 8.7 feet. A short-throw projector at a 0.6:1 ratio would sit about 4.4 feet from that same 100-inch screen. Ultra-short-throw models in the 0.2 to 0.4:1 range can produce 80 to 120-inch images from just inches away.
To use this in practice: measure from your intended mounting spot (table, pole, ceiling, or tripod location) to where your screen or wall will be. Divide that distance by your screen width to get the throw ratio you need. Then shop for a projector whose published throw ratio range includes that number. Every projector has a minimum and maximum throw ratio (which relates to its zoom range), and you need to fall within that window.
| Screen Size (diagonal, 16:9) | Screen Width | Distance at 1.2:1 ratio | Distance at 1.5:1 ratio | Distance at 0.6:1 ratio |
|---|---|---|---|---|
| 80 inches | ~69.7 in (5.8 ft) | ~83.6 in (7 ft) | ~104.6 in (8.7 ft) | ~41.8 in (3.5 ft) |
| 100 inches | ~87.2 in (7.3 ft) | ~104.6 in (8.7 ft) | ~130.8 in (10.9 ft) | ~52.3 in (4.4 ft) |
| 120 inches | ~104.6 in (8.7 ft) | ~125.5 in (10.5 ft) | ~156.9 in (13.1 ft) | ~62.8 in (5.2 ft) |
| 150 inches | ~130.7 in (10.9 ft) | ~156.8 in (13.1 ft) | ~196.1 in (16.3 ft) | ~78.4 in (6.5 ft) |
Always use the specific throw ratio published by the manufacturer for the exact model you're buying, not generic estimates. Use an online throw distance calculator to cross-check before you purchase. Getting this wrong means returning the projector after one disappointing backyard screening.
Screen options for patios
Your screen choice has as much impact on picture quality as the projector itself, especially outdoors where you're fighting ambient light. Here's how the main options break down.
Fixed-frame screens
A fixed-frame screen is a tensioned fabric panel in a rigid frame, mounted permanently to a wall, fence, or purpose-built frame structure. It stays flat, wrinkle-free, and aligned at all times. This is the best image quality option for a covered patio with a permanent setup. The downside is cost (good ones start around $200 to $400 for a 100-inch screen and go up from there) and the fact that it takes up space year-round. In climates with harsh winters, you'll either take it down seasonally or invest in a weatherproof cover.
Portable and tripod screens
A portable roll-up or pull-up screen on a tripod stand is the most accessible option for most homeowners. You set it up when you want it and store it in the garage otherwise. Screen flatness isn't quite as good as a tensioned frame, but for casual movie nights it's more than acceptable. Budget between $50 and $150 for a decent 100-inch portable screen.
Inflatable screens
Inflatable screens are popular for backyard parties, especially for larger formats (120 to 180 inches). They set up in minutes and fold down into a bag. Image quality is lower than tensioned options because the surface isn't perfectly flat, and wind can cause noticeable movement. For a regular patio setup, I'd recommend a tensioned portable or fixed screen instead. For a one-off big event where size matters more than perfection, an inflatable works well.
Tensioned retractable screens
Tensioned retractable screens motorized or manual drop from a ceiling-mounted housing. When not in use, the screen rolls up and disappears. This is a premium option well-suited to a covered patio where you want image quality close to a fixed frame without leaving the screen exposed. Expect to pay $400 to $1,500 or more for a quality 100 to 120-inch motorized tensioned screen. Installation usually requires a contractor unless you're comfortable with ceiling framing work.
Painted-wall screens
Projector screen paint applied to a smooth exterior wall is a low-cost permanent option. Applied correctly on a smooth, primed surface, it can look surprisingly good. The key variable is surface preparation: any texture, irregularities, or sheen will show up in the projected image. Screen paint products specify a gain value (typically 1.0 to 1.5), and a higher-gain surface reflects more light back toward the viewer, boosting perceived brightness. This is a solid DIY option for a covered patio with a suitable wall.
Screen gain explained
Gain is a multiplier on how much light the screen reflects toward the viewer. A gain of 1.0 reflects light evenly in all directions. A gain of 1.5 appears brighter from the center but loses brightness at viewing angles. For outdoor use with ambient light, a mild gain of 1.0 to 1.4 helps without causing hot spots. High-gain screens above 1.8 to 2.0 are difficult to use well outdoors because the viewing angle becomes very narrow. Match your screen gain to your seating arrangement: wide seating area means stick closer to 1.0 to 1.2.
Placement, mounting, and physical installation
Where you put the projector changes everything about setup complexity, image stability, and long-term convenience. Here are the main approaches, from simplest to most involved.
Table placement
Setting the projector on a table behind or between the seating area is the fastest way to get up and running. Use a sturdy surface at a consistent height, and consider a small rubber mat or projector shelf to keep the angle consistent. The downside is cables running across the patio, the projector occupying table space, and the risk of someone bumping it mid-movie. For occasional use, this is fine. For a regular setup, it gets old quickly.
Tripod placement
A projector tripod mount gives you height and angle flexibility without any permanent installation. Many projectors include a standard camera-thread socket (1/4"-20) that accepts off-the-shelf camera tripods or dedicated projector mounts. This is a solid step up from table placement for portability and adjustability.
Pole mounting
A ground-driven pole or a pole attached to a fence post or pergola column can put the projector at the right height and distance behind your seating. This is a semi-permanent option popular for uncovered patios. You'll need a weatherproof enclosure for the projector if it's not rated for outdoor exposure, and a proper outdoor-rated outlet within reach.
Ceiling mounting
A ceiling mount on a covered patio is the cleanest permanent installation. The projector hangs upside down (most projectors support inverted mounting and flip the image automatically), cables run through the ceiling structure, and nothing occupies floor or table space. You'll need to use the throw formula to calculate mount position before drilling. Ceiling mounting requires securely anchoring into structural framing, running power to the mount location (ideally through a conduit in the ceiling), and running HDMI or a wireless HDMI extender to avoid visible cables. If you're not comfortable with ceiling electrical work, this is a job for a local AV contractor.
Permanent vs temporary: which is right for you
If you're in a rental, moving within a few years, or only watch movies outside a handful of times per season, a portable setup with a tripod or table mount makes more sense than a permanent ceiling install. If you've built out your patio as a genuine outdoor living space and you watch movies or sports outdoors regularly, the one-time effort of a permanent ceiling mount with clean cable management pays off in convenience every single time you use it. The permanent route typically costs $200 to $600 in materials plus contractor labor if you go that route, and it adds real perceived value to the patio as a finished space.
Power, cable management, and weatherproofing the setup
Outdoor-rated extension cords (12 or 14 AWG, marked for outdoor use with a W designation) are the minimum for any patio projector setup. For a permanent install, a dedicated outdoor GFCI outlet near the mounting point is the right solution. Run HDMI cables rated for in-wall or outdoor burial if you're going through a wall or under a deck. HDMI signal can degrade over long runs above 25 feet, so either use a quality shielded HDMI cable or consider a wireless HDMI extender for runs over 20 feet. If the projector will live outdoors even occasionally, a weatherproof project enclosure or projector cover protects the lens and vents from moisture, insects, and debris.
Audio integration for your patio projector
Built-in projector speakers are almost never good enough for outdoor use. Sound disperses quickly outdoors, and even modest ambient noise (wind, neighbors, traffic) competes with what a 5-watt built-in speaker can produce. Plan for external audio from the start. For detailed recommendations on speaker types, placement, and wiring, see the outdoor patio speaker setup guide. The simplest upgrade is a portable Bluetooth speaker placed near the screen, which works well for casual setups. For a more capable system, a pair of outdoor patio speakers wired to a small amplifier and positioned to flank the screen will transform the experience. If your patio has a built-in speaker setup, run audio from the projector's HDMI ARC, optical, or 3. For playlist ideas and speaker pairings that complement outdoor movies, see our guide to best patio music. 5mm output to your existing receiver or amplifier.
Bluetooth audio from the projector to a speaker introduces a small lag (latency) that can cause lip-sync issues with some combinations of projectors and Bluetooth speakers. If this is a concern for your setup, use a wired connection or look for projectors and speakers that support Bluetooth codecs with low latency. In-ceiling speakers installed in a covered patio ceiling are another excellent option for a permanent build, keeping the audio clean and the patio visually uncluttered.
Wi-Fi, streaming, and connectivity on the patio
Streaming video outdoors requires solid Wi-Fi coverage at the patio. Most home routers drop signal significantly through walls and over distance, and a weak signal at 20 feet from the house can mean buffering during the movie. If your router's signal doesn't reach the projector reliably, a Wi-Fi extender or mesh node placed near the patio door or a window facing the patio usually solves the problem without running any new cables. This is especially important if you're running a smart projector with built-in streaming rather than a wired HDMI source.
For projectors without built-in streaming, a streaming stick (Chromecast, Fire TV, Roku) plugged into the HDMI port is the simplest solution. Power the stick from the projector's USB port if it provides enough output (most modern projectors do at 5V/0.9A or above), or use a dedicated USB charger. If you want the most reliable streaming experience, run an Ethernet cable from your router to a compact switch or Wi-Fi access point near the patio, which eliminates wireless signal variability entirely.
Weatherproofing, enclosures, and seasonal protection
Most patio projectors are not weather-rated for rain or direct moisture exposure. Even models marketed as 'outdoor projectors' typically mean they can tolerate some humidity and are dust-resistant, not that they're waterproof. If the projector will live in a permanent outdoor mount, use a projector enclosure rated for outdoor use (these are metal or heavy plastic housings with ventilation and a front glass panel). They're not cheap, typically $150 to $500 depending on size, but they protect a $500 to $2,000 projector investment from dew, rain splash, insects, and UV exposure.
For a portable or semi-permanent setup, a projector cover made from waterproof fabric is the minimum. Always store the projector indoors when not in use. Humidity cycling, especially in high-humidity climates like the Gulf Coast or Southeast, can cause lens fogging, mold growth on optical surfaces, and circuit corrosion over time. In freezing climates, cold temperatures below the projector's operating range (check the manual, typically around 41 to 104 degrees Fahrenheit for most models) can damage electronics and cause condensation on the optics when brought back indoors. Bring the projector inside or use a heated enclosure in climates where temperatures drop below the operating range.
Maintenance, light source life, and warranties
Lamp-based projectors require periodic replacement of the UHP bulb, which degrades in brightness over time and eventually burns out. Replacement lamps typically cost $50 to $150 and are available for most popular models for several years after release. Lamp life varies by mode: standard mode often gets 3,000 to 5,000 hours, while eco mode may extend that to 6,000 to 10,000 hours or more depending on the model. If you watch movies outdoors 3 hours per week through a 6-month season, that's roughly 75 hours per year, meaning a 5,000-hour lamp lasts over 60 years at that pace, but if you use it daily or run it for large gatherings regularly, lamp costs become a real factor.
Laser and LED light sources are rated at 20,000 hours or more by most manufacturers (Epson, for example, rates many of its laser engines at 'up to about 20,000 hours'), though this defines life as the point when brightness drops to a specified percentage of original output, not sudden failure. In practical terms, laser projectors used at a typical outdoor entertainment pace may run for 10 to 20 years before the laser engine needs attention. This is a genuine long-term advantage over lamp-based units for a permanent outdoor setup.
Check the warranty on any projector you buy for outdoor use. Many manufacturer warranties are 1 to 3 years for the projector and shorter (sometimes 6 months) for the lamp. Some manufacturers void the warranty if the projector is used in environments outside its rated temperature or humidity range, so read the fine print if your patio environment is extreme. Registering the product and keeping your receipt matters more for projectors than many other consumer electronics, given the cost of light source replacement.
Budget vs premium, portable vs permanent: making the call
If you watch movies outside once or twice a month during summer, a $300 to $500 portable setup (BenQ TH575 or Epson CO-FH02 with a portable screen and a good Bluetooth speaker) will serve you well. You'll deal with setup and teardown each time, occasional lamp replacements, and the cable shuffle, but the image will be genuinely impressive on a warm dark evening.
If your patio is your primary outdoor living space and movie nights or sports watching outdoors is a regular part of your routine, the investment in a permanent setup makes sense. That means a laser projector like the Anker Nebula X1 or JMGO N3 Ultimate, a ceiling mount or good pole mount, a fixed or motorized retractable screen, wired audio through outdoor speakers, and clean cable management. Total project cost for a quality permanent setup runs $1,500 to $4,000 depending on screen size, audio level, and whether you hire an AV contractor. It's real money, but you're effectively building an outdoor theater that functions as a true extension of your home entertainment space.
If you're debating between a projector setup and a dedicated outdoor TV, the practical difference comes down to image size versus reliability. A 65-inch outdoor TV is weatherproof, always set up, and viewable in brighter conditions than any projector, but $2,000 to $4,000 buys you a 65-inch TV. The same money buys you a 120-inch projected image with great audio on a projector build. For pure size and the cinematic feel of a big screen, projectors win. If you're weighing the trade-offs, see our outdoor patio TV setup guide (0178a96f-d65c-4505-aa20-a3cfdefd48dd) for a direct comparison and buying tips. For simplicity, durability, and daytime use, an outdoor TV is the stronger choice.
Step-by-step setup and troubleshooting checklist
- Measure your patio: note the distance from your intended projector position to your screen or wall, and measure the width of your planned screen.
- Calculate throw ratio needed: divide the projector-to-screen distance by the screen width. Match this to models with a compatible throw ratio range.
- Confirm ANSI lumen requirements: based on your typical viewing time (full dark, dusk, or twilight) and patio ambient light conditions, select a minimum ANSI lumen target using the 1,000–1,800 / 1,800–3,000 / 3,000+ framework.
- Choose your light source: lamp for budget/occasional use, laser for permanent/frequent use.
- Select your screen: painted wall, portable frame, fixed frame, or motorized retractable based on how often you use it and whether the setup is permanent.
- Plan your power: confirm a suitable outdoor outlet exists or plan for one. Use outdoor-rated extension cords as a temporary measure.
- Plan your cable run: measure HDMI run distance. Use a wireless HDMI extender or high-quality shielded cable for runs over 20 feet.
- Test Wi-Fi signal at the patio: stream a 4K test video from where the projector will sit. If it buffers or drops, add a Wi-Fi extender or mesh node near the patio.
- Mount the projector: table, tripod, pole, or ceiling mount based on your setup. Use the throw formula to position accurately before drilling any permanent hardware.
- Connect and calibrate: connect to your source (streaming stick, cable box, gaming console), set picture mode to Cinema or Movie (not Vivid/Dynamic), and adjust keystone only minimally. Use lens shift for any significant repositioning.
- Set up audio: connect external speakers via 3.5mm, optical, or HDMI ARC. Test for audio sync and adjust projector audio delay if needed.
- Protect the projector: use a weatherproof cover or enclosure when not in use. Bring portable units indoors during rain or after every session in humid climates.
- Troubleshoot image wash-out: if the image looks faint, try starting later (after full dark), reducing nearby lights, or upgrading to a higher-gain screen.
- Troubleshoot focus or geometry issues: re-center the projector relative to the screen to reduce keystone correction needed. Check lens focus ring adjustment.
- Troubleshoot Wi-Fi buffering: move a mesh node or extender closer to the patio, switch from 2.4 GHz to 5 GHz if the signal is strong enough, or use a wired Ethernet run.
Bringing it all together for your patio
The best outdoor patio projector is the one that matches your actual yard, your typical viewing conditions, and the level of setup complexity you're willing to manage. For most homeowners, a 1080p lamp-based projector in the 3,000 ANSI lumen range paired with a portable screen and a good Bluetooth or wired speaker covers 90 percent of use cases at a price that doesn't require a second thought. For homeowners who've invested in a real outdoor living space and want a permanent entertainment centerpiece, a laser-based projector with a ceiling mount, motorized screen, and wired outdoor audio is a project worth doing right, whether you tackle it yourself or bring in a local AV pro to finish the install cleanly.
Audio and connectivity are as important to the overall experience as the projector itself. A great image paired with tinny built-in sound is a disappointing evening. Solid patio speakers, reliable Wi-Fi coverage, and clean cable management are what separate a backyard setup that gets used every weekend from one that sits in the garage after three outings. Think of the projector as the centerpiece of a complete outdoor entertainment system, and build the rest of the setup around it accordingly.
FAQ
What are the best outdoor patio projectors across budgets and use cases?
Top picks (2026-recommended examples): Premium/bright 4K: Anker Nebula X1 (bright triple‑laser 4K eShift) for large screens and twilight viewing. Upper mid: JMGO N3 Ultimate for bright image and features. Mid-range: XGIMI Horizon 20 Pro balances brightness, image quality and ease-of-use. Value/high-brightness budget: BenQ TH575 (high ANSI lumen count for its price, good for bright patios/gaming). Budget/portable: Epson EpiqVision Flex CO‑FH02 (3000 ANSI lumens portable 1080p). Choose by needed ANSI lumens, native resolution, installation type (portable vs permanent) and feature set (laser for long life, DLP/3LCD for color/contrast preferences).
How many lumens do I need for outdoor patio use?
Use ANSI-lumen heuristics: ~1,000–1,800 ANSI lumens for dark-night-only viewing on moderate screens (100–120"). ~1,800–3,000 ANSI lumens to watch at dusk or with modest patio lighting. 3,000+ ANSI lumens for bright twilight, larger screens, or to tolerate significant ambient light. Adjust up for higher-gain screens or smaller image distances; check independent measured ANSI/ISO lumen tests where possible.
What is ANSI lumens and why does it matter?
ANSI lumens is the industry-standard method for measuring projector brightness using a 9-point grid across the image; it's the most reliable figure for comparing actual output. Manufacturer 'LED lumens' or other marketing numbers are non‑standard and can overstate perceived brightness—prefer ANSI/ISO-measured values from reviewers or spec sheets.
How does light-source type (lamp vs LED vs laser) affect outdoor use?
Traditional lamp (UHP) projectors can deliver high peak brightness at lower upfront cost but require periodic lamp replacements. LED and laser sources offer much longer rated lifetimes (commonly ~20,000 hours for modern lasers/LEDs), lower maintenance, and instant on/off. Laser typically gives best long-term reliability and steady brightness for permanent patio installs; lamps may be a better short‑term budget choice if extremely high ANSI lumens per dollar are required.
How do I calculate throw distance and choose a projector that fits my patio?
Use the throw formula: Throw distance = Throw ratio × Screen width (use screen width, not diagonal). Example: a 100" 16:9 screen has width ≈ 87.2 in; a 1.5:1 throw ratio needs ≈ 10.9 ft. Check the projector’s published minimum and maximum throw ratios and use a throw calculator to confirm the projector fits your mounting location. For very short spaces, consider an ultra‑short‑throw (UST) model (≈0.2–0.4:1).
What screen options work best outdoors?
Options: inflatable screens (portable, large sizes), fixed-frame outdoor projector screens (best image quality, permanent), tensioned pull-up screens (compromise), or a smooth painted wall (budget). Choose screen gain for your lumen level—higher gain (1.2–1.5) increases brightness but narrows viewing angle. For patios with ambient light, a higher-gain ALR (ambient light rejecting) outdoor screen helps but can be costly.