A complete outdoor patio setup comes together in a specific order: layout and zones first, then flooring, then overhead cover and climate control, then lighting and design, and finally furniture. Skip that sequence and you end up bolting a pergola to a slab that wasn't reinforced for it, or buying a sectional that physically won't fit once the dining table is in place. This guide walks you through every layer, from measuring your space on day one to scheduling the contractor call you actually need, so you end up with a patio that works for your climate, your budget, and how you actually live outside. If you want ideas for how all of these choices come together into the best outdoor patio looks, use this guide to plan the zones, materials, comfort upgrades, and lighting in the right order.
Outdoor Patio Setup Guide: Layout, Zones, Materials, Add-Ons

Decide your patio layout and zones first
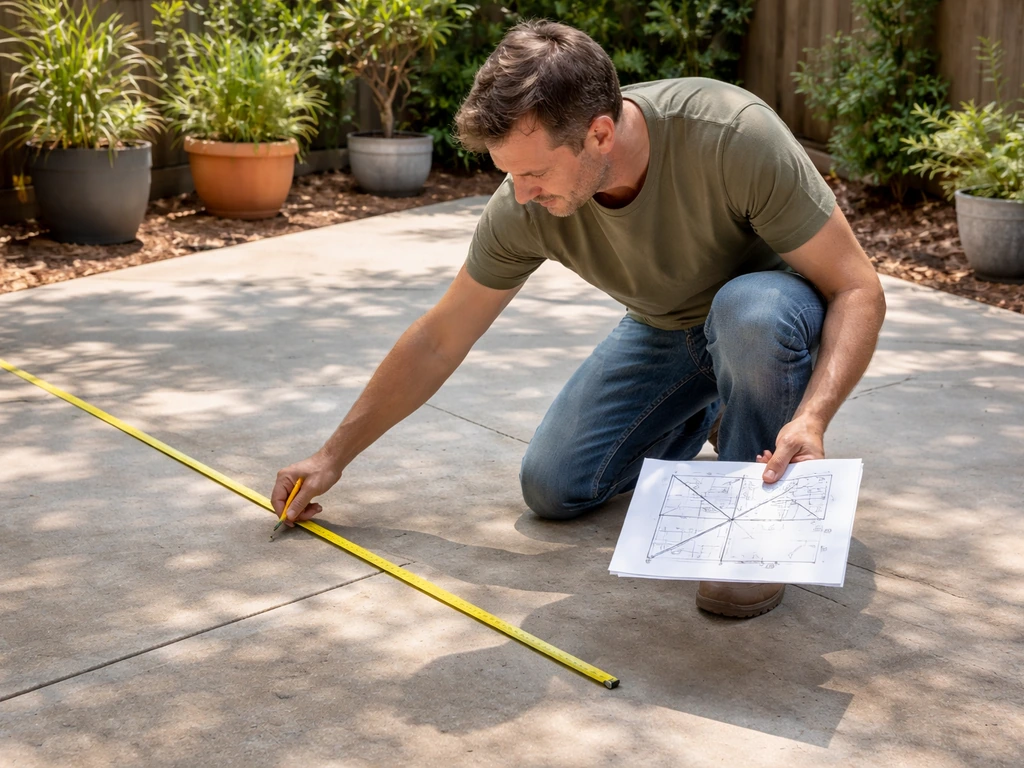
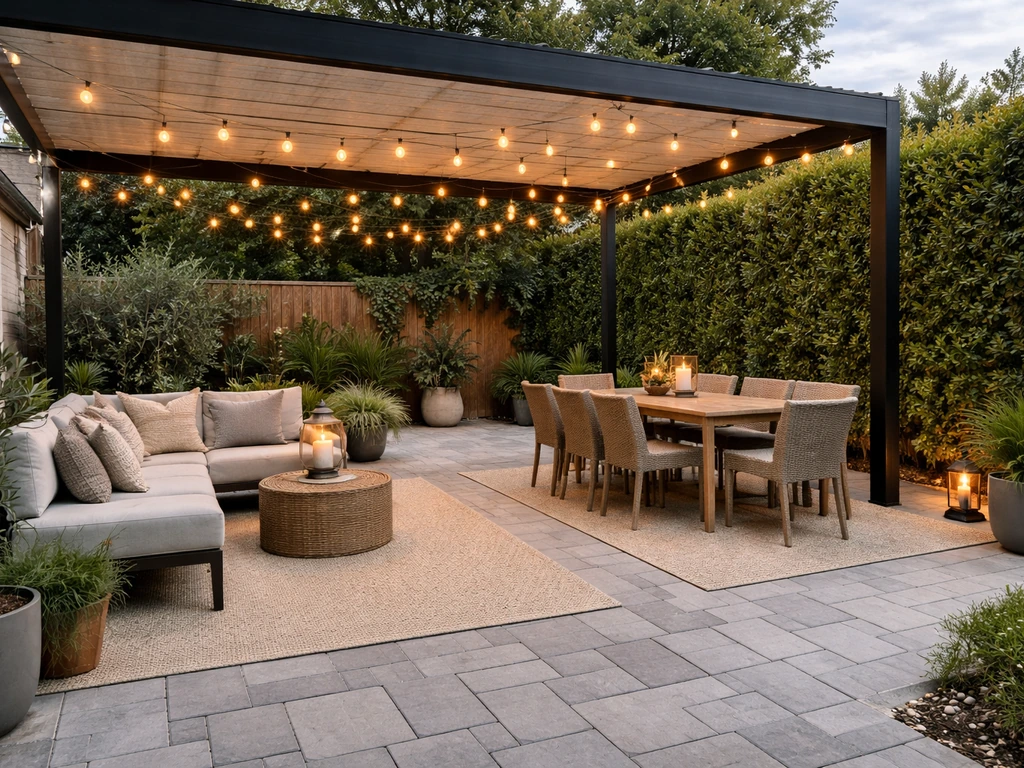
Before you buy a single piece of furniture or pick a paver color, walk outside with a tape measure and map your space on paper. The two most common mistakes I see are treating the patio as one undifferentiated rectangle and underestimating how much clearance moving bodies actually need. A functional outdoor patio setup almost always has at least two zones: a dining zone and a lounging zone. Depending on your square footage, you might add a third, like a grilling station or a shaded reading corner.
For a dining zone, you need a minimum of 10x10 feet for a 4-person table with chairs pulled out, and 12x14 feet is far more comfortable. The lounging zone needs at least 12x12 for a sofa and two chairs with a coffee table between them. If both zones are sharing one patio, aim for at least 300 to 400 square feet total so neither zone feels cramped. Mark off walkway corridors too: 36 inches is the code minimum for accessible paths, but 42 to 48 inches feels natural when people are carrying plates or drinks.
Think about your traffic flow before you finalize zone placement. The dining zone almost always works best closest to the house and the kitchen door. The lounging zone can push further out toward the yard, which creates a natural depth to the space and keeps the cooking smell away from where people are relaxing. If you have a great view, orient your lounging seating toward it. If you back up to a neighbor's fence, put your privacy screening on that side and face your seating inward or toward the house.
Choose the right base materials and flooring
Your flooring choice is the hardest thing to change later, so get it right now. The main options are poured concrete, concrete pavers, natural stone, brick, porcelain tile, and composite or wood decking. Each one has a distinct tradeoff between cost, maintenance, comfort underfoot, drainage, and regional suitability.
| Material | Typical Cost (installed) | Durability | Drainage | Best For | Watch Out For |
|---|---|---|---|---|---|
| Poured concrete | $6–$12/sq ft | High | Poor unless graded or saw-cut | Large flat patios, budget builds | Cracking in freeze-thaw climates |
| Concrete pavers | $10–$20/sq ft | Very high | Good (joints allow runoff) | Most climates, DIY-friendly | Settling over time on poor sub-base |
| Natural stone (flagstone, bluestone) | $15–$30/sq ft | Very high | Good | Premium aesthetics, cool climates | Irregular surface, needs re-sealing |
| Brick | $10–$18/sq ft | High | Good | Traditional/classic styles | Can heave in hard freeze zones |
| Porcelain tile | $15–$25/sq ft | High | Poor if improperly sloped | Hot dry climates, modern design | Slippery when wet; needs pro install |
| Composite decking | $20–$35/sq ft | High | Excellent (gaps between boards) | Uneven ground, raised decks | Heat retention in direct sun |
| Pressure-treated wood decking | $12–$22/sq ft | Moderate | Excellent | Budget wood option | Requires annual sealing/staining |
In freeze-thaw climates like the Midwest or Northeast, concrete pavers outperform poured slabs because individual units can shift slightly without cracking the whole surface. In hot sun climates like Arizona or Texas, porcelain and light-colored natural stone stay cooler underfoot than dark composite or asphalt-based products. Whatever material you choose, grade the surface away from the house at roughly 1/8 to 1/4 inch per foot for drainage. This is non-negotiable if you want to avoid water intrusion at your foundation.
For a DIY-friendly patio floor, concrete pavers on a compacted gravel and sand base are the most forgiving option. You can cut them with a diamond blade saw, fix settling by lifting and re-leveling individual units, and add to the patio later without a visible seam. If you are on a slope or building elevated, composite decking on a pressure-treated frame gives you the best drainage and is also manageable for a confident DIYer.
Weather comfort essentials: covers, shade, misting, and fans
This is the section most people skip in the planning phase and then regret. If your patio is uncomfortable in summer heat or unprotected from afternoon rain, you simply will not use it. Climate control is not a luxury upgrade. It is what makes the difference between a patio you actually live on and one that just looks good in photos.
Shade and overhead cover options
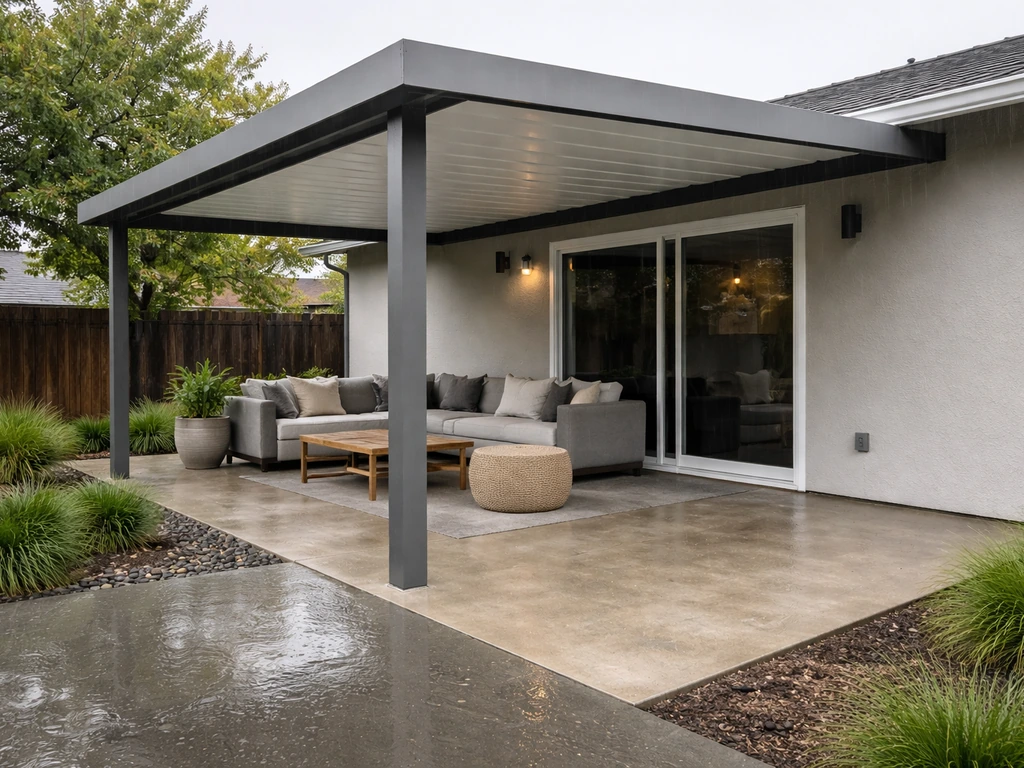
Shade structures fall into four main categories: attached pergolas, freestanding pergolas, motorized retractable awnings, and solid patio covers (like aluminum or insulated panel roofs). An attached pergola with a louvered roof system is the most versatile and premium option. You get adjustable shade, rain protection, and the ability to add integrated lighting and fans. Expect to pay $8,000 to $25,000 installed for a quality louvered system. A basic attached wood or aluminum pergola runs $3,000 to $10,000. A motorized retractable awning is a great mid-range option at $2,000 to $6,000 and requires no post footings, but it offers zero rain protection when retracted.
Solid patio covers (insulated aluminum panel systems) are the go-to choice in rain-heavy climates like the Pacific Northwest or the Gulf Coast. They block 100 percent of precipitation, can be insulated to reduce heat transfer, and many systems accept integrated light kits and ceiling fans. If you live somewhere where afternoon thunderstorms are a near-daily summer event, a solid cover is worth every dollar over a pergola.
Misting systems
A high-pressure misting system (operating at 1,000 PSI or more) can drop the perceived air temperature by 20 to 25 degrees Fahrenheit in dry heat climates. In humid climates, low-pressure misters mostly make you feel wet rather than cool, so they are not worth the investment if your humidity regularly tops 60 percent. High-pressure systems need a dedicated pump, stainless steel or brass nozzles (every 18 to 24 inches along the line), and a connection to your water supply. A professional install runs $500 to $2,500 depending on the line length. DIY kits are available for $150 to $400 but typically run at lower pressure and produce larger droplets.
Outdoor ceiling fans and floor fans
If you have an overhead structure, an outdoor-rated ceiling fan is one of the best value-adds per dollar you can make. To finish the comfort layer, choose the best fans for your outdoor patio size and exposure level best fans for outdoor patio. Look for fans rated UL-listed for 'wet' or 'damp' locations depending on how exposed your patio is. A 52-inch fan covers roughly a 15x15 foot area adequately. For larger spaces, two 52-inch fans spaced evenly outperform one oversized 60-inch fan. Pedestal and tower fans designed for outdoor use are a good supplemental option for patios without overhead covers, particularly in zones where you mainly need air movement rather than cooling. Pairing a fan with a misting system in a dry climate is genuinely one of the most effective setups you can build.
Design and ambiance: style, privacy, and lighting
The structural and comfort decisions are done. Now you get to make the patio feel like somewhere you actually want to be. Design comes down to three things: a consistent visual style, lighting that works after dark, and privacy where you need it.
Choosing a visual style
Pick one design direction and stick to it. The most common successful styles for residential patios are modern/minimalist (clean lines, concrete or large-format porcelain tile, neutral palette), Mediterranean or Spanish (warm terracotta, wrought iron, lush plants, mosaic accents), farmhouse/rustic (wood tones, Edison bulbs, galvanized metal accents), and contemporary coastal (whitewashed or bleached teak, navy or sand tones, natural rope textures). Your house exterior should inform this choice. A brick colonial home looks awkward with ultra-modern poured concrete and minimalist furniture. A contemporary stucco exterior pairs beautifully with large-format porcelain and clean-lined aluminum furniture.
Outdoor lighting done right
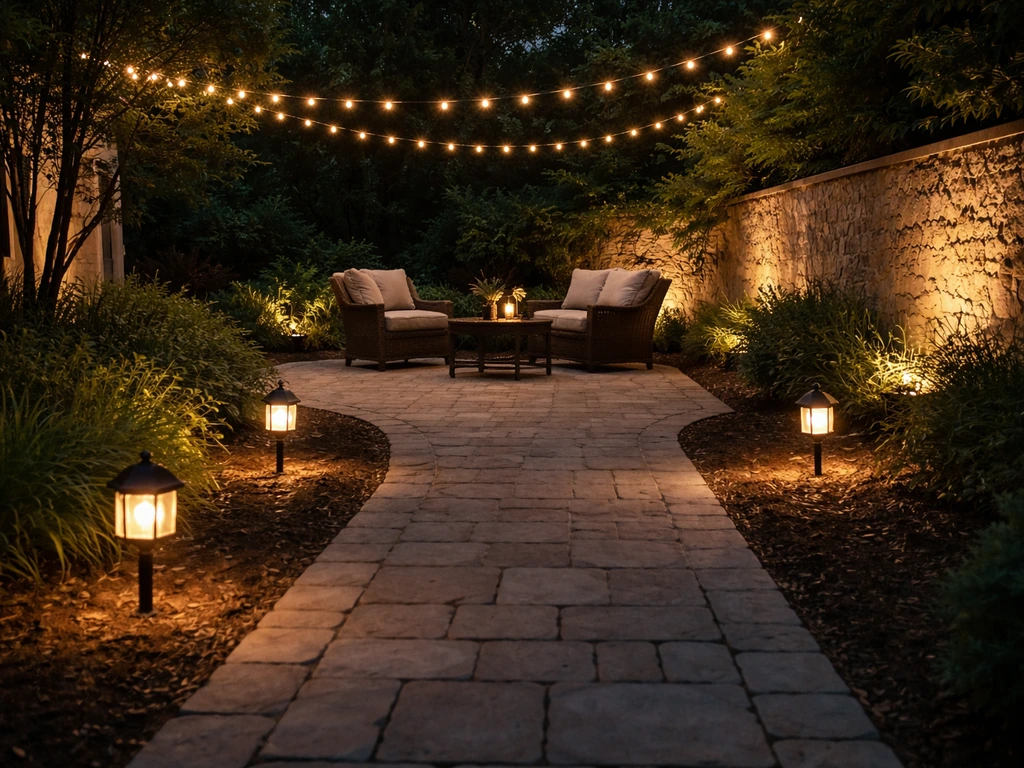
blank" rel="noopener noreferrer">Good outdoor lighting uses three layers: ambient, task, and accent. Ambient light provides general illumination across the patio, typically from overhead string lights, ceiling fan light kits, or wall sconces. Task lighting handles safety-critical areas like steps, pathway edges, and grilling zones. Accent lighting highlights plants, architectural features, or water elements. For path and step lighting specifically, blank" rel="noopener noreferrer">place low-voltage path lights roughly 10 to 15 feet apart to maintain continuous visual guidance without creating a runway effect. All three layers running together at once is what makes a patio feel designed rather than just lit.
String lights are the single fastest way to transform a patio's evening feel and are one of the easiest DIY installs. Use heavy-duty commercial-grade string lights rated for outdoor use with at least 48 feet per run for a standard patio. Warm white (2700K to 3000K) is almost universally more flattering and inviting than daylight or cool white. For step lighting and path lights, low-voltage LED systems are code-friendly, energy-efficient, and safe for DIY installation. Any recessed or hardwired fixtures in an overhead structure should be handled by a licensed electrician.
Privacy solutions
If you are exposed to neighbors or a street, privacy is a comfort essential, not just an aesthetic choice. The fastest options are privacy fence panels, outdoor curtain panels hung from a pergola beam, or a row of fast-growing evergreen shrubs (like Green Giant arborvitae, which can grow 3 to 5 feet per year). Lattice screens with climbing plants give you a softer, more decorative result over time. Concrete block or masonry privacy walls are permanent and highly effective but require permits and professional installation in most municipalities.
Furniture and accessories that actually fit your space
Measure twice before you order anything. Patio furniture dimensions on product pages include the frame but not always the cushion overhang, and conversational sectionals in particular are notorious for being larger in person than they appear in staged photos. Before purchasing, tape out the footprint of each major furniture piece on the actual patio surface and walk around it with a coffee cup in hand. If you want a quick reference point, browse outdoor patio examples to compare layouts, seating arrangements, and accessory choices before you commit. If it feels tight with tape, it will feel claustrophobic with furniture.
For material durability, powdercoated aluminum is the best all-around choice for frames: it won't rust, it's lightweight, and quality pieces will last 15 to 20 years with minimal maintenance. Teak and eucalyptus hardwood are excellent for tables and occasional chairs if you are willing to oil them annually. Avoid painted steel frames unless they are galvanized underneath. For cushion fabrics, Sunbrella and comparable solution-dyed acrylic fabrics are the standard for UV and moisture resistance. Budget outdoor fabrics will fade and mildew within 2 seasons in most climates.
Accessories worth budgeting for: an outdoor rug (defines the zone and adds warmth), a weather-resistant side table for every seating area, and storage, either a deck box or a built-in bench with storage inside. If you have a grilling station, a dedicated prep cart or side table adjacent to the grill is worth more than its cost in daily convenience. Outdoor speakers are a common add-on that pairs well with the lighting and ambiance layer, and like hardwired lighting, they are best installed by a professional if they require running wire through a structure.
DIY vs hiring a contractor: what to outsource and why
The honest answer is that most homeowners can DIY the flooring, furniture arrangement, lighting accessories, and decorative elements. Where professionals earn their fee is in anything structural, anything electrical, and anything that requires a permit.
- Hire a contractor for: attached pergolas or solid patio covers (footing depth and ledger attachment to the house require structural knowledge and often a permit), any hardwired electrical including ceiling fans, recessed lighting, and outdoor outlets, high-pressure misting system installation if it requires tapping into main water supply lines, masonry walls and privacy structures, and drainage modifications near the foundation.
- DIY-friendly tasks: laying paver patios on a properly prepared gravel and sand base, installing freestanding pergolas with pre-set post anchors, hanging string lights and installing low-voltage landscape lighting, assembling furniture, installing outdoor rugs and curtains, and setting up freestanding misting fans.
- Gray area: Freestanding pergolas in some jurisdictions require permits even though they are not attached to the house. Always check with your local building department before breaking ground or setting any footings.
When vetting a contractor, ask specifically whether they pull permits for structural covers and whether their electricians are licensed in your state. Ask to see two or three completed projects in your region and ask those clients about post-installation support. Reputable patio cover installers and pergola companies will provide a written warranty on both materials and labor. Get at least three quotes, but do not automatically take the lowest. A structural patio cover installed incorrectly is a safety liability, not just an aesthetic problem.
For the electrical side, a licensed electrician should run a dedicated outdoor circuit if you plan to add ceiling fans, a refrigerator, lighting, and speakers simultaneously. Most standard outdoor outlets are on a 20-amp GFCI circuit, which can handle a fan and lights but will trip if you add a mini-fridge and a sound system without upgrading the circuit. Plan the electrical load before the electrician visits so you get the right infrastructure on the first call.
Budgeting, measurements, and your setup plan
Here is a realistic budget breakdown by setup tier. These numbers reflect mid-2026 installed costs for a 300 to 400 square foot patio in most U.S. markets. DIY labor savings can reduce each tier by 20 to 35 percent on the components you handle yourself.
| Setup Tier | Flooring | Shade/Cover | Fans + Misting | Lighting | Furniture | Total Estimate |
|---|---|---|---|---|---|---|
| Budget ($8K–$15K) | Poured concrete or basic pavers | Freestanding pergola or shade sail | Pedestal fan(s) | String lights + path lights | Mid-range aluminum/polyester | $8,000–$15,000 |
| Mid-range ($15K–$35K) | Concrete pavers or composite deck | Attached pergola (wood or aluminum) | Ceiling fan(s) + low-pressure misting | Layered LED + string lights | Quality aluminum/Sunbrella cushions | $15,000–$35,000 |
| Premium ($35K–$80K+) | Natural stone or large-format porcelain | Louvered pergola or insulated solid cover | Ceiling fans + high-pressure misting system | Full layered system with smart controls | Teak/powdercoat + premium outdoor upholstery | $35,000–$80,000+ |
Your pre-purchase measurement checklist
- Overall patio dimensions (length x width) and square footage
- Distance from house door to edge of patio (affects traffic flow and zone placement)
- Height from patio surface to eaves or soffit (critical for pergola height and fan clearance — minimum 7 feet of fan clearance is required by most codes)
- Location of existing electrical outlets and distance to nearest panel or sub-panel
- Slope/grade of the existing surface (use a level and tape measure across 10 feet to check)
- Locations of drainage points, downspouts, and utility lines
- Sun angle at peak afternoon hours (use a compass app to identify south and west exposures)
- Distance to nearest neighbors and height of existing fencing for privacy planning
- Local HOA restrictions and permit requirements before committing to any structural work
Recommended installation order
- Grade and drainage work first (before any flooring goes down)
- Electrical rough-in (before flooring and structure if wiring needs to run underground or through footings)
- Flooring and base installation
- Structural overhead cover or pergola (requires footings or ledger attachment)
- Ceiling fans, recessed lights, and hardwired fixtures (by licensed electrician)
- Misting system installation
- Privacy screens, fence panels, or masonry
- Landscape lighting and string lights
- Furniture, rugs, and accessories last (after all construction is done to protect them)
Your region should influence where you put your money. In Phoenix or Houston, the shade structure and misting system should be your biggest investment. In Portland or Seattle, a solid waterproof cover matters more than shade louvering. In Minneapolis or Denver, freeze-resistant pavers and furniture that stores easily through winter are the smart priorities. Whatever your climate, start with the checklist above, get your measurements locked down, and use the installation order to sequence your contractor calls and purchases so nothing has to be moved or redone. If you are planning the best outdoor patio in Atlanta, use this order so shade, cover, and comfort decisions come together before you commit to flooring and furniture. A well-planned outdoor patio setup does not have to be the most expensive one. A best outdoor patio also prioritizes comfort features like shade, weather protection, and smart layout planning. It just has to be done in the right order. If you want the best patio setup, focus on getting your zones, flooring, weather comfort, and lighting dialed in before you buy furniture outdoor patio setup.
FAQ
If I already have a concrete slab, can I build my outdoor patio setup on top of it?
Most patio projects should still start with zoning and drainage grading, even if you already have an existing slab or deck. If you are planning an attached pergola, ceiling fans, or any solid cover, confirm the structural attachment points and load requirements early, because you may need reinforcement before flooring or final furniture sizing. For quick screening, mark where the heaviest loads will sit (posts, beams, fan bracket locations) on day one, then verify those points with a contractor or engineer before ordering materials.
What clearance should I plan for around dining chairs and between patio zones? (I keep buying furniture that feels cramped.)
Target clearance around seating that accounts for chair backs, people turning, and serving. A common mistake is planning “armchair clearance” but forgetting the chair pull-out and person overlap when someone stands up. When in doubt, leave wider space on the dining-to-walkway side (often 42 to 48 inches feels better than the minimum), and keep the lounging coffee table placement such that you are not reaching over a walkway to reach it.
How do I plan outdoor electricity so I do not overload circuits or have to rewire later?
When your patio is under a cover, you still need to design the electrical system as if it could get wet. Use fixtures rated for the exact exposure (damp vs wet), and plan a dedicated outdoor circuit if you will combine ceiling fans, lighting, outlets for speakers, and any refrigeration. Also decide whether you want lights and fans on separate switches or smart controls, because retrofitting wiring after a finished ceiling or pergola is installed is usually more expensive.
Is a misting system worth it in humid climates, or will it just make the patio feel wetter?
Do not assume “misting” will cool you the way it does in desert climates. High-pressure misting can feel dramatically cooler in dry air, but in humid areas it often just increases wetness and discomfort, and it can add slip risk around the seating. If your typical humidity frequently exceeds about 60 percent, prioritize a solid cover, shade, and airflow instead of misting.
How many outdoor ceiling fans do I need for my patio size? Should I choose one big fan or multiple?
Pick a fan size based on the patio’s open airflow area, not the furniture grouping, and avoid treating one large fan as a substitute for multiple smaller ones in big spaces. As a rule, a 52-inch fan typically covers around a 15 by 15 foot area adequately, and spacing two fans evenly can outperform a single oversized unit. Also confirm the mounting height under your cover, since airflow effectiveness drops when fans are too close to seating.
What outdoor rug size and material should I use so it actually lasts through storms?
Choose rugs carefully for patios. The rug should be sized to anchor the seating zone (front legs on the rug for both dining or lounging if possible), but it also must be made for outdoor conditions, with solution-dyed or UV-resistant fibers and a design that tolerates rain. If your patio drains away from the house but pools occur near a seating wall, reposition the rug or adjust drainage, because water trapped under the rug can shorten cushion and floor life.
What is the best way to add privacy if my patio faces a neighbor’s fence?
If you back onto a fence or a neighbor’s yard, privacy should be planned as part of zone orientation, not only as a screen after the fact. Consider placing the lounging zone inward toward the house for natural privacy, then add screening on the exposure side (curtains on pergola beams, privacy panels, or shrubs). For evergreen screening, remember growth takes time, so combine a temporary option (curtain or panel) with long-term planting so you are comfortable in year one.
Should I prioritize shade, a waterproof cover, or climate control first for a patio that I want to use year-round?
The safest approach is to treat weather exposure as a seating decision. If your climate includes frequent afternoon rain or heavy storms, a solid cover is the most reliable way to keep the patio usable. If you mainly need sun control, a louvered pergola can work well, but it will not perform like a roof in driving rain. For sun-dominant climates, prioritize heat management choices first, shade structure second, and only then decide on misting and fans.
What parts of an outdoor patio setup are realistic to DIY, and what mistakes are most costly to fix later?
You can often DIY arrangement and accessory placement, but anything structural, electrical, or permitted should be handled professionally. Even if you are doing flooring yourself, confirm that your base, slope, and any future cut lines will not conflict with planned posts, fan mounts, or wiring routes. A practical next step is to mark the “do not disturb” footprint zones for structural elements on your patio plan before you start leveling or installing materials.