The best patio for a Minnesota home is one built with freeze/thaw cycles in mind, sized for how you actually use it, and outfitted with at least one or two climate-comfort features that stretch the season into May and October. That usually means concrete pavers or natural stone on a deep, well-compacted gravel base, a layout that catches afternoon sun while blocking northwest winds, and some kind of overhead cover plus a heat source for shoulder-season nights.
Best Patio MN Guide: Materials, Layout, Costs, and Design

Elise Prescott
17 May 2026
What 'best patio' actually means for Minnesota homeowners
Minnesota backyards have a short-but-intense outdoor season, so 'best' here isn't just about looks. Most MN homeowners I talk to are solving one of a few core problems: they want a comfortable spot to grill and eat outside from May through September, they want a fire pit area that works on cool spring and fall nights, or they want an entertainment zone that can handle a crowd without everything heaving, cracking, or flooding by year three. Many Minnesota homeowners extend outdoor living into fall and spring by building separate outdoor living zones, including fire features such as fire pits or outdoor fireplaces along with dedicated dining or grilling areas fire pit area that works on cool spring and fall nights, or they want an entertainment zone.
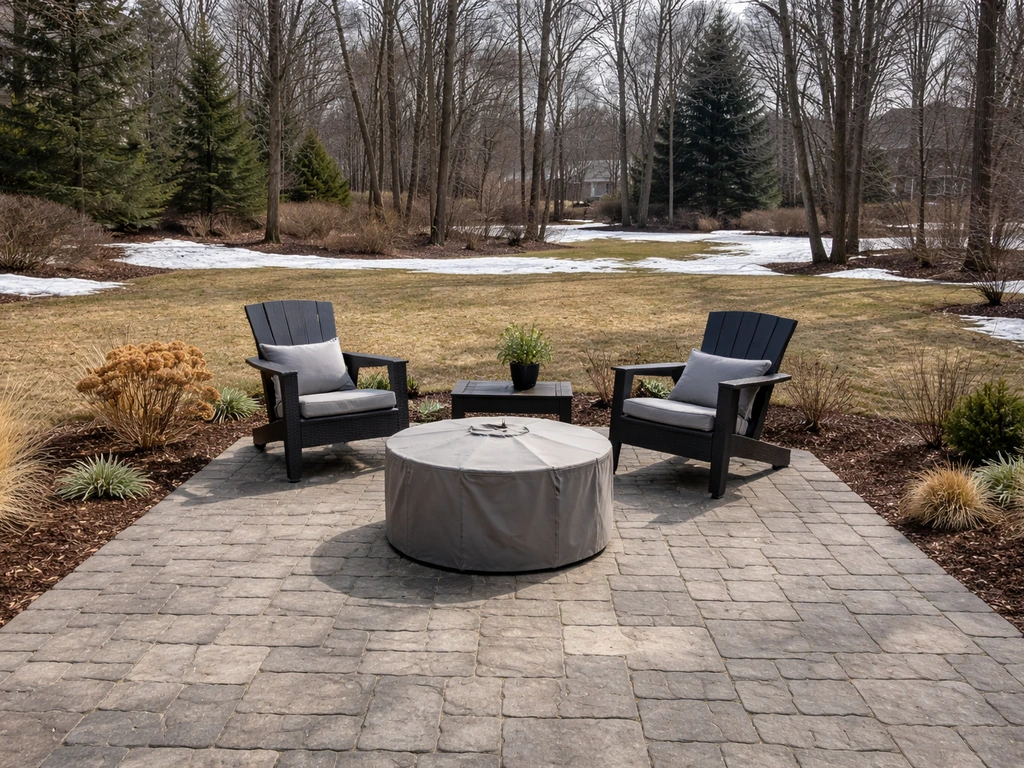
Use-case really drives the design. A dining and grilling patio needs hard, level surface right off the back door, good drainage so it doesn't pond after a rainstorm, and room to pull chairs back from the table without stepping off the edge. A fire pit zone is usually set a bit further from the house, sometimes at a lower grade, and benefits from a looser, more informal feel. An entertainment patio needs sheer square footage, often 400+ sq ft, plus some kind of overhead element so guests aren't squinting into late afternoon sun. Many MN homeowners end up combining two of these into one multi-zone layout, which is increasingly popular in the Twin Cities metro and suburbs like Bloomington, Minnetonka, and Edina.
The other Minnesota-specific priority is durability against the climate. A freeze/thaw cycle can destroy a poorly built patio in three to five years. Snow load matters if you're adding a roof structure. Wind off the open prairie can make an otherwise lovely patio completely unusable on a 65-degree evening. Getting these factors right is what separates a patio you love for 20 years from one you're already regretting by year two.
Best patio materials for Minnesota weather
Material choice is where Minnesota homeowners have to be most careful. The ground here moves. Period. Whatever surface you choose needs to tolerate that movement without cracking apart or becoming a trip hazard. Here's how the main options stack up.
| Material | MN Freeze/Thaw Performance | Maintenance Level | Typical Lifespan | Cost Range (installed) |
|---|---|---|---|---|
| Concrete Pavers | Excellent — individual units shift without cracking | Low to moderate (re-leveling every 5-10 yrs) | 25-50+ years | $15-$25/sq ft |
| Natural Stone (flagstone, bluestone) | Very good if properly set | Moderate (sealing, re-setting) | 30-50+ years | $20-$35/sq ft |
| Poured Concrete | Fair — prone to cracking without control joints | Moderate (sealing, crack repair) | 15-25 years | $8-$15/sq ft |
| Brick | Good with proper base; older brick can spall | Moderate (re-pointing, re-leveling) | 20-40 years | $18-$28/sq ft |
| Composite Decking (raised) | Very good — doesn't heave like ground-set materials | Low (annual cleaning) | 25-30 years | $20-$40/sq ft |
| Porcelain Tile/Pavers | Good if rated for freeze/thaw; avoid non-frost-rated tile | Low (cleaning, occasional re-grouting) | 20-30 years | $18-$30/sq ft |
| Gravel/Decomposed Granite | Excellent — nothing to crack | High (raking, replenishing) | Ongoing | $3-$7/sq ft |
Concrete pavers: the Minnesota sweet spot
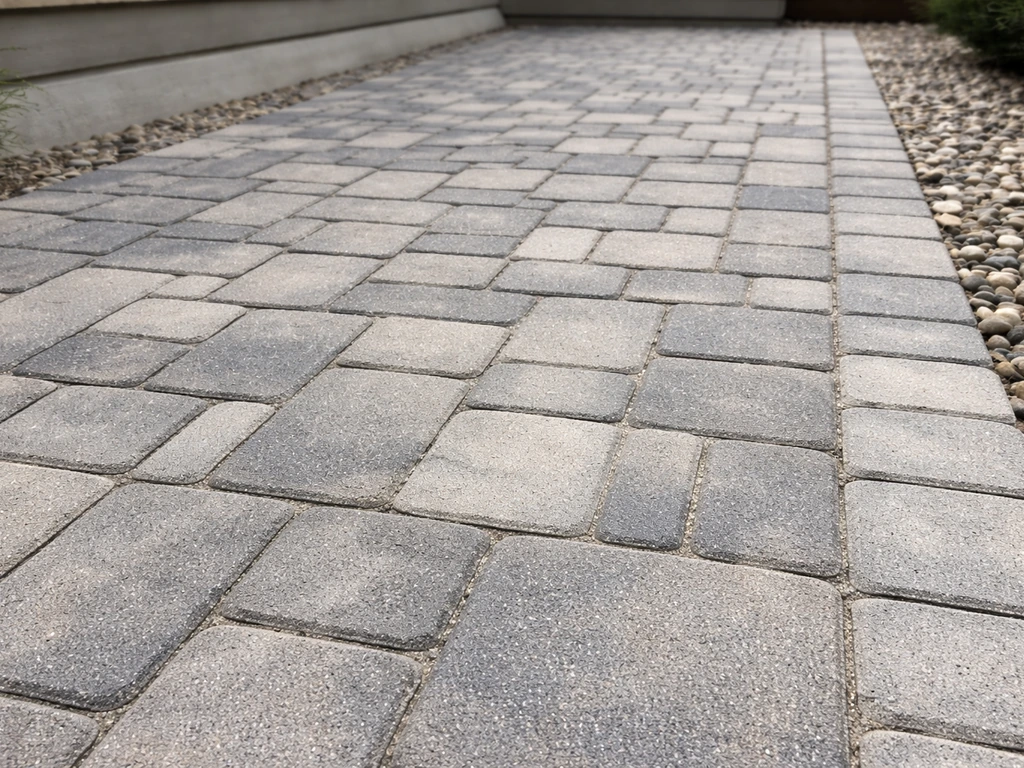
Concrete pavers are the most popular choice for good reason. Because each unit is independent, the surface can heave slightly in winter and settle back in spring without cracking. If one paver does shift noticeably, you pull it up, add or remove sand, and reset it. That's a DIY-able repair that costs almost nothing. Modern pavers come in textures and colors that easily rival natural stone at a lower price point, and they hold up to de-icing salt better than poured concrete. My recommendation for most MN homeowners: start here unless you have a specific reason not to.
Natural stone: premium look, longer base prep
Flagstone and bluestone look incredible and last a long time, but they demand a very thorough base. In Minnesota, that means at minimum 6 inches of compacted class 5 gravel, sometimes 8-12 inches in areas with poor drainage or heavy frost penetration. Skimping on the base is the single biggest reason natural stone patios fail here. Done right, a flagstone patio is genuinely beautiful and adds significant home value. Done on a cheap base, it becomes an uneven mess in five years.
Poured concrete: cheapest upfront, more long-term work
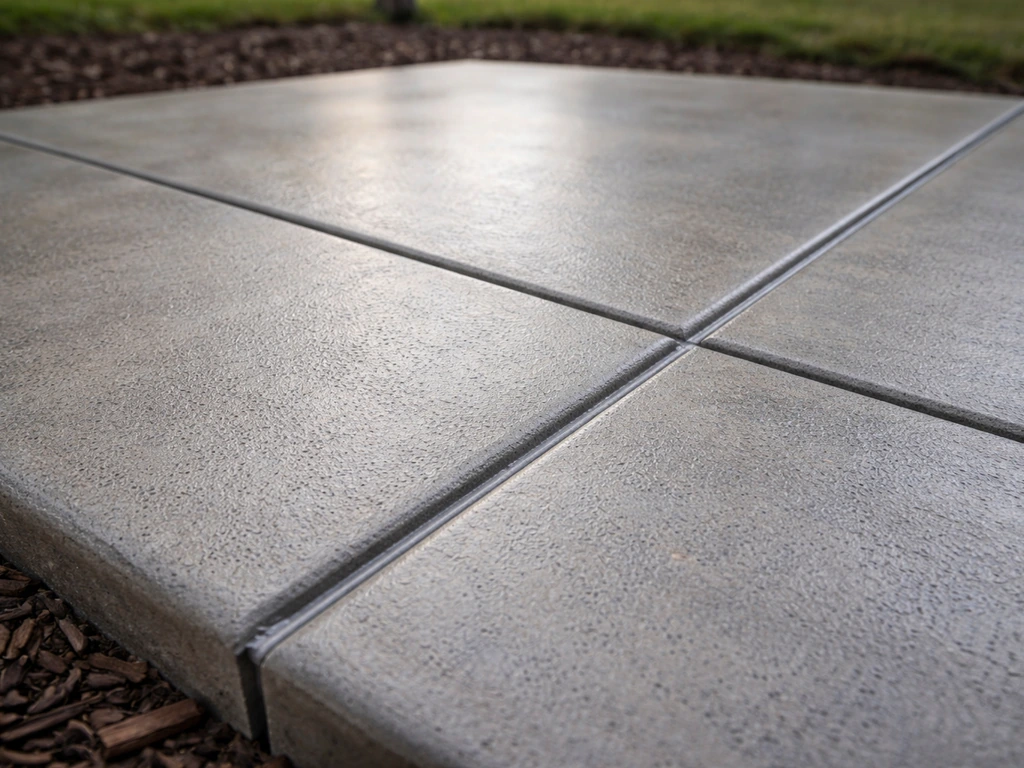
Poured concrete is the budget entry point, and it can work fine if the contractor installs proper control joints and seals the surface every two to three years. The problem in Minnesota is that concrete slabs heave as a single unit, and cracks are not 'if' but 'when.' A good installer can manage cracking through joint placement, but you're still looking at sealing and occasional crack repair as ongoing tasks. If budget is tight, poured concrete is a reasonable choice. Just go in knowing the maintenance tradeoffs.
Composite decking and raised platforms
If your yard has significant grade changes or you want a raised outdoor living area, composite decking on a pressure-treated or steel frame is worth serious consideration. It doesn't heave because it's attached to footings below the frost line (typically 42-48 inches deep in Minnesota). Composite materials have dramatically improved in the last decade: they don't rot, splinter, or require annual staining, and they stay cooler underfoot than older wood composites. The tradeoff is higher upfront cost and the need for proper frost-depth footings, which usually means professional installation or at minimum very careful DIY.
Designing your MN patio layout the right way
Where you put the patio and how big you make it matters as much as the material. I've seen beautiful pavers completely undercut by bad placement decisions.
Size it for real use
A patio that's too small is one of the most common regrets I hear from homeowners. The minimum comfortable dining area for four people is about 10x12 feet (120 sq ft), and that feels tight. For six to eight people with a grill zone and some circulation space, aim for 16x20 feet or 320 sq ft. If you're adding a fire pit zone or lounge area, plan for a separate connected pad or a larger footprint in the 400-600 sq ft range. Sketch out your actual furniture with real dimensions before you finalize a size.
Sun, wind, and orientation
In Minnesota, a south or southwest-facing patio is almost always the best choice. You get the most sun on cool spring and fall days when you really need it, and afternoon light in summer can be managed with shade (more on that below). A north-facing patio stays cold and shaded longer into spring, which shortens your usable season noticeably. Prevailing winds in Minnesota typically come out of the northwest, especially in fall and winter. If your patio is exposed to the northwest, a fence, solid pergola wall, or strategic evergreen plantings on that side makes a real difference in comfort.
Drainage and grading: don't skip this
Any patio surface needs a slight slope away from the house, typically 1/8 to 1/4 inch per foot. This prevents water from pooling against your foundation and reduces the freeze/thaw damage from standing water. In Minnesota, poor drainage is one of the top reasons patios fail early. If your yard has heavy clay soil or low spots that collect water, address that during base prep, not after. Consider a perimeter drain or a dry creek bed to route water away from the patio edge.
Proximity to the house and transitions
Attaching the patio directly to the house foundation works well for a dining or grilling zone, but make sure the surface slopes away from the house and never traps water against the siding or foundation. If you're building a raised deck/patio combo, the ledger board connection to the house requires flashing and often a permit. For ground-level patios set slightly away from the house, a simple transition step or landing manages elevation changes without structural complexity.
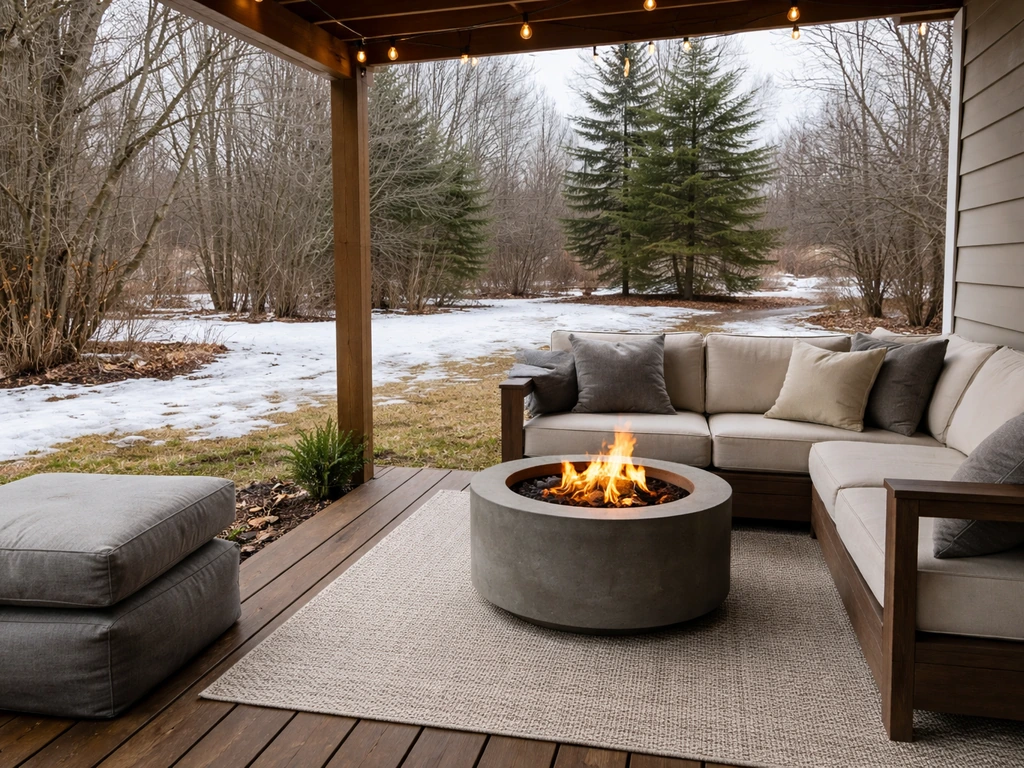
Patio covers and climate control options for MN
This is where a good MN patio goes from 'nice' to 'something we actually use every week.' Minnesota's shoulder seasons, late April through May and September through October, are the payoff for a well-covered patio. You can easily get 5-6 months of real use out of a patio that has a cover and a heat source.
Pergolas
A pergola is the most popular patio cover in Minnesota for good reason: it provides partial shade and defines the space without blocking airflow or requiring the structural engineering of a full roof. Open-top pergolas work well for shade and aesthetics but offer no rain protection. Louvered pergolas (with adjustable roof slats) are increasingly popular because they let you control sun and rain in real time. For MN snow load, make sure any pergola you buy or build is rated for at least 40 lbs per square foot of snow load, which is the typical Minnesota code requirement. Many cheap imported aluminum pergolas are not rated for this, so check before you buy.
Gazebos and full roof structures
A hard-top gazebo or full patio roof gives you rain and sun protection but adds significant cost and structural requirements. A full roof attached to the house is typically a permitted structure in most MN municipalities and needs to meet snow load and wind requirements. The upside is maximum weather protection and the ability to add ceiling fans, lighting, and even a wall-mount heater. If you're investing at this level, hire a contractor who understands local building codes.
Screens and privacy panels
A screened porch or three-season room is the ultimate MN upgrade for bug-free, weather-moderated outdoor living. It's also the most expensive option, starting around $15,000-$30,000 for a professionally built addition. Simpler options include shade sails, retractable awnings, and privacy screen panels on the windward side, all of which can be done for $500-$3,000 depending on scale.
Outdoor heaters for shoulder-season use
A propane or natural gas patio heater adds roughly 10-15 degrees of perceived warmth in a 10-foot radius and makes October patio nights genuinely comfortable. Infrared heaters mounted under a pergola roof are more efficient and weather-resistant than freestanding units. Electric infrared heaters are a good choice if you have outdoor electrical access and want a low-maintenance setup. For the fire pit crowd, a built-in gas fire feature or a quality wood-burning fire pit doubles as a heat source and a social focal point.
Cooling comfort on a Minnesota patio
Here's where MN differs meaningfully from warmer states: most of the time, a Minnesota patio doesn't need a misting system. Misters add humidity to an already-humid Midwest summer air, and on most MN days the real discomfort is the sun, not the temperature. Shade plus airflow is the right cooling strategy for the vast majority of Minnesota summer days.
Shade first, always
A pergola, shade sail, or retractable awning on the south or west exposure reduces the felt temperature on a hot afternoon by 10-15 degrees just by blocking direct sun. If you have or can plant a deciduous tree on the west side, that's free cooling for the next 15 years. Get your shade sorted before you spend anything on active cooling.
Ceiling and pedestal fans
Under a pergola or patio cover, a ceiling fan is one of the best investments you can make. A damp-rated outdoor ceiling fan (not just 'indoor' rated) running on low creates enough airflow to make 85-degree days feel like 75, and it also discourages mosquitoes. For open patios without overhead structure, a large pedestal fan or tower fan does a similar job. Look for fans with a blade span of at least 52 inches for a 12x16-foot space.
When misting actually makes sense in MN
Misting systems are worth considering during the 10-15 days a year when Minnesota hits 90+ degrees with lower humidity, typically in late July. A low-pressure misting kit ($50-$200) attached to a pergola or fence can drop temps noticeably on those specific days. High-pressure misting systems (professional install, $1,500-$3,000+) are probably overkill for Minnesota's climate unless you're running a commercial outdoor space. For most homeowners, a portable misting fan is a practical and much cheaper option for the handful of truly hot days.
Durability, safety, and Minnesota code basics
This is the section most homeowners skim and then regret later. Getting the structural and code basics right isn't just about passing inspection. It's about making sure your patio is still level, safe, and functional in 15 years.
Base preparation: the most important step
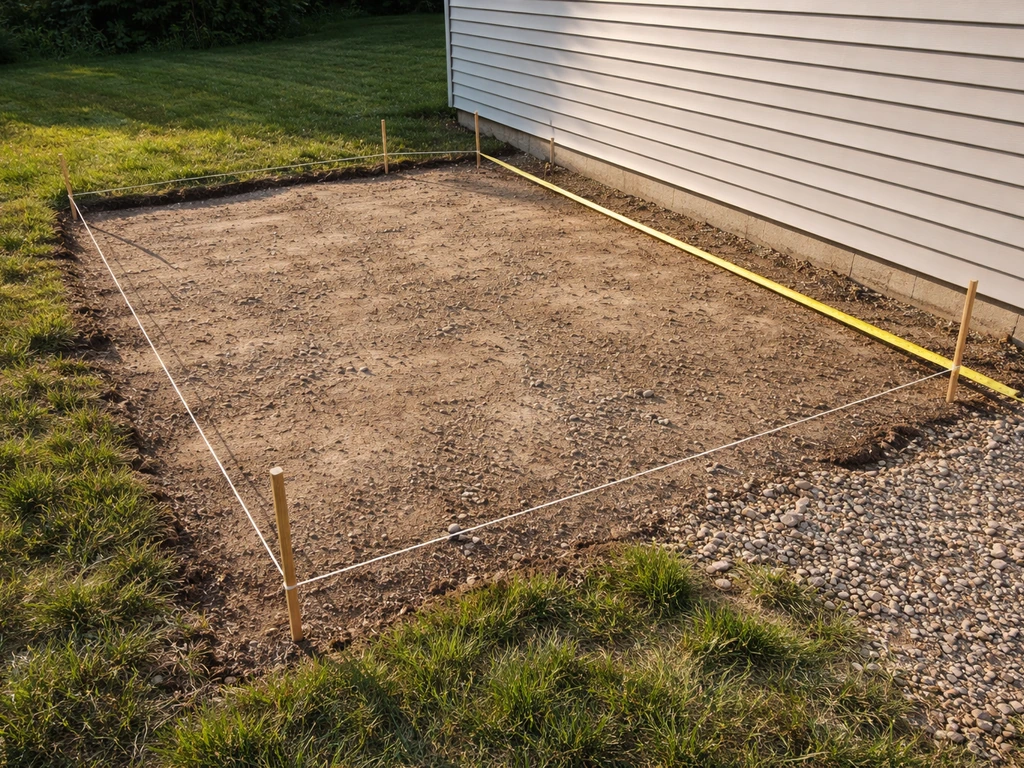
For any ground-set patio in Minnesota, a proper base is non-negotiable. That means removing all organic material (sod, roots, topsoil) from the patio footprint, then installing a compacted base of class 5 aggregate gravel. The standard minimum is 4 inches of compacted gravel for a simple paver patio on well-draining soil. In areas with heavy clay, poor drainage, or heavy use, 6-8 inches is better. Skipping this step is the single most common cause of patio failure in Minnesota. A 1-inch layer of coarse bedding sand goes on top of the gravel, and then your pavers or stone.
Footings for structures
Any above-ground structure (pergola posts, gazebo columns, deck supports) needs footings that extend below the frost line. In most of Minnesota, that means 42 to 48 inches deep, with some northern areas requiring deeper. A post set in a shallow footing will heave out of the ground within a few freeze/thaw cycles. Concrete tube footings (Sonotubes) dug to the proper depth are the standard DIY-friendly solution.
Drainage and water management
Beyond surface slope, think about where water goes when it leaves your patio. It shouldn't flow toward the house foundation or pool in a neighbor's yard. French drains, catch basins, or simple channel drains at the low edge of a patio are practical solutions when natural grading doesn't handle the runoff. In Minnesota's clay-heavy soils, especially in the Twin Cities metro, drainage planning is especially important.
Railings and fall protection
If any part of your patio or deck surface is 30 inches or more above grade, Minnesota residential building code requires a guardrail at least 36 inches tall (42 inches for decks above 30 inches, in many jurisdictions). Balusters must be spaced so a 4-inch sphere can't pass through. Even for patios where railings aren't technically required, edge treatments like a small retaining wall or a step-down border improve safety and aesthetics.
Permits: check before you dig
Permit requirements for patios vary by Minnesota municipality, but they're more common than most homeowners expect. Shoreview, for example, requires a permit to build, replace, or expand a patio. Many other Twin Cities suburbs and outstate cities have similar rules, especially for patios over a certain square footage or those with structural elements. Always check with your local building department before starting. Getting caught without a permit can mean tearing out work or having trouble selling your home later. The cost and time of a permit ($50-$300 for most ground-level patios) is trivial compared to the headache of non-compliance.
Cost breakdown and DIY vs. hiring a pro
Let me give you real numbers so you can plan a budget that makes sense for your project.
| Project Type | DIY Material Cost | Professional Installed Cost | Notes |
|---|---|---|---|
| Basic paver patio (200 sq ft) | $800-$1,400 | $3,000-$5,000 | Includes base materials, pavers, edging |
| Mid-size paver patio (400 sq ft) | $1,600-$3,000 | $6,000-$10,000 | May include steps or borders |
| Natural stone patio (400 sq ft) | $2,500-$5,000 | $9,000-$16,000 | Flagstone or bluestone, deep base |
| Poured concrete patio (300 sq ft) | $800-$1,500 | $3,000-$6,000 | Includes control joints and sealing |
| Open pergola (12x16 ft) | $1,200-$4,000 | $4,000-$10,000 | Wood or aluminum, excludes lighting |
| Louvered pergola (12x16 ft) | $3,000-$8,000 | $8,000-$18,000 | Motorized louver models at top end |
| Outdoor gas/infrared heater | $200-$800 | $800-$2,500 installed | Includes gas line run if needed |
| Three-season screened room | N/A (pro only) | $15,000-$35,000+ | Permitted addition, varies widely |
When to DIY
DIY is genuinely viable for a ground-level paver or flagstone patio if you're comfortable with physical labor and careful prep work. Renting a plate compactor ($60-$90/day) is essential for proper base compaction. The main risk with DIY in Minnesota is cutting corners on base depth or drainage, which will cost you more to fix later than hiring out would have cost upfront. If you've never done base prep work before, consider hiring a contractor for the gravel base and doing the paver installation yourself. That hybrid approach saves money while protecting the most critical step.
When to hire a pro
Hire a contractor for anything requiring frost-depth footings, any work attached to the house, any permitted structure, complex drainage solutions, or if your yard has significant grade changes. Also hire out if you're building a large patio (600+ sq ft) where incorrect base work becomes very expensive to redo. When getting quotes, ask specifically how deep they're planning the gravel base and what drainage provisions they're including. A contractor who can't answer those questions clearly is a red flag.
Your next-steps checklist
- Walk your yard and note: sun direction at midday and late afternoon, low spots that collect water, prevailing wind direction, and the slope away from your house.
- Decide your primary use case (dining/grilling, fire pit zone, entertainment area, or a combination) and rough out a target size using real furniture dimensions.
- Check with your city or township building department about permit requirements for a patio or any covered structure before you do anything else.
- Get at least three quotes from local MN patio contractors. Ask each one about base depth, drainage plan, frost-line footings (if applicable), and their warranty on settling or cracking.
- Decide which elements you'll DIY (paver installation, minor landscaping) versus hire out (base prep, any structural or permitted work).
- Set a realistic budget with a 10-15% contingency for drainage surprises or soil issues, which are common in MN clay soils.
- Plan your climate-comfort additions (pergola, heater, fan) into the initial design so electrical and gas rough-ins happen during construction, not as an expensive afterthought.
Finding the best fit for your MN backyard
If I had to give a simple 'best fit' recommendation for most Minnesota homeowners, it would be this: a concrete paver patio (400+ sq ft) on a 6-inch compacted gravel base, oriented toward the south or southwest, with a louvered or solid-top pergola on at least half of the surface, a ceiling fan under the covered section, and a propane or gas heat source for shoulder-season use. That combination gives you durability against MN freeze/thaw, genuine comfort from May through October, and enough flexibility to add a fire pit zone or dining area in a second phase. It's not the cheapest option, but it's the one that delivers real return on every dollar spent.
Budget-first homeowners can absolutely start with a well-built poured concrete or basic paver slab and add the cover and heat later. The key is getting the base and drainage right from day one, because fixing those after the fact is expensive. If you're still in research mode on pricing and timing, it's worth looking into current patio deals and sales from local suppliers, since MN patio season typically kicks off in April and May with promotional pricing that can cut material costs meaningfully. If you want the best patio clearance opportunities, check what end-of-season promos local suppliers run for pavers, stone, and patio cover kits patio deals and sales. For more inspiration on new product trends and seasonal offers, check what Patio Magazine is recommending patio deals and sales. If you want a contractor-supported recommendation, start by checking the best patio store options near you for materials, delivery, and install-ready guidance patio deals and sales. If you want the best patio deals, keep an eye on seasonal promotions from local suppliers and installers patio deals and sales. If you want to compare options, focus on the best patio sales from local suppliers right as the season starts.
FAQ
Can I start with an uncovered paver patio and add a pergola or heater later? (What should I plan for now?)
Yes, but only if the base is built for it. If you want to add a cover after installing pavers, plan for post footings that extend below the frost line and do not rely on the paver layer for support. You may need to remove sections of the patio to install footings, then re-set pavers and reestablish proper slope and drainage around the new structure.
What’s the biggest mistake I can make with the paver base in Minnesota?
Avoid piling sand directly over compacted gravel and calling it “bedding.” Use a coarse bedding sand layer at about 1 inch for pavers, and make sure the gravel below is compacted to the depth the material needs. A common failure in Minnesota is insufficient gravel depth, which leads to rocking stones that eventually create gaps and water pathways.
How should a patio drain when it’s attached to the house foundation?
For a dining and grilling patio next to the house, keep the connection tight but never trap water at the wall line. Maintain the recommended slope away from the foundation and consider a small gap or flashing detail where water could otherwise run behind siding or up against concrete. If you are building a raised section and touching a ledger board, treat it like a permitted structure and follow flashing requirements.
If my yard is clay and pools water, what drainage solution works best for a patio?
A dry creek bed or perimeter drain can be very effective even on a small patio, but size and placement matter. Start by identifying where water flows during a heavy rain, then route it away from the patio edge before it reaches the base. In clay-heavy yards, it’s usually better to plan drainage during base prep rather than relying on “surface cleanup” later.
Can I add planters or edging to an MN patio without hurting the patio’s longevity?
Warm-season perennials are fine, but avoid planting directly in the patio footprint or where roots can disrupt the base. Use landscape fabric and keep plant borders separated from the patio edge so you don’t introduce organic material into the base area. Also, choose plants that tolerate salt or de-icing residue if you use it near the patio.
Is a west-facing or northwest-exposed patio still “best” in Minnesota?
Yes, but it changes your whole comfort strategy. If you can get dependable afternoon shade, you may prefer a south or west-facing patio with louvered coverage, ceiling fan airflow, and a heater for nights. If the patio will be exposed to northwest winds, prioritize a solid windbreak on that side (fence wall or evergreen massing) because shade alone won’t stop wind chill.
Do I need a guardrail for a raised patio in Minnesota, and how do I confirm the height requirement?
If railings are required depends on the height above grade. For guardrail placement, use the code trigger of 30 inches above grade and verify local jurisdiction rules, since some cities interpret deck vs patio edges differently. When unsure, err on safety with a step-down or retaining border, especially if kids or guests will use the space frequently.
When do Minnesota patios usually need permits, especially if I’m only expanding an existing patio?
You can often avoid a permit for small, simple, ground-level patios, but expansions and structural elements commonly trigger requirements. A practical check is to measure square footage, note any roof structures or attached posts, and call your building department with the plan. One way to reduce risk is to keep the first phase ground-level and postpone covered or elevated add-ons until you confirm permitting.
What de-icer or salt should I use on a patio surface in winter?
Do not use de-icing salt as a blanket solution without considering finish and surface choice. Many paver systems handle salt better than poured concrete, but repeated freeze-thaw plus harsh salt can still accelerate surface wear and staining. If you expect heavy winter use, ask your contractor or supplier what de-icer is compatible with your specific pavers or stone finish.
How can I confirm my patio slope and drainage are correct before I finish the project?
For pavers and many stones, you generally want to avoid low spots, but you do not want a steep pitch either. Stay within about 1/8 to 1/4 inch per foot away from the house, then verify that water actually drains off the patio rather than running along the paver joints. A quick test is to hose down the patio and watch where runoff goes before you fully finalize the base and edging.