The best patio paint for most homeowners is a 100% acrylic exterior masonry or concrete coating, paired with a compatible primer and proper surface prep. If you have a wood deck or porch floor, you want a dedicated porch and floor enamel or deck coating. For the best porch and patio paint results, choose the coating type that matches your porch floor or patio surface material and your local weather conditions. Metal railings and furniture need a rust-inhibiting exterior paint. The product category matters more than any single brand name, and choosing the wrong type for your surface is the number one reason patio paint fails within a season.
Best Patio Paint: How to Choose, Prep, and Apply

Elise Prescott
7 May 2026
How to pick the best patio paint for your surface
Start with your surface material, not a product review. Concrete, brick, and stucco are porous masonry surfaces that need paints formulated to breathe and bond to alkaline substrates. Wood needs a paint or coating that flexes with seasonal expansion and contraction. Metal needs adhesion primers and rust inhibitors. If you mix these up, you'll be repainting inside two years.
After material, consider your climate. A homeowner in humid Florida has completely different priorities than someone in Colorado Springs dealing with freeze-thaw cycles, or someone in Phoenix who needs serious UV resistance. Climate shapes which performance features matter most, so a product that's "best overall" in one region can be a mediocre choice in another.
Finally, think about foot traffic. A horizontal patio floor takes punishment that a vertical wall never sees. You need a coating with abrasion resistance, good coefficient of friction (slip resistance), and the ability to handle temperature-driven movement. Decorative vertical surfaces like painted brick walls can get away with a standard exterior masonry paint.
Outdoor durability requirements (UV, moisture, mildew, freeze-thaw)
Outdoor paint faces a brutal combination of stressors that interior paint never has to deal with. UV radiation breaks down the binder in paint films over time, causing chalking and fading. Moisture drives mold and mildew growth, especially in shaded areas or climates with high humidity. And in colder regions, water that penetrates a paint film and then freezes will literally push the coating off the surface in sheets.
Here's what to look for on any product you're considering for a horizontal patio surface:
- UV and fade resistance: Look for 100% acrylic formulas with UV-stable pigments. Cheaper paints use lower-quality binders that chalk and fade within one or two seasons in direct sun.
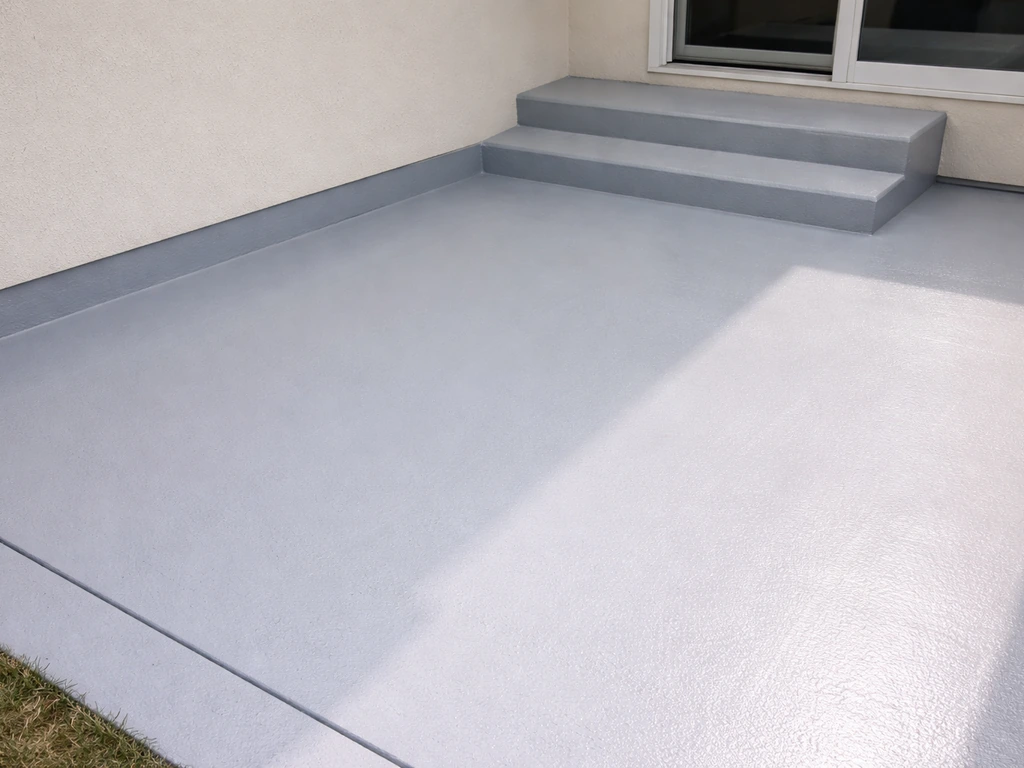
- Moisture and waterproofing: Horizontal surfaces pool water after rain. Products like BEHR PREMIUM Concrete and Masonry Protector and Waterproofer are specifically formulated for this, with a spread rate of about 250 sq. ft. per gallon applied until the surface is saturated.
- Mildew resistance: Any outdoor coating in a humid or shaded environment should include a mildewcide. Check the product data sheet, not just the label.
- Freeze-thaw stability: In climates with hard winters (Colorado, Minnesota, the Midwest), you want an elastomeric or flexible coating that can handle substrate movement. Rigid coatings crack when concrete flexes under frost.
- Abrasion and foot traffic: Patio floors need coatings rated for foot traffic, not just vertical surfaces. Polycuramine and epoxy-hybrid coatings like Rust-Oleum RockSolid are designed for this, with foot traffic readiness in 8 to 10 hours and full vehicle-grade cure in 24 to 36 hours.
- Salt air resistance: Coastal homes in Florida, the Gulf Coast, or Pacific coast regions need coatings specifically rated for salt air, as chlorides accelerate corrosion on metal substrates and degrade standard paint binders faster.
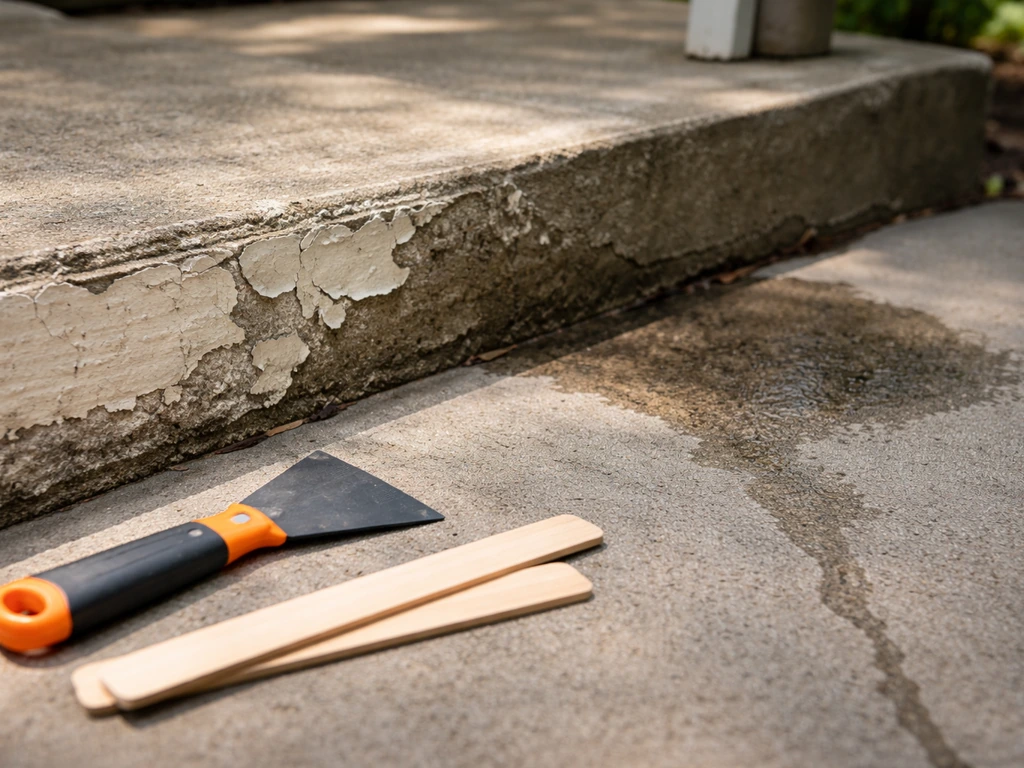
Surface prep and priming: the make-or-break step
I can't stress this enough: the prep is where patio paint jobs succeed or fail. The best paint in the world will peel off a dusty, contaminated, or improperly primed surface. This is not the step to rush.
Cleaning and repairs
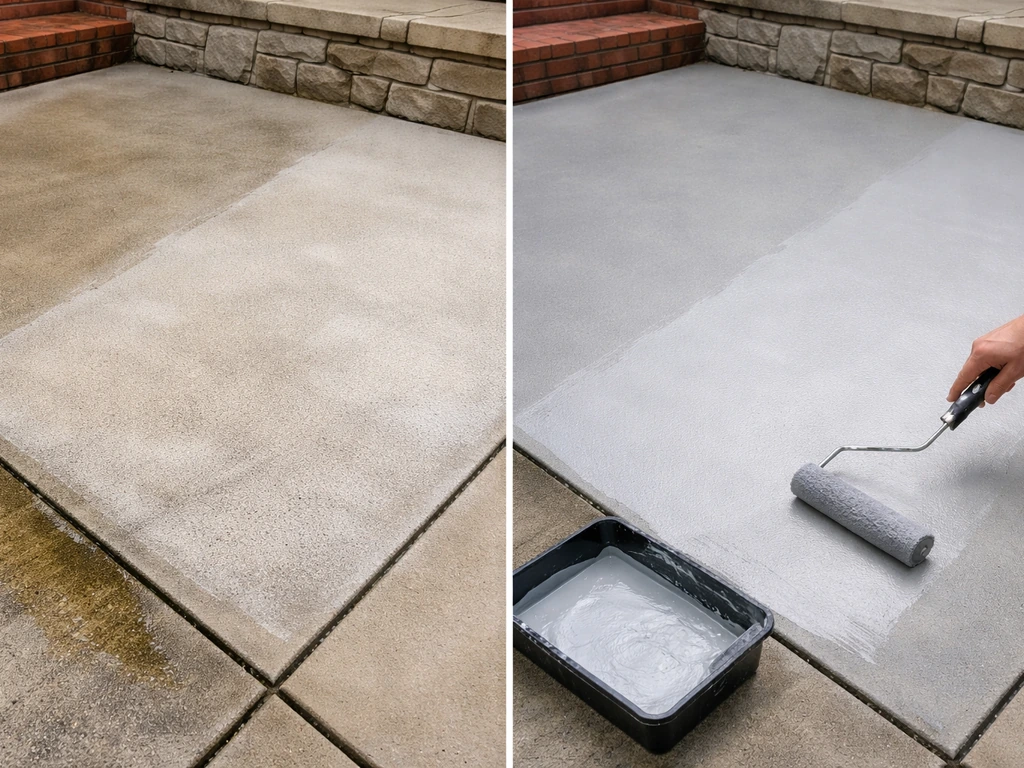
Pressure wash concrete and masonry at 2,000 to 3,000 PSI to remove dirt, oil, and any loose existing paint. Let the surface dry completely, which typically takes 24 to 48 hours depending on your climate and time of year. Fill cracks with a concrete patching compound rated for exterior use, and let patches cure fully before painting (usually 24 hours minimum, longer for deep repairs). On wood, sand rough areas, countersink any popped nails, and fill holes with exterior wood filler. On metal, remove rust with a wire brush or angle grinder and sand to bare metal in corroded areas.
Dealing with existing coatings
If the surface was previously painted, you need to assess what's there. Sound, tightly adhered existing paint can often be painted over after cleaning and light sanding for adhesion. Peeling, flaking, or chalking paint must be removed. Trying to paint over a failing coating just traps the failure underneath and you'll be back to square one within months. Use a scraper, wire brush, or chemical paint stripper depending on how bad it is, then prime bare areas before recoating.
Priming
New or bare concrete and masonry almost always need a masonry primer or block filler first. These seal the porous surface, even out the substrate, and give the topcoat something to grip. Bare wood needs an exterior primer (oil-based is harder and more moisture-resistant, but water-based acrylic primers work well for most applications). Bare or rusty metal needs a rust-inhibiting primer before any topcoat. Skipping primer to save time is how you get a peel job that looks bad by the following spring.
Best paint types by patio material
| Surface | Best Paint Type | Key Feature to Look For | Paint vs Stain vs Sealer |
|---|---|---|---|
| Concrete patio floor | Concrete and masonry floor coating or polycuramine/epoxy hybrid | Abrasion resistance, slip resistance, UV stability | Paint or epoxy coating for color/protection; sealer alone for natural look |
| Brick (horizontal or vertical) | 100% acrylic exterior masonry paint | Breathability, mildew resistance, alkali resistance | Paint for color change; clear masonry sealer if keeping natural look |
| Stucco | Elastomeric or 100% acrylic exterior masonry paint | Flexibility, waterproofing, crack-bridging ability | Always paint; stucco needs a protective coating |
| Wood porch or deck floor | Porch and floor enamel or deck coating | Flexibility, adhesion to wood, mildew resistance | Paint for opaque color; solid deck stain for semi-opaque; clear sealer for natural |
| Wood railings or trim | Exterior 100% acrylic paint with exterior primer | Adhesion, flexibility, UV resistance | Paint for durability; stain for natural wood look |
| Metal railings or furniture | Rust-inhibiting exterior paint over rust-inhibiting primer | Adhesion to metal, rust prevention, UV stability | Paint always; no stain or sealer alternatives for bare metal |
Concrete and masonry: your main options
For a standard concrete patio, a 100% acrylic concrete floor coating is the most accessible DIY option. It cleans up with water, handles UV reasonably well, and is available at every home improvement store. You can find quality patio paint at home improvement stores and online retailers that carry exterior masonry and concrete coatings where to buy patio paint. For a more durable, garage-floor-grade finish, polycuramine or epoxy-hybrid coatings (like Rust-Oleum RockSolid) bond harder and resist abrasion better, though they have a shorter working window and require more careful application. Elastomeric coatings like Sika Thorocoat-250 are worth considering if you have a stucco or masonry wall with hairline cracks, since elastomerics bridge small cracks rather than just coating over them. Thorocoat-250 has a recoat window of 2 to 4 hours, which makes multi-coat application manageable in a single day under good conditions.
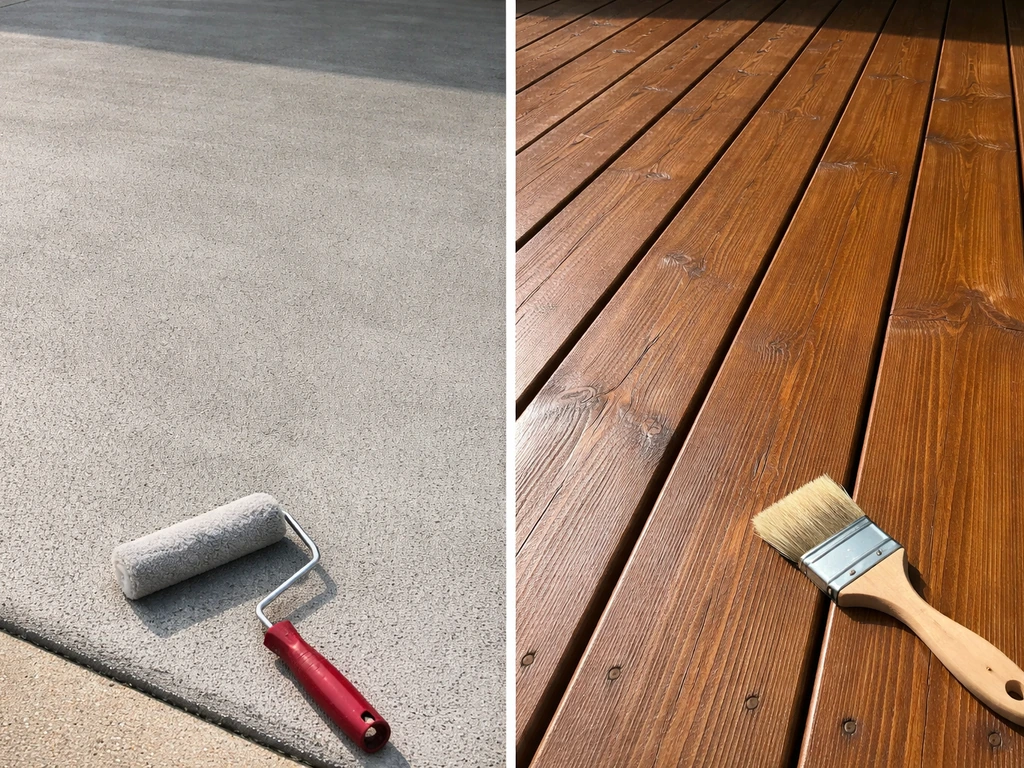
Wood: paint vs stain vs sealer
Wood porch floors and decks connected to a patio are a slightly different category. A dedicated porch and floor enamel gives you an opaque, hard-wearing surface. Solid deck stains penetrate and color the wood while showing some texture. Semi-transparent stains let the wood grain show through and are easier to maintain but offer less protection. Clear sealers protect without adding color. The more opaque the product, the more it hides existing damage but the harder it is to recoat down the road without stripping. If you're starting fresh with new wood, a semi-transparent stain is forgiving and good-looking. If the wood is weathered or you want a clean uniform color, go with a solid stain or porch enamel.
Finish, color, and slip considerations for outdoor use
Choosing the right sheen
Flat and matte finishes hide surface imperfections well and look natural on concrete and masonry, but they're harder to clean and tend to fade faster in direct sun. Satin finishes are the sweet spot for most patio surfaces: easier to clean, more moisture-resistant, and still relatively low-glare. High-gloss finishes are the most durable and easiest to wipe down, but they show every scratch, footprint, and surface imperfection. On a patio floor, satin or low-sheen is almost always the right call. Glossy railings and trim look sharp and hold up well to weathering.
Color choices and heat
Dark colors absorb heat, which is a real issue on horizontal surfaces in warm climates. A dark gray or charcoal concrete patio in Arizona or Texas can get uncomfortably hot underfoot in summer and accelerates thermal expansion, which stresses the coating over time. Lighter colors reflect heat, stay cooler, and tend to fade less visibly. If you're committed to a darker palette, look for products specifically formulated with heat-reflective or cool-coating technology, which use pigments designed to reflect infrared radiation even in dark shades.
Slip resistance
This matters a lot on horizontal surfaces that get wet. Some concrete coatings include built-in slip-resistant aggregates or publish coefficient of friction data. For context, BEHR PREMIUM Concrete and Masonry Protector and Waterproofer lists a coefficient of friction of 0.76 wet and 0.89 dry using ASTM C1028, which is a solid result for a wet patio surface. BEHR PREMIUM Concrete and Masonry Protector and Waterproofer lists a coefficient of friction of 0.76 (wet) and 0.89 (dry) using ASTM C1028 0. 76 wet and 0. 89 dry using ASTM C1028. If your chosen product doesn't include a slip-resistant additive, you can buy anti-slip aggregate (fine sand or polymer grit) separately and mix it into the final coat. This is especially important around pool areas, steps, and any surface where someone might walk in wet bare feet.
Application checklist: tools, coats, weather timing, and drying/curing
Tools you'll need
- Pressure washer (rent if you don't own one)
- Wire brush and concrete patching compound for crack repair
- Painter's tape and drop cloths to protect adjacent surfaces
- 9-inch roller with a 3/8 to 1/2 inch nap for rough concrete or masonry; 1/4 inch nap for smooth surfaces
- Roller extension pole to save your back on horizontal surfaces
- Paintbrush (2 to 3 inch) for cutting in edges, corners, and tight spots
- Paint tray or 5-gallon bucket with roller screen
Weather and timing
The ideal application window is 50 to 90 degrees Fahrenheit with low humidity and no rain in the forecast for at least 24 hours after your final coat. BEHR Premium’s printable product PDF lists an application temperature range of 50, 90°F (10, 32°C) for BEHR PREMIUM Concrete and Masonry Protector & Waterproofer BEHR PREMIUM Concrete and Masonry Protector & Waterproofer’s 50–90°F application temperature range. Don't paint in direct blazing sun on a hot surface (the coating can dry too fast and not adhere properly), and don't paint when temps are expected to drop below 50 degrees overnight. Morning application is often ideal because it gives the coating the full day to dry before overnight temperatures drop. In humid climates, aim for lower-humidity days whenever possible; humidity slows drying and can trap moisture under the film.
Number of coats and coverage
Most patio floor coatings need two coats for full coverage and durability. The first coat may soak into a porous surface (especially new concrete), which is why the primer or first coat coverage rate is often lower than the label suggests. Budget for more material than the square footage calculation implies. At 250 sq. ft. per gallon for a waterproofing product on a porous slab, a 500 sq. ft. patio needs at least 2 gallons per coat, or 4 gallons for two coats. Factor in waste, edge cuts, and any texture variation that increases absorption.
Dry time vs cure time
Dry time and cure time are not the same thing. Most concrete coatings are dry to the touch in 2 to 4 hours and ready for a second coat (recoat window) within that same range under good conditions. Foot traffic readiness varies by product: polycuramine coatings like Rust-Oleum RockSolid reach foot-traffic ready status in 8 to 10 hours, but full cure to handle vehicle traffic takes 24 to 36 hours. Full chemical cure, meaning the point at which the coating is fully hardened and at maximum durability, typically takes 7 days. Avoid placing heavy furniture or putting the patio through heavy use during that first week if you want the finish to last.
Common failure points and quick fixes to avoid peeling or fading
Most patio paint failures come down to a handful of predictable mistakes. Knowing them in advance saves you a complete redo.
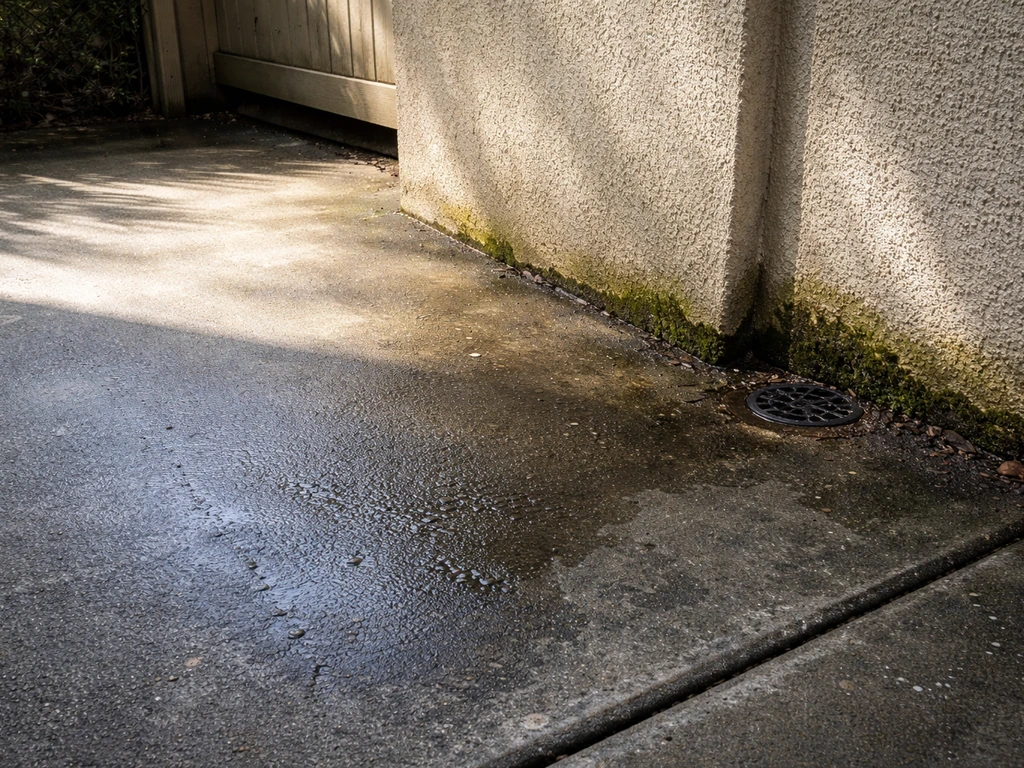
- Painting over a damp surface: Concrete holds moisture longer than it looks. Even if the surface looks dry, give it a full 24 to 48 hours after washing or rain before painting. Moisture trapped under the film causes bubbling and peeling within weeks.
- Skipping the primer on new or bare concrete: Concrete is alkaline and porous, and paint applied directly without a masonry primer often has adhesion problems. Prime, always.
- Painting in the wrong temperature or humidity: Paint applied outside the recommended temperature range (typically 50 to 90 degrees F) or in high humidity doesn't cure properly. This is the cause of a lot of "soft" coatings that scratch too easily.
- Using interior paint outdoors: Interior paint has no UV resistance or mildew inhibitors and will fail quickly. It's an obvious mistake but it happens, especially when people have leftover interior paint and think it will do for a quick touch-up.
- Applying coats too thick: Thick single coats trap solvents, slow drying, and don't adhere as well as two thinner coats. Roll on a consistent, even film rather than trying to get full coverage in one pass.
- Not addressing the source of moisture before painting: If your concrete is wet because of poor drainage, water wicking up from below, or a plumbing issue, no surface coating will hold long-term. Fix the moisture source first.
- Recoating too quickly or waiting too long: For multi-coat systems, apply the second coat within the product's recoat window (often 2 to 4 hours for masonry coatings, up to 24 hours for some products). Waiting too long means the first coat is fully cured and the second coat won't bond as well without sanding in between.
If you already have peeling, the fix is straightforward but not quick: scrape all loose material, spot prime bare areas, and recoat. There's no shortcut that sticks over peeling paint. And if you're seeing widespread failure within a year, it's worth reassessing whether the right product was used for that surface type and climate, because a good paint system applied correctly should last 3 to 5 years on a patio floor with normal maintenance, and 7 to 10 years on vertical masonry surfaces.
If you're thinking through color options alongside your paint choice, the decisions around light vs dark, warm vs cool, and how sheen interacts with your patio's surroundings are worth spending time on before you buy. Similarly, if your project includes pool areas, deck surfaces connected to the patio, or railings, those surfaces each have their own coating requirements that are worth matching to your overall system for a cohesive result.
FAQ
How do I know if my patio needs a masonry primer or a full recoat system?
Check adhesion of the existing surface. If the old paint is sound, you can usually clean and lightly sand, then prime only scuffed areas. If you see chalking, widespread fading that comes off as powder, or any soft spots, plan to remove failing coating back to stable material and prime the entire affected zone before recoating.
Can I use exterior paint on concrete, or do I really need a concrete floor coating?
You can sometimes paint concrete with an exterior masonry coating, but a dedicated concrete floor coating is usually designed for the abrasion, moisture movement, and alkali environment of horizontal slabs. For areas that get foot traffic, wet bare-foot use, or standing water, choose a product formulated for concrete floors rather than generic wall masonry paint.
What’s the safest way to handle oil stains on a concrete patio before painting?
Pressure washing alone often leaves residues that block adhesion. After washing, confirm the surface is dry and do a quick water test (water should not bead). If it beads, degrease with a concrete-safe cleaner compatible with paint, then rinse and allow full dry time before priming.
Is it better to paint a new concrete patio right away or wait?
Wait until the concrete has cured and is fully dry, then confirm with a moisture check if the surface looks damp or new. New slabs also absorb primer differently, so expect lower first-coat coverage and plan for two coats plus adequate primer or block filler to prevent patchy results.
How long should I wait before using the patio after the final coat?
Dry-to-touch time is not the same as full durability. For most coatings, avoid heavy furniture and intense use for at least a few days, and keep vehicles off until the product’s stated cure time (often about a week for full hardness). If it rains during the first cure window, you may need to reschedule or recoat depending on how much the film was disturbed.
What’s the best way to prevent roller marks or patchiness on textured concrete?
Use a method matched to the coating type, and don’t overwork it. Apply at the recommended spread rate, keep a wet edge, and watch for over-thinning. On porous or heavily textured slabs, plan for extra material because the coating can soak into peaks and leave low spots under-coated.
If my painted wall looks fine but my floor peels, what causes the difference?
Horizontal surfaces see more moisture movement, abrasion, and freeze-thaw stress than vertical walls. Even if the paint system works on a wall, the floor needs abrasion-resistant chemistry and often slip-resistance features, plus stricter cure and weather timing. Using the wrong product category for floors is a common reason for early peeling.
Can I mix anti-slip grit into the topcoat, and will it change how the coating wears?
Yes, you can add anti-slip aggregate if the product allows it, but expect a texture change and slightly increased wear on edges. Mix only enough to meet traction needs, distribute evenly to avoid high spots, and rinse off any loose grit that sits on the surface rather than integrating into the film.
What sheen should I choose for patio walls versus a patio floor?
For walls, matte or flat can hide imperfections, but on floors and steps choose satin, low-sheen, or another low-glare finish that cleans more easily and holds up to frequent contact. Gloss is very wipeable but shows every scratch and footprint, which becomes more obvious on horizontal surfaces.
Why does dark paint feel hotter on a patio, and what can I do if I want dark colors anyway?
Dark pigments absorb more radiant heat, which raises surface temperature and increases thermal movement stress on the coating. If you want dark, select products designed for heat reflection or cool-coating technology, and consider using lighter-toned adjacent surfaces to reduce overall heat buildup.
Do I need to repaint if there’s just mildew staining on my concrete?
Milestone is to treat the cause, not just the color. Clean and remove mildew thoroughly, verify the surface is dry and adhesion-ready, then prime stained or porous areas if they bleed through. If the coating film is intact and cleanable, you might not need a full strip, but if the paint is chalking or flaking, removal and spot-priming won’t be enough.
What’s the biggest mistake that makes patio paint fail in one season?
Insufficient surface prep and wrong product matching. Painting over dust, oils, loose coating, or skipping the correct primer for the substrate is the fastest path to peeling. Also avoid applying outside the ideal temperature and low-humidity window, because trapped moisture or too-fast drying can prevent proper bonding.