
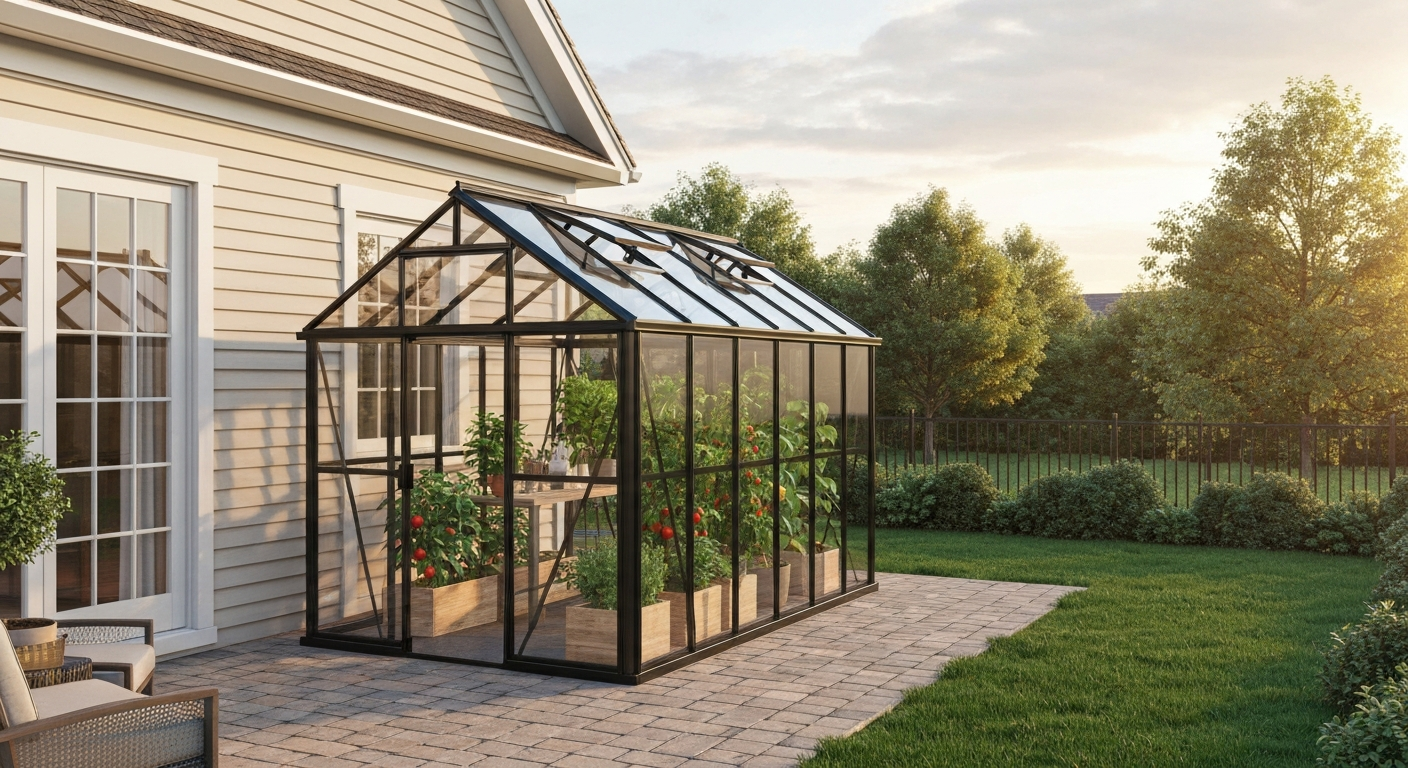
The best patio greenhouse for most homeowners is a twin-wall polycarbonate lean-to or small freestanding kit in the 6x8 to 8x12 foot range. For inspiration and design ideas, see examples of the best patio ever. It gives you meaningful growing space, handles moderate wind and snow loads, and fits against a house wall or in a corner without eating your entire patio. If you're on a balcony or have under 40 square feet to work with, a mini lean-to or a tiered balcony greenhouse cabinet is more realistic. If budget isn't the constraint but a custom look is, a powder-coated aluminum or timber-frame structure integrated into your existing hardscape is worth every extra dollar.
Best Patio Greenhouse: Top Picks, Design & Climate Guide

Elise Prescott
17 Jul 2026
Who this guide is for and how to use it
This guide is written for homeowners and renters who want to add growing space to an existing patio, balcony, or integrated outdoor area. Whether your patio is a sprawling concrete slab with a pergola, a tiled terrace off the kitchen, or a rooftop deck with a hot tub in the corner, the core questions are the same: what structure fits the space, what will it cost, what can you actually grow, and how do you make it look intentional rather than like you dragged a kit from a big-box store and just left it there.
The three scenarios this guide covers most directly are: a standalone patio greenhouse on a ground-level slab or gravel pad; a compact greenhouse on an elevated deck or balcony where structural load limits matter; and an integrated-patio setup where the greenhouse connects to or is sited near existing features like a hot tub, patio cover, or pergola. Each scenario has different anchoring, drainage, and electrical considerations, and I flag those differences throughout. Use the quick decision framework first to narrow your options, then jump to the Top Picks section that matches your budget and size. If you already know your type, go straight to the spec table or the climate-control section.
Quick decision framework: purpose, climate, size, budget, materials, and fit
Before you look at a single product page, work through this checklist. I've watched homeowners spend four hours comparing kits only to buy something that doesn't fit their patio's drainage slope or their HOA's height limit. Five minutes here saves real frustration.
- Purpose: Are you year-round growing, seed starting in spring, overwintering tender plants, or extending the season by 6 to 8 weeks? Year-round use demands better insulation (R-value 2+), heating capacity, and electrical access. Seasonal use gives you much more flexibility.
- Climate zone: Look up your USDA Plant Hardiness Zone and note your average winter low. If you're in Zone 5 or colder (below -10°F), structural snow load (aim for 25+ psf rated kits) and insulation matter far more than in Zone 9 or 10. In hot, humid climates (think Gulf Coast), ventilation and shade are the priorities, not heat retention.
- Size and footprint: Measure your usable patio area and subtract clearance for furniture, traffic, and any required setbacks. A lean-to against a wall takes roughly half the footprint of a freestanding structure for the same growing area. On a balcony, check your building's load limit first — IBC practice pegs typical residential balcony design loads around 60 psf, but the actual allowable live load for added structures depends on your specific building engineer's sign-off.
- Budget: Kit greenhouses run from roughly $150 for a mini balcony cabinet up to $3,000 to $5,000 for a premium polycarbonate kit. Custom timber or aluminum builds start around $8,000 installed and go well past $25,000 for a fully integrated structure with electrical, HVAC, and automated vents.
- Materials: Polycarbonate is the practical default for most patio greenhouse buyers. Tempered glass looks premium and transmits more light but adds weight and cost. Poly film is cheapest but requires annual replacement. Frame choices are aluminum (low maintenance, long life), powder-coated steel (affordable, watch for rust), and wood/timber (beautiful, requires seasonal sealing).
- Aesthetic fit: Walk outside and look at your patio. What are the dominant finishes — pavers, concrete, cedar decking, tile? Your greenhouse frame and glazing color should echo, not fight, those finishes. A black powder-coat aluminum frame reads modern and sharp against concrete; a cedar-framed lean-to integrates naturally into a wood-heavy outdoor space.
- HOA and permit check: Many municipalities require a permit for any permanent structure over 120 square feet (some set the threshold at 200 sq ft). HOAs often have additional height and appearance restrictions. Make this call before you buy anything.
Top picks: best patio greenhouses by budget, size, and style
Mini and balcony greenhouses (under $400)
A compact 4-tier shelving greenhouse or a Palram-style 4x2 lean-to cabinet is the right call when you have fewer than 30 square feet of usable outdoor space, or when you're renting and can't anchor anything permanently. These are not serious growing structures for full crops, but they are genuinely useful for overwintering herbs, starting seeds, or protecting container plants from frost. Assembly on the 4x2 Palram lean-to runs about 1 to 2 hours for one person. Expect twin-wall or single-layer polycarbonate glazing, no base included, and no heating. If you're on an apartment balcony, these are often your only practical option and they work fine for that purpose.
Small freestanding hobby greenhouses ($400 to $1,500)
The 6x8 and 6x10 polycarbonate kit greenhouse is the most popular category for a reason. Brands like Palram (Canopia), Juliana, and Rion sell well-reviewed kits in this range. The Palram Mythos 6x8, for example, rates snow load at around 15 psf and wind resistance at roughly 55 mph, adequate for most of the continental U.S. except high-elevation mountain areas and parts of the Upper Midwest and Northeast with heavy snow. You get twin-wall polycarbonate panels (typically 4mm, R-value around 1.49), an aluminum frame, roof vents, and a lockable door. These are a genuine step up from a balcony cabinet: you can stand inside, run a small electric heater, and grow tomatoes, peppers, or container raspberries through a full season. Budget around $600 to $1,000 for the kit and another $200 to $400 for a concrete pad or paver base, anchoring hardware, and a basic shelving system.
Lean-to greenhouses ($500 to $2,500)
A lean-to structure attaches to or leans against an existing wall, usually the house, a garage, or a fence. This is my personal favorite configuration for a typical suburban patio because you get shared wall insulation (the house wall does half the thermal work), easy electrical and water access from inside the home, and a smaller footprint per square foot of growing space. The tradeoff is that placement is fixed to where your wall is, which may not be your sunniest exposure. South-facing or west-facing walls are ideal in most of the U.S. Common kit sizes run from 4x2 (basically a cabinet) up to 8x12 or 10x16 feet. At the upper end of this category, you're approaching custom territory and the build quality gap between cheap kits and well-engineered ones becomes very apparent.
Premium and custom-build greenhouses ($3,000 and up)
If your patio is already at a high aesthetic level, quality hardscape, an integrated cover or pergola, maybe a hot tub, a kit greenhouse will look out of place unless you invest in finishing details. Premium kits from brands like Hartley Botanic, Janssens, or Alitex use anodized or powder-coated aluminum with thicker glazing profiles and better seals. Fully custom builds use a structural engineer to design the frame to your exact site, your local snow and wind loads per ASCE 7 maps, and your preferred materials. Costs start around $8,000 to $12,000 for a professional custom lean-to in the 100 to 150 sq ft range and climb steeply with features. At this level, you're also looking at real HVAC integration, automated venting, grow lighting circuits, and a finished floor, more of an outdoor room than a growing cabinet.
Greenhouse types compared: kit vs custom and what each is best for
| Type | Typical Size Range | Typical Kit Price | Custom Price Range | Best For | Key Limitations |
|---|---|---|---|---|---|
| Mini / Balcony Cabinet | 2x2 to 4x4 ft | $150 – $400 | N/A (not typically custom) | Renters, balconies, seed starting, overwintering | No standing room, no heat, limited growing volume |
| Small Freestanding | 6x6 to 8x12 ft | $500 – $1,500 | $5,000 – $12,000 | Most homeowners, ground-level patios, general hobby growing | Requires dedicated pad/foundation, full footprint on patio |
| Lean-To (kit) | 4x2 to 10x16 ft | $400 – $2,500 | $6,000 – $15,000 | Space-limited patios, south-facing walls, easy utility access | Tied to wall placement and orientation |
| Wall-Mounted / Window Greenhouse | 1x2 to 3x4 ft | $80 – $300 | $500 – $2,000 | Apartments, small window extensions, herb displays | Minimal growing volume, mostly ornamental/herb use |
| Premium / Custom Build | 80 sq ft and up | N/A | $8,000 – $30,000+ | High-end patios, year-round use, full integration with hardscape | High cost, requires permits, longer build timeline |
The kit vs custom decision usually comes down to two factors: whether your site has unusual structural or aesthetic requirements, and whether you want the greenhouse to last 20+ years as a permanent feature. Kits are well-engineered for standard conditions and give most homeowners everything they need. Custom builds make sense when your local snow or wind loads exceed what most retail kits are rated for, when your patio layout requires a non-standard footprint, or when aesthetic integration with premium hardscape is a priority. I'd generally recommend getting at least one quote from a local contractor before ruling out custom, the price gap with a premium kit is sometimes smaller than you'd expect once you factor in a concrete foundation, anchoring, electrical, and finishing work.
Spec-driven buying criteria: what the numbers actually mean
Most greenhouse product listings bury the specs that actually matter or express them in ways that are hard to compare. Here's what to look for and what the numbers mean in practice.
| Spec | What to Look For | Practical Benchmark | Why It Matters |
|---|---|---|---|
| Footprint (W x D) | Listed in inches or feet; match to your available pad size with 6-12" clearance on each side | Min. 6x6 ft for functional growing space | Underbuy here and you'll feel cramped immediately |
| Glazing Type | Twin-wall polycarbonate, single-pane glass, double-pane glass, poly film | Twin-wall 4mm poly for most budgets; 6mm or 8mm for cold climates | Directly affects insulation, light transmission, and weight |
| R-Value | Higher = better insulation; twin-wall 4mm poly ≈ R-1.49; 6mm twin-wall ≈ R-1.89; double-pane glass ≈ R-2 to R-3 | Aim for R-2+ if heating in Zone 6 or colder | Low R-value means high heating bills and cold-stressed plants |
| Light Transmission | Clear twin-wall poly 6mm ≈ 80% LT; diffused poly slightly lower; single-pane glass ≈ 90%+ | 80%+ LT for fruiting crops; diffused OK for herbs/greens | Low light transmission limits fruiting and flowering crops |
| Frame Material | Aluminum (best longevity), galvanized steel (good but watch rust at joints), wood (beautiful, needs maintenance) | Aluminum for low-maintenance; cedar for aesthetics with seasonal sealing | Frame determines lifespan, maintenance load, and visual style |
| Wind Rating | Listed in mph; most entry-level kits rate 45–56 mph | 55+ mph for most regions; 70+ mph for coastal or High Plains areas | Undersized wind rating risks structural failure in storms |
| Snow Load | Listed in psf (pounds per square foot); Palram Mythos 6x8 ≈ 15.4 psf | 25+ psf for Zone 5 and colder; 15 psf acceptable for mild-winter regions | Check ASCE snow load maps for your county; kits often underrate for northern climates |
| Ventilation | Count of roof vents and side vents; some kits include auto-openers | Minimum 1 roof vent per 6 ft of length; auto-openers strongly recommended | Stagnant air causes disease; overheating kills plants in minutes on hot days |
| Foundation / Anchoring | Base frame, anchor brackets, or ground screws | Concrete pad or paver base with perimeter anchoring for anything over 4x4 ft | Inadequately anchored structures become dangerous in wind events |
| Weight | Total structure weight; critical for deck/balcony installations | Check against deck live load rating before purchase; consult a structural engineer for balconies | Exceeding load limits is a safety and liability issue |
| Maintenance Requirements | Frame corrosion protection, gasket/seal replacement, glazing cleaning | Aluminum and twin-wall poly are lowest maintenance; wood and glass require annual attention | Affects real long-term cost beyond purchase price |
Before finalizing any purchase for a cold-climate site, cross-check the kit's listed snow load against the ASCE GIS snow load map for your county. The difference between a kit rated at 15 psf and your local ground snow load of 30 psf is a structure that can fail under a heavy winter storm. This is not hypothetical, it happens every few years to homeowners who assume a national retail kit meets their regional load requirements. For most of the South, Mid-Atlantic, and Pacific Coast, standard kit ratings are fine. For the Rockies, Upper Midwest, and New England, double-check or go custom.
Climate control and accessories tailored to patio use
A greenhouse without a climate plan is just an expensive way to kill plants faster. Heat, humidity, and stagnant air are the three things that go wrong most often, and all three are solvable with the right equipment.
Ventilation: the most important thing you'll add
blank" rel="noopener noreferrer">University of Florida IFAS greenhouse ventilation guidance recommends a minimum of about 2 air changes per hour (ACH) in winter and up to roughly 60 ACH (1 air change per minute) in peak summer heat for temperature control. For a small patio greenhouse, you translate that to CFM using the NGMA formula: required CFM equals greenhouse volume in cubic feet multiplied by target ACH, divided by 60. A 6x8x8 ft greenhouse (384 cubic feet) at 60 ACH needs 384 CFM at peak. A quiet 6-inch inline fan like the VIVOSUN AeroZesh T6 (rated 390 to 408 CFM, 32 to 45 dBA depending on speed) handles that job. For a patio or balcony where noise is a concern, look for fans with AMCA-certified sound ratings. AMCA standards (see blank" rel="noopener noreferrer">Specification excerpts citing AMCA 210/300 (AMCA certified fan testing and sound rating standards)) define laboratory methods for testing and certifying fan aerodynamic performance and sound ratings, so for low-noise patio or balcony installations choose fans with AMCA/AMCA-listed sound and airflow ratings. The AC Infinity CLOUDLINE S4 (4 inch, up to 205 CFM, about 28 dBA) is notably quiet and good for smaller structures. For larger structures, step up to a 6-inch or 8-inch unit and use a speed controller so you can throttle down on cooler days.
Passive ventilation through roof vents and louvered side panels should be your first line of defense before you run any electric fan. Hot air rises, so a high-mounted roof vent paired with a low side vent creates a natural chimney effect that can handle mild days with zero electricity cost. Automatic vent openers (wax-cylinder type, no electricity needed) are one of the best $30 to $60 investments for any greenhouse. They open when internal temperature rises above a set point and close when it cools. Every greenhouse on a patio that isn't constantly monitored should have at least one.
Heating options
For small patio greenhouses, a small electric fan heater with a built-in thermostat (1,500W is standard) is the most practical solution. They're cheap, controllable, and safe. Propane heaters are an option where no electrical access exists, but require ventilation precautions and aren't ideal for enclosed spaces without CO monitoring. For premium setups, a mini-split heat pump can maintain precise temperature control year-round and doubles as a cooling system, worth considering if you're doing a serious custom build with electrical infrastructure already in the plan.
Shade and misting systems
In hot climates (Zone 8 and warmer, or anywhere with prolonged summer heat above 90°F), shade cloth rated at 30 to 50 percent shade reduction is essential from late spring through early fall. Interior shade cloth on a wire frame above the plants is more effective than exterior shade paint or film. Misting systems add evaporative cooling in dry climates (effective in the Southwest and Mountain West) but can drive humidity dangerously high in already-humid climates like the Southeast. If you're already running a misting system on your main patio for comfort, it's worth extending a line into the greenhouse with a separate solenoid and timer.
Grow lights, irrigation, and electrical planning
Patio greenhouses at northern latitudes (Zone 6 and colder) benefit from supplemental LED grow lights during winter months when day length drops below 10 to 12 hours. Full-spectrum LED bars (quantum board style) are the current best option for efficiency and heat output. For irrigation, a simple drip system on a timer keeps watering consistent without daily trips outside in bad weather. Plan your electrical layout before you build: identify the nearest outdoor-rated circuit, run conduit rated for wet/damp locations (schedule 80 PVC or liquid-tight flex conduit), and use GFCI-protected outlets throughout. If you're adding more than one circuit or integrating with existing patio lighting or speaker wiring, have a licensed electrician run a dedicated sub-panel to the structure. This is one area where DIY shortcuts create real fire and safety hazards, especially in wet greenhouse environments.
Siting and integration: placement on patios and balconies
Choosing your location
Light is the first constraint. A south-facing orientation (in the Northern Hemisphere) maximizes winter sun exposure when the sun angle is lowest. East-facing gets gentler morning light, good for herbs and greens but suboptimal for fruiting crops. West-facing gets afternoon heat, which can be an advantage in cool climates and a problem in hot ones. Avoid placing the greenhouse under tree canopy or where an existing patio cover, pergola, or overhang shades more than a third of the glazed roof area during peak growing hours (10am to 2pm). Before committing to a location, watch the sun path across your patio for at least a full day in the season you plan to use it most.
Anchoring and foundation
On a ground-level patio, the preferred foundation for any greenhouse over 6x6 feet is a concrete perimeter or poured slab with embedded anchor bolts. A well-compacted paver base with perimeter ground screws is a workable DIY alternative for lighter structures. On an elevated deck or balcony, weight is the critical variable. Before you place any structure larger than a small cabinet on a deck or balcony, have a structural engineer review the deck's load capacity. IBC-based practice commonly pegs residential balcony design loads around 60 psf, but actual allowable added load depends on the specific structure, age, and condition of your deck framing. A 6x8 polycarbonate kit with a concrete base can easily exceed 500 to 700 pounds concentrated in a small area, that math has to be done before installation, not after.
Drainage, runoff, and placement near hot tubs or patio covers
Greenhouses produce condensation and sometimes water overflow from irrigation. Site the structure so that water drains away from the patio surface and away from any adjacent hot tub, electrical outlets, or existing structure foundations. A 2 percent slope (about 1/4 inch per foot) on the pad is sufficient. If you're placing a lean-to greenhouse adjacent to a patio cover or pergola, verify that the greenhouse roof doesn't redirect a concentrated water stream onto the patio cover's framing. A short drip edge and gutter on the greenhouse roof is worth adding in any rainfall-heavy climate. Keep a minimum 18 to 24 inches of clearance between a hot tub and a greenhouse wall for access, maintenance, and air circulation.
Access routes and traffic flow
Think through how you'll actually move between the house, greenhouse, and the rest of the patio. A greenhouse that requires you to squeeze around a hot tub, step over a raised planter, or duck under a low patio cover every single time you want to water gets annoying fast and starts feeling like a mistake. Plan a clear, direct path at least 36 inches wide from the house door to the greenhouse door, and keep the greenhouse door on the side of the structure closest to that path.
Styling, materials, and aesthetics: making the greenhouse look like it belongs
This is the part of the buying process that most buyers ignore until after installation and then immediately regret. A greenhouse that looks bolted onto a well-designed patio as an afterthought undermines everything else you've done out there. For inspiration on cohesive designs, see our gallery of best patio looks for ideas you can adapt to your space. The good news is that a few deliberate choices at purchase time make a massive difference.
Coordinating frame and glazing with your patio finishes
Match your greenhouse frame color to the dominant metal or trim tones in your outdoor space. If your patio furniture, fire pit, and outdoor kitchen fixtures are matte black or dark bronze, a black powder-coat aluminum greenhouse frame will look intentional and sharp. If your space is lighter, natural materials oriented (cedar furniture, light-toned pavers, a wood pergola), look for aluminum in a white or silver finish, or seriously consider a cedar or Douglas fir framed lean-to. Clear polycarbonate panels read more neutral and blend with most color schemes; bronze-tinted panels can add warmth and reduce glare but lower light transmission slightly. Avoid mixing competing metal finishes: a shiny chrome-look greenhouse next to aged bronze furniture just looks like two unrelated products sharing a space.
Privacy, screening, and seasonal looks
If your greenhouse faces a neighbor's yard, the street, or an area where you'd prefer privacy, opaque side panels or lower-section frosted polycarbonate on the sides (clear on the roof for maximum light) can address that without significantly reducing growing performance. For a seasonal look, climbing plants on the exterior frame (on trellises attached to, not drilled into, the glazing) add life and soften the industrial look of a kit greenhouse in summer. In winter, interior LED grow lights visible through the glazing at night actually look beautiful from the patio, a warm glowing growing space viewed from a hot tub or patio seating area creates the kind of layered outdoor ambiance that makes patios feel genuinely special.
Integrating with hardscape and outdoor furniture
The best integrated patio greenhouses echo the geometry and material language of the surrounding hardscape. If your patio uses rectangular pavers in a running bond pattern, a rectangular lean-to with a clean ridge line reads as a natural extension of that geometry. If your patio is more organic, curved planters, irregular flagstone, rounded furniture, a hexagonal or irregular-footprint greenhouse can actually fit better than a hard-cornered rectangle. Use the same paving material inside the greenhouse as outside, or match the interior floor to the patio edge detail, to make the transition feel seamless when the greenhouse door is open. These are the kinds of choices that separate a patio that looks designed from one that looks assembled, and they don't necessarily cost more, they just require thinking the project through before ordering.
What to grow: plants that thrive in a patio greenhouse
The honest answer is that a patio greenhouse extends your growing season and protects tender plants, but it doesn't replace full outdoor growing conditions. That said, the range of what works well is genuinely impressive: tomatoes, peppers, cucumbers, herbs (basil, cilantro, parsley, chives), salad greens, and dwarf citrus all perform extremely well in a small heated greenhouse. Container raspberries are a natural fit for a small greenhouse in cooler climates, varieties bred for container growing stay compact and produce reliable crops in 5 to 10-gallon containers. For recommendations on the best patio raspberry varieties and container-growing tips, see our guide to the best patio raspberry. Orchids, succulents, and tropical houseplants that struggle outdoors in cold climates thrive in an overwintering lean-to with minimal supplemental heat. In warm climates, a shaded lean-to becomes a perfect nursery for propagating cuttings and getting new plants established before transplanting to the main patio garden.
- Herbs (basil, mint, chives, cilantro, parsley): thrive in containers on tiered shelves; harvest continuously
- Salad greens (lettuce, spinach, arugula, kale): fast-growing, ideal for autumn through spring in a heated greenhouse
- Cherry tomatoes and dwarf pepper varieties: suit 5-gallon containers; need full sun and regular pollination (hand-pollinate or leave vents open for insects)
- Container raspberries (compact varieties like 'Raspberry Shortcake'): produce in 5-10 gallon containers; useful in Zone 4-6 for extending season
- Dwarf citrus (Meyer lemon, calamondin, kumquat): perfect for overwintering in Zones 5-8 where outdoor winters are too cold
- Succulents and cacti: low-water, low-maintenance; great for a partially shaded lean-to in Zones 9-10
- Orchids and tropicals: overwinter beautifully with minimal heat in a well-sealed lean-to
Installation, costs, permits, and the DIY vs hire decision
Realistic cost ranges
| Category | Kit/Material Cost | Foundation / Site Prep | Electrical / Accessories | Professional Install (if hired) | Total Realistic Range |
|---|---|---|---|---|---|
| Mini balcony cabinet | $150 – $400 | $0 – $50 (no foundation needed) | $0 – $100 (extension cord / GFCI) | N/A (DIY only) | $150 – $550 |
| Small freestanding kit (6x8 to 8x10) | $500 – $1,500 | $200 – $600 (paver base or concrete pad) | $100 – $400 (heater, fan, lights) | $300 – $800 labor | $1,100 – $3,300 |
| Lean-to kit (6x10 to 10x16) | $700 – $2,500 | $300 – $1,000 (concrete perimeter or slab) | $200 – $800 (dedicated circuit, GFCI) | $400 – $1,200 labor | $1,600 – $5,500 |
| Premium kit (Janssens / Hartley style) | $2,500 – $6,000 | $500 – $1,500 | $500 – $1,500 | $800 – $2,500 | $4,300 – $11,500 |
| Custom build (architect/contractor) | N/A (included in build) | Included | Included | $8,000 – $30,000+ | $8,000 – $30,000+ |
Permits: what triggers a requirement
Most jurisdictions follow the International Building Code or International Residential Code, both of which typically require permits for permanent structures above a certain size threshold. In many areas, that threshold is 120 to 200 square feet, but local amendments vary widely. Lean-to structures attached to a house almost always require a permit because they affect the building envelope. Freestanding structures under the local threshold may be exempt but still need to comply with setback rules. Always check with your local building department before starting, not because inspectors are out to get you, but because an un-permitted permanent structure can complicate a home sale and may not be covered by homeowner's insurance if it's damaged.
DIY vs hiring: an honest take
A 6x8 polycarbonate kit on a pre-existing concrete slab is a reasonable DIY project for someone comfortable with basic tools and a full weekend. Manufacturer assembly times often list 4 to 8 hours for a small kit with two people, but real-world first-time assembly usually runs longer, especially if the base needs leveling. Where I'd strongly recommend hiring out: concrete foundation work (leveling matters enormously for frame fit and door function), electrical work beyond a single outdoor GFCI outlet, any deck/balcony installation requiring a structural review, and any custom fabrication or connection to the house structure. Getting three quotes from local contractors, checking for licensing and greenhouse installation experience, and asking for references from similar patio projects are the basics. If a contractor can't tell you what foundation type they recommend for your specific site, that's a red flag.
Maintenance and troubleshooting: keeping your greenhouse running well
Seasonal maintenance checklist
- Spring: clean glazing panels inside and out (mild soap and soft cloth only on polycarbonate — no abrasive cleaners); check and replace any cracked or yellowed panels; lubricate door hinges and vent opener mechanism; inspect frame joints for loose bolts or corrosion
- Before summer: install or inspect shade cloth; verify fan operation and clean fan blades; test automatic vent openers; check misting system lines for clogs if applicable; calibrate thermostat on heater/fan controller
- Fall: deep clean interior surfaces to remove algae and pest debris; check glazing seals and re-apply silicone caulk at frame joints if needed; service heater (replace filters, test ignition on propane units); add weatherstripping to door if drafts are present
- Winter (cold climates): clear snow from roof after heavy events using a soft broom (never a metal scraper); check that anchor bolts are secure going into storm season; monitor for condensation and fungal growth; keep a minimum temperature above 40°F for most plants
- Year-round: monitor for spider mites, whitefly, and fungus gnats (small yellow sticky traps catch problems early); maintain humidity between 50 and 70 percent for most crops; keep a minimum 6-inch air gap between dense plant canopies and glazing to reduce mold
Common problems and fixes
- Overheating in summer: add shade cloth, increase ventilation CFM, and ensure roof vents are fully operational; a single stuck auto-opener can cause a greenhouse to cook on a warm day
- Condensation pooling on glazing or frame: improve air circulation, reduce over-watering, and ensure the structure has adequate drainage; persistent pooling leads to mold and accelerates frame corrosion
- Pest infestations: introduce beneficial insects (predatory mites, parasitic wasps) for organic control; use yellow sticky traps for monitoring; avoid bringing infected outdoor soil into the greenhouse
- Cold spots near the door or base vents in winter: add door weatherstripping and close base vents at night; a small circulating fan at low speed prevents cold stratification near the floor
- Algae on polycarbonate panels reducing light: clean with diluted white vinegar or a greenhouse-specific algaecide; algae build-up can reduce light transmission by 10 to 20 percent over a single season if left unchecked
FAQ
What primary authoritative data sources should be consulted to create a spec-driven buyer’s guide for “best patio greenhouse” covering U.S. and global climate/use cases?
At minimum consult: USDA Plant Hardiness Zone Map (plant cold-hardiness); Köppen–Geiger climate classification (regional climate/seasonality); ASCE GIS/maps for snow-load and wind-load design values (structural sizing); International Building Code / ASCE 7 (local permit/structural load baselines); NGMA standards (ventilation, glazing, manufacturer practices); AMCA standards (fan performance/sound ratings) and university extension guidance for greenhouse environmental control (e.g., UF IFAS ventilation). Supplement with manufacturer technical datasheets (Palram/Canopia, Palram glazing sheets), verified retail spec pages for typical product footprints/assembly times, and reputable industry glazing/performance comparison guides.
Which vendor- and product-level specs must be collected and compared for each recommended patio greenhouse model?
Collect: model footprint (L×W×H) and net internal usable volume; glazing type, thickness and light-transmission (% LT); thermal performance (R-value or U‑value); rated wind/mapping speed, rated snow-load (psf or kg/m²); structural materials (frame alloy/thickness, fastener types); ventilation openings and max vent area (sq ft); accessory compatibility (shelf/mount points, heater/fan power access); assembly time and skill level; manufacturer warranty and expected service life; weight and anchoring requirements; recommended max plant load (if stated). Also capture retail price and typical installation cost ranges (kit vs pro install).
What climate- and site-specific research questions must be answered to recommend the right greenhouse for a reader's patio or balcony?
Determine reader’s USDA hardiness zone and local Köppen climate class; local extreme design loads (ASCE snow and wind values for their coordinates); local summer peak temperatures and solar insolation; humidity patterns/seasonal RH; patio exposure (sun/shade hours, prevailing winds), elevation and proximity to salt spray (coastal corrosion); structural capacity of the patio/balcony/deck (engineered live-load rating, often per IBC/IRC); and local code/permitting thresholds for attachments or enclosures. These dictate glazing choice, insulation, ventilation sizing, anchoring and whether permits/structural review are required.
What engineering and code questions should be answered regarding siting a greenhouse on a balcony or patio?
What is the designed live load (psf) of the balcony/deck and does added greenhouse dead/load plus plant/soil loads exceed it? Are attachments to the building permitted and do they require flashing, thermal bridging details or fire separation clearance? Will wind uplift or snow accumulation at that location exceed the greenhouse’s rated values per ASCE/IBC? Are there egress, setback, or impermeable-surface rules that trigger permits? Which local editions of IBC/IRC are adopted by jurisdiction and what is the threshold (size or occupant load) for requiring structural/permit review?
What ventilation, heating, cooling and airflow specification questions must be answered to size climate-control for patio greenhouses?
What is the greenhouse internal volume (ft³) and target ACH for season(s) (e.g., 2 ACH winter minimum, up to 60 ACH for extreme summer cooling per UF IFAS/NGMA guidance)? Required CFM = (Volume × target ACH) ÷ 60; what fan models meet that CFM at acceptable dBA (AMCA-rated sound where possible)? What passive ventilation (vent area, placement) is provided and what auxiliary systems are needed (mixed-flow inline fans, thermostats, oscillating circulation fans)? For heating: required BTU/hr to maintain desired minimum temp based on heat loss (U-values) and design delta-T; for cooling: shading/misting/evaporative needs given site humidity. Also electrical availability/loads for fans/heaters/lights and safe, code-compliant exterior wiring.
Which plant-use and layout research questions are needed for patio-specific crop recommendations and trellis/layout guidance?
What crops suit container production in restricted root volume and shallow beds (e.g., herbs, salad greens, dwarf tomatoes, compact peppers, container raspberries, small citrus)? What light (PAR) and daily light integral (DLI) do those crops require and how do glazing options affect PAR penetration? What pot sizes, container depths and soil volumes are realistic on small patios given structural capacity? What pruning/trellis systems fit narrow footprints (vertical trellises, espaliers, wall-mounted planters) and what irrigation/drainage practices prevent overloading deck drainage? What microclimate strategies (heat-loving vs cool-season staging) should be used seasonally?