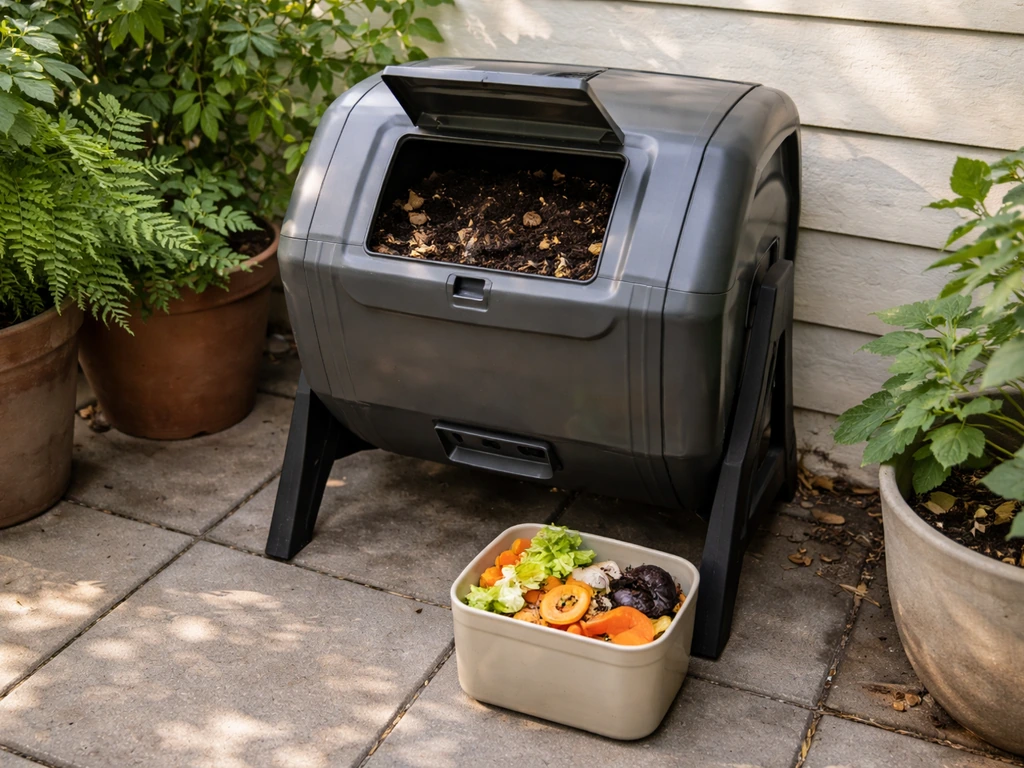
For most patios, a tumbling composter like the FCMP Outdoor HotFrog 37-gallon dual-chamber bin hits the sweet spot: compact footprint (about 28 inches wide), enclosed design that keeps pests out and odors in, and dual chambers so you can cure one batch while adding to the other. If you're working with a balcony or a truly tiny space, step down to the Envirocycle Mini at 17 gallons. If you want zero outdoor odor and low maintenance, a Worm Factory 360 worm bin kept in a shaded corner is hard to beat. The right pick depends on your climate, how much kitchen waste you generate, and how much fuss you're willing to tolerate, so let's walk through all of it.
Best Patio Composter: Picks, Setup, and Troubleshooting Guide

Elise Prescott
30 Jun 2026
What a patio composter is (and which type fits your situation)
A patio composter is any enclosed or semi-enclosed composting system sized and designed for use on an outdoor living space rather than a large backyard. The key word is enclosed: open pile composting is not a patio solution. It smells, attracts animals, and your neighbors will hate you for it. On a patio, you need something with a lid, controlled airflow, and a footprint that doesn't take over your seating area.
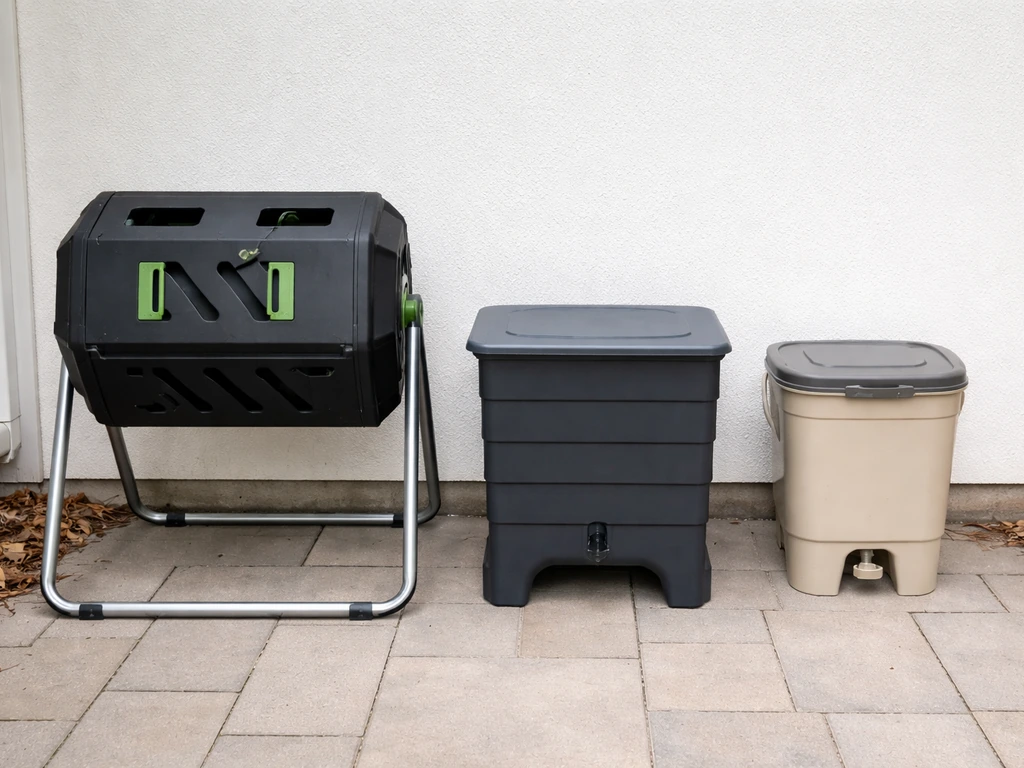
There are four main types worth considering for patios. Tumbling composters sit on a raised stand and rotate to aerate the pile without digging. Worm bins (vermicomposting) use red wiggler worms to break down food waste in stacked trays with very little odor when managed properly. Bokashi systems use fermentation rather than decomposition, so they can handle meat, dairy, and cooked food in a sealed bucket with virtually no smell until you open it. And for people who just need to stage kitchen scraps before taking them elsewhere, a countertop or compact collection bin (1-gallon styles) handles the holding role, though that's not a true composter.
| Type | Best For | Odor Risk | Footprint | Maintenance Level |
|---|---|---|---|---|
| Tumbling composter | General kitchen and yard waste | Low when sealed | Medium (stand-mounted) | Low-moderate |
| Worm bin | Kitchen scraps, balconies, odor-sensitive spots | Very low | Small-medium | Low (~15 min/week) |
| Bokashi bucket | Meat, dairy, cooked food, small spaces | Very low until opened | Very small | Low |
| Collection/countertop bin | Staging scraps only, not composting | Low short-term | Tiny | Very low |
Best patio composter picks by situation
Small patio with moderate waste: FCMP HotFrog 37-Gallon Dual Chamber
This is the one I'd recommend to most homeowners. If you are also shopping for a cleaning solution for outdoor mess, a best patio vacuum can help you keep leaves, grit, and debris from building up around the composting area. The HotFrog (model HF-DBC4000) offers two independent 18.5-gallon chambers in a body made from BPA-free, 100% post-consumer recycled plastic. Each chamber spins independently, which lets you finish one batch while actively feeding the other. The footprint is about 28 inches wide, narrow enough to fit along a fence line or wall without blocking foot traffic. It handles vegetable scraps, coffee grounds, yard clippings, and cardboard well. Bob Vila's testers found it performed well even in hot and humid conditions. It's available at Lowe's, Target, and Best Buy, so parts and replacement units aren't hard to find.
Balcony or micro-patio: Envirocycle Mini 17-Gallon
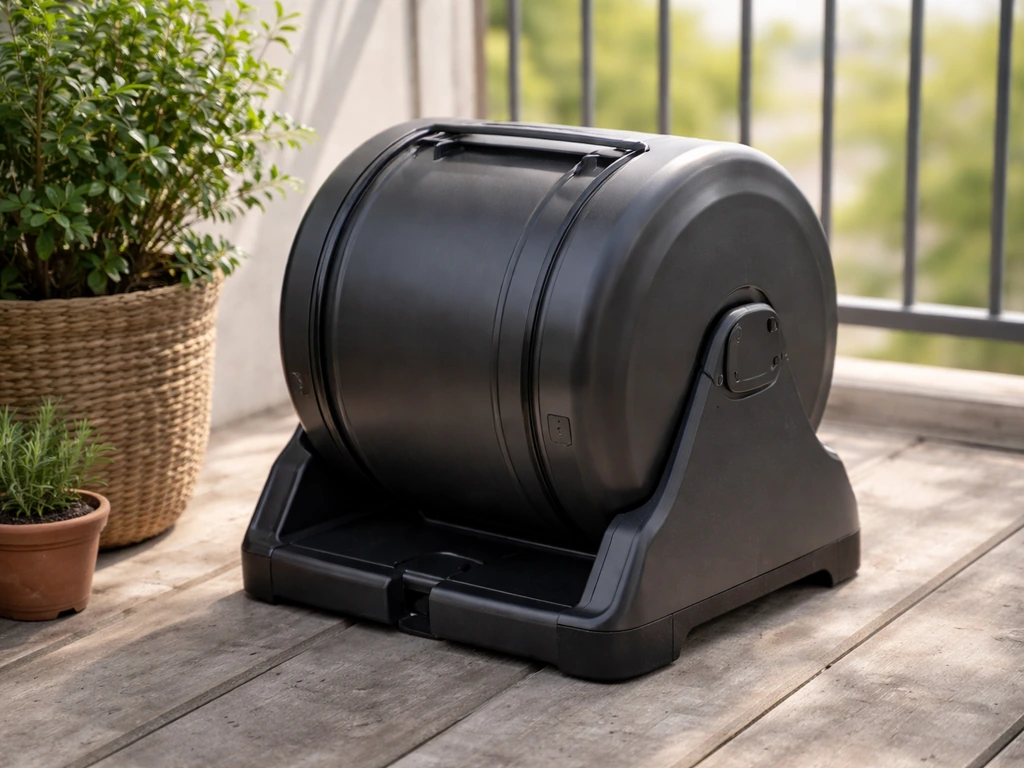
The Envirocycle Mini is purpose-built for tight spaces. At 17 gallons, it's genuinely small enough for a balcony without dominating the floor space. The drum rotates on its base, and the base doubles as a collection tray for compost tea, which is a nice bonus. One caution for balcony users: any tumbler can potentially leak liquid through the drum seams if you add too many wet greens without balancing with dry browns, so be deliberate about moisture management. The Envirocycle brand recommends chopping materials into smaller pieces to improve airflow and surface area for microbes, which also helps prevent the wet, anaerobic mess that causes leaks and smells.
Odor-sensitive households or shared outdoor spaces: Worm Factory 360
If you live close to neighbors, share a patio, or just can't tolerate any composting smell, a Worm Factory 360 is the answer. It houses 8,000 to 12,000 red wigglers in a stackable tray system and produces essentially no odor when managed correctly. Users report about 15 minutes of attention per week at peak operation. The tradeoff: it can produce a noticeable smell when you remove the lid if the balance is off (too wet, too much food at once), and fruit flies are a real risk if you overfeed. The system works year-round indoors or outdoors in mild climates, but you'll need to bring it inside below freezing temperatures since worms don't survive prolonged cold.
Wet climates, heavy rainfall, or Pacific Northwest patios: Mantis ComposTumbler 88-Gallon
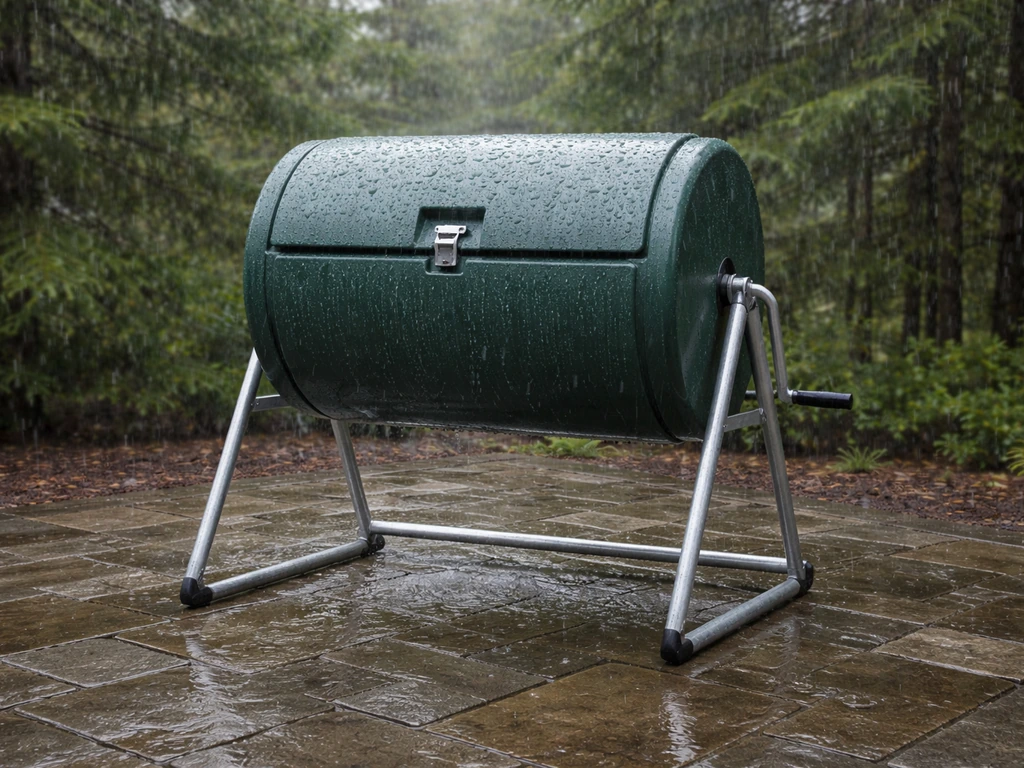
If you live somewhere that gets serious rainfall and you generate a lot of waste (yard debris plus kitchen scraps), the Mantis Compact ComposTumbler at 88 gallons is built for it. The drum is galvanized steel with a gear-driven spinning mechanism, which holds up better in wet climates than plastic over time. It includes both vents and a drain, which is critical for rainy environments where moisture can saturate a closed system. The larger capacity means you can process more material and still maintain the carbon-to-nitrogen balance without running out of room. It's a heavier investment, but the galvanized steel construction justifies it for longevity.
Apartment balcony or zero-outdoor-smell requirement: Bokashi bucket
Bokashi fermentation uses inoculated bran to ferment food waste anaerobically in a sealed bucket. It handles things tumblers and worm bins can't, like meat, fish, and cooked leftovers. The smell is extremely low until you open the bucket, at which point it can be strong and vinegary. Real-world users recommend a two-bucket rotation system and swapping to an airtight lid (like a Gamma Seal-style lid) to minimize odor escape. The fermented output isn't finished compost; it needs to be buried in soil or added to a secondary composter to complete the process. For balcony-only situations, that can be a limitation.
Key features that actually matter when buying
- Capacity: For a household of two generating kitchen scraps only, 17 to 37 gallons is plenty. Four or more people plus yard waste need 37 to 88 gallons. Don't over-buy if space is limited.
- Footprint: Measure your available floor space before buying. The HotFrog at 28 inches wide fits most standard patios. The Envirocycle Mini is smaller. The Mantis at 88 gallons needs more real estate.
- Airflow design: Good tumblers have built-in vents. Without adequate oxygen, your pile goes anaerobic and produces the rotten-egg hydrogen sulfide smell everyone dreads. Aeration is non-negotiable.
- Pest and rodent resistance: A fully enclosed drum on a raised stand is the strongest pest deterrent. Ground-level bins with snap lids are more vulnerable. If raccoons or squirrels are active on your patio, get a tumbler.
- Drainage: In rainy climates or if you add a lot of wet greens, a drain spout prevents the composter from becoming a waterlogged mess. The Mantis has this. Most plastic tumblers do not.
- Ease of emptying: Look for large access doors or removable drum ends. Digging finished compost out of a small hatch is genuinely frustrating and a reason people quit composting.
- Maintenance: Tumblers require spinning every few days. Worm bins need feeding and moisture checks weekly. Bokashi just needs to be sealed and emptied on schedule. Know your tolerance before you buy.
How to choose based on your climate and what you're composting
Climate shapes composter choice more than most guides admit. In hot, dry climates like Arizona or Texas, moisture evaporates fast. A tumbler in full sun will dry out your pile quickly, stalling decomposition. You want a unit you can place in partial shade and may need to add water regularly to hit the 50 to 60 percent moisture target (the sweet spot confirmed by both University of Georgia extension guidance and Manitoba agriculture research). A squeeze test is the classic field check: grab a handful of compost material and squeeze it. It should feel like a wrung-out sponge, with just a few drops of water coming out.
In wet climates like the Pacific Northwest or Florida, the opposite problem dominates: too much moisture and not enough air. A tumbler with vents and a drain is essential, and you need to be diligent about balancing wet greens (fruit scraps, grass clippings) with dry browns (cardboard, dried leaves, wood chips). The EPA and LSU AgCenter both note that bulking agents like wood chips help maintain porosity and keep air channels open, which prevents the anaerobic conditions that cause odor.
For cold climates (Minnesota, Colorado at altitude, anywhere with hard freezes), composting slows dramatically below 50°F and essentially stops when frozen. Manufacturer warnings on the HotFrog documentation specifically caution about frozen contents jamming the drum mechanism. A worm bin brought inside for winter is a better strategy than fighting a frozen tumbler. Alternatively, keep adding to the tumbler through winter and let it thaw and activate again in spring.
On the waste side: if you're primarily composting raw vegetable and fruit scraps plus yard material, any tumbler works. If you want to compost cooked food or meat, go bokashi. If you produce mostly kitchen scraps and want finished vermicast (one of the best soil amendments available), go worm bin. The carbon-to-nitrogen ratio matters for how fast things break down. The target range is 25:1 to 30:1 carbon to nitrogen, achieved by mixing roughly equal volumes of greens (nitrogen-rich: food scraps, fresh grass) with browns (carbon-rich: cardboard, dried leaves, straw). Manitoba recommends aiming for a 20:1 to 40:1 carbon-to-nitrogen (with a preferred 25:1 to 30:1) and maintaining moisture around 40% to 70% (preferably 50% to 60%), along with good aeration to support microorganisms a C:N range of 20:1 to 40:1 with preferred 25:1 to 30:1 and moisture 40% to 70% (preferred 50% to 60%). Too many greens and you get a slimy, smelly pile. Too many browns and decomposition stalls.
Setup and placement on your patio
Place a tumbling composter in partial shade if you're in a hot climate, or a spot that gets morning sun and afternoon shade. Direct afternoon sun in summer accelerates moisture loss and can push internal temperatures above 158°F, which kills the beneficial microorganisms doing the work. For worm bins, shade is non-negotiable: worms die above 85°F.
Distance from doors and seating areas matters. Even a well-managed composter has some odor when you open it to add material. A minimum of six feet from a door or frequently used seating is a reasonable buffer. If your patio is small, position it at the far edge or corner. For shared patios or multi-unit living, closer to a fence line and away from shared gathering zones is the respectful choice. A best patio trash can helps you keep waste contained and makes cleanup around your outdoor living space much easier shared gathering zones.
Stability and drainage on the surface matter more than people think. Tumblers on stands need a level, firm surface so the stand legs don't sink or tip. A good rule is to match the size and footprint of your setup, especially if you're looking for the best toy hauler with side patio tumbling composter. On wooden deck boards, use a flat paver or rubber mat under each leg to distribute weight and protect the decking. On concrete patios, ensure the stand sits level and won't vibrate or rock when spun. For units without built-in drains, avoid placing them directly against a wall where liquid runoff could stain or damage surfaces.
Critter-proofing starts with the unit choice: a fully enclosed rotating drum on a stand is inherently more secure than a ground-level bin with a snap lid. If you're in an area with persistent raccoons, rats, or squirrels, verify that the drum's access hatches have secure latches rather than simple flip covers. Rats are the biggest concern on patios because they can smell food scraps from a distance. Never leave material sitting outside the drum even briefly, and avoid composting cooked food or meat in open tumblers.
Running your patio composter day to day
For a tumbling composter, the workflow is simple: collect scraps in a small container in your kitchen (a 1-gallon countertop bin works well for staging), then take them to the composter every two to three days. When you add greens, add roughly an equal volume of browns at the same time. Give the drum five to ten rotations after each addition. That's genuinely all it takes most days.
Chop or tear materials into smaller pieces before adding them. Envirocycle's guidance points out that smaller pieces create more surface area for microorganisms and more space for oxygen, which speeds decomposition and reduces odor risk. A whole head of lettuce composts much more slowly than torn lettuce leaves.
For the Worm Factory 360, feed worms about once a week, burying scraps under the bedding rather than leaving them on top. Exposed food on the surface is the primary cause of fruit fly infestations. Keep a layer of damp newspaper or coconut coir on top of the feeding layer at all times. The moisture level in a worm bin should feel like a damp sponge, never dripping, never dry.
What to add and what to avoid
- Good greens: vegetable and fruit scraps, coffee grounds, tea bags (paper only), fresh grass clippings, plant trimmings
- Good browns: cardboard (torn up), dried leaves, straw, paper bags, wood chips, egg cartons
- Avoid in open tumblers: meat, fish, dairy, oily foods, cooked meals, pet waste (these need bokashi or municipal composting)
- Avoid in worm bins: citrus in large quantities, onions, spicy peppers, salty foods, and anything with added preservatives
- Problem materials: large woody branches (take too long), diseased plant material (risk of spreading pathogens), invasive weeds with seeds
Troubleshooting common problems
- Pile not breaking down: Usually too dry or too many browns. Add water and more greens, then spin.
- Slimy or mushy pile: Too many greens or too wet. Add dry cardboard or wood chips and spin daily for a week.
- Takes forever: Material pieces are too large. Chop inputs before adding. Cold weather also slows the process.
- Drum won't spin: Material is frozen (cold climates) or compacted and dry. Add water, wait for a thaw, or use a stick to break up the mass.
- Worm bin not processing fast enough: Worms may be too cold, too hot, or underfed. Check temperature and moisture first.
Odor control and pest prevention
Odor in a patio composter almost always has one of three causes: too many nitrogen-rich materials with not enough carbon, excess moisture creating anaerobic conditions, or an unsealed or poorly sealed unit that releases gases freely. The fix for the first two is the same: add dry browns, spin or aerate, and check moisture. The fix for the third is choosing a better unit or checking that all latches and gaskets are intact.
For worm bins, the most common odor complaint comes from opening the lid on an overfed or too-wet bin. Community members in vermiculture forums note that the smell is minimal with the lid on but can be strong when first opened. The solution is feeding less at each session and ensuring bedding on top of the food layer is always present. Never pile food scraps in one corner; spread them out to prevent anaerobic hot spots.
For bokashi, smell escapes primarily at the seal point. Users who've upgraded to a Gamma Seal-style airtight lid report significantly less odor compared to standard bucket lids. The liquid collected at the bottom of a bokashi bucket (sometimes called bokashi juice) can develop a foul smell if left too long. Empty it every few days and dilute it with water before using it as a fertilizer.
Pest prevention is mostly about eliminating access and temptation. A raised tumbler drum is physically inaccessible to most rodents. For worm bins kept on a patio, place the legs in small containers of water (a simple moat) to deter ants, which are a common nuisance. Avoid adding anything that smells strongly of cooked food or animal protein to any outdoor composter. If you're finding rodent activity despite a sealed tumbler, check whether material is falling out of the access hatch seams, which can happen with lower-quality units after weathering.
Cost, longevity, and what you actually get for the money
Budget tumblers in the $50 to $80 range (often small single-chamber plastic units) work but tend to have thin-walled drums that crack after two to three years of UV exposure, poor vent designs, and flimsy latches that fail against persistent animals. They're fine for trying composting before committing, but don't expect decade-long service. If you want the best patio weeder experience, choose a model that matches your outdoor conditions and stays easy to manage season after season best patio composter.
Mid-range options like the FCMP HotFrog run $80 to $130 and use 100% recycled BPA-free plastic that holds up better to UV and temperature swings. The dual-chamber design adds genuine practical value. Most users report five or more years of reliable use. It's the best value position for the majority of patio composters.
Premium options like the Mantis 88-gallon galvanized steel tumbler cost $200 to $350 or more. Galvanized steel resists UV degradation, physical impact, and long-term weathering far better than plastic. The gear-driven mechanism is more durable than simple axle-and-bearing designs. If you're serious about composting and plan to use this for ten or more years, the steel construction pays off. Check the manufacturer's warranty before buying: reputable brands at this price point should offer at least a one-year warranty on hardware with longer coverage on the drum body.
The Worm Factory 360 sits in the $100 to $130 range and is essentially a lifetime purchase if managed properly. The trays are durable polypropylene, and replacement components (trays, lids, spigots) are available directly from Nature's Footprint. The ongoing cost is worm food and the occasional handful of fresh bedding material, which is negligible.
On operating costs: composting itself is free once you have the unit. If you want to accelerate a slow tumbler, commercial compost activator products exist but are optional. The main hidden cost is your time. Budget a realistic five to fifteen minutes per week for any of these systems. If that sounds like too much, a bokashi bucket is the lowest-effort path to diverting food waste from your trash, even if it requires a secondary step to finish the compost.
Your next steps today
Start by answering three questions: How much space do you have (measure it now)? What waste will you primarily be composting (kitchen scraps, yard debris, or both)? And how much smell and maintenance can you realistically tolerate? If you have at least 30 inches of patio width, generate kitchen scraps and some yard material, and want low maintenance, order the FCMP HotFrog and you're done deliberating. If space is tighter or you're on a balcony, go Envirocycle Mini. If odor is the primary concern and you're willing to do a bit more hands-on management, the Worm Factory 360 will serve you better than any tumbler.
Once your unit arrives, pick your placement spot before assembly, not after. Find that partial-shade location at least six feet from your primary seating, make sure the surface is level, and have a bag of dry cardboard or wood chips ready before your first batch of scraps goes in. Starting with good carbon-rich material from day one prevents the most common beginner mistakes. Within four to eight weeks in warm weather, you'll have usable compost for your patio planters or garden beds, and you'll have permanently reduced your household food waste. That's a win from both a sustainability and a practical patio management standpoint. If you prefer keeping waste contained between collections, consider an outdoor trash can with lid for patio use.
FAQ
Can I compost in winter on a patio?
Yes, but the right method depends on the system. For tumblers, avoid packing frozen material tightly, since it can jam the drum, and instead keep adding small amounts of thawed browns until normal rotation resumes. For worm bins, bring the unit indoors (or insulate it) so the tray stays above freezing, worms remain active, and you do not end up with a soggy, anaerobic mess.
What should I do if it rains a lot where I live?
You can, but only if you control moisture and size the additions. In rainy climates, a tumbler should have a drain and vents so excess liquid can escape, and you should add dry browns more often than you think. If your tumbler lacks a drain, divert runoff away from the stand and keep adding bulking material (wood chips or shredded leaves) to maintain airflow.
My patio composter smells, what’s the first thing to check?
If you see or smell problems, stop changing “everything” at once. For tumblers, check the moisture first, then balance with browns (cardboard, dried leaves, straw) before increasing rotations. A fast way to tell what you have is the squeeze test (wrung-out sponge), if it drips you are too wet, if it crumbles you are too dry.
Why isn’t my compost finishing fast enough?
Time is usually not the issue, balance is. For general compost, aim for equal-ish volumes of greens and browns, and chop food waste smaller so it breaks down faster. For worm bins, mature vermicast depends on consistent weekly feeding, keep bedding damp like a wrung sponge, and harvest only when the lower tray is dark and crumbly rather than simply “waiting longer.”
How do I keep raccoons, rats, and ants from getting into it?
To reduce pests, you need both unit access control and workflow discipline. Never leave scraps sitting on the patio, clean any drips or spills near the hatch, and confirm latches stay fully engaged after rain or temperature swings. For worm bins, bury food under bedding, keep a cover layer on top, and do not feed more when fruit flies appear.
Can I use any liquid that comes out of the composter?
Yes, but you should treat liquid differently by system. Tumblers can produce compost tea or leachate depending on design, if your unit has a drain collect it separately and do not use it on seedlings without diluting. Bokashi buckets also produce liquid, empty it every few days and dilute before using as fertilizer to prevent an overpowering, vinegary smell.
Is it okay to put a tumbling composter on a deck or concrete patio?
Most of the time, yes, but placement prevents damage. On a wooden deck, use individual pavers or rubber mats under each stand leg to spread weight and avoid wobbly motion while spinning. On concrete, confirm the stand is level and does not rock, vibration can loosen panels or stress drum seams over time.
What causes odor even when I’m following the greens and browns advice?
For tumblers, the most common “too wet” situation is adding lots of wet greens without adding enough dry browns. For worm bins, overfeeding and leaving food exposed creates odor and fruit flies, even if the bin is otherwise enclosed. If you have repeated odor after minor fixes, check the gasket and latch alignment, because gas release is often a sealing issue rather than only a recipe issue.
Does bokashi produce “finished compost” the same way tumblers do?
You can, but it changes the expected outcome and process. Bokashi fermented material needs finishing in soil (or another compost stage) to become true finished compost, so it will not behave like a tumbler output you can put straight into planters. If your goal is ready-to-use compost for patio planters, choose a system that naturally reaches finished compost, or plan an added finishing step.
Which patio composter type is best for cooked food or leftovers?
If you are aiming for the least time and lowest mess, worm bins and bokashi typically win, but only when you match them to your food habits. Worm bins are best for consistent small feedings of raw produce scraps, bokashi is better when you regularly have cooked leftovers or animal-based foods. If you want minimal fuss with yard waste too, a tumbler is generally the better fit.
What’s the best way to choose a composter if I’m odor-sensitive?
Start with what is easiest to measure and repeat: space, waste type, and tolerance for any odor. If you can only place a unit near a doorway or busy area, prioritize better sealing and a fully enclosed tumbler, because opening any system can release some scent. If you are sensitive to smell and want near-zero odor, a worm bin in shade or bokashi with an airtight lid will be easier to live with than most tumblers.